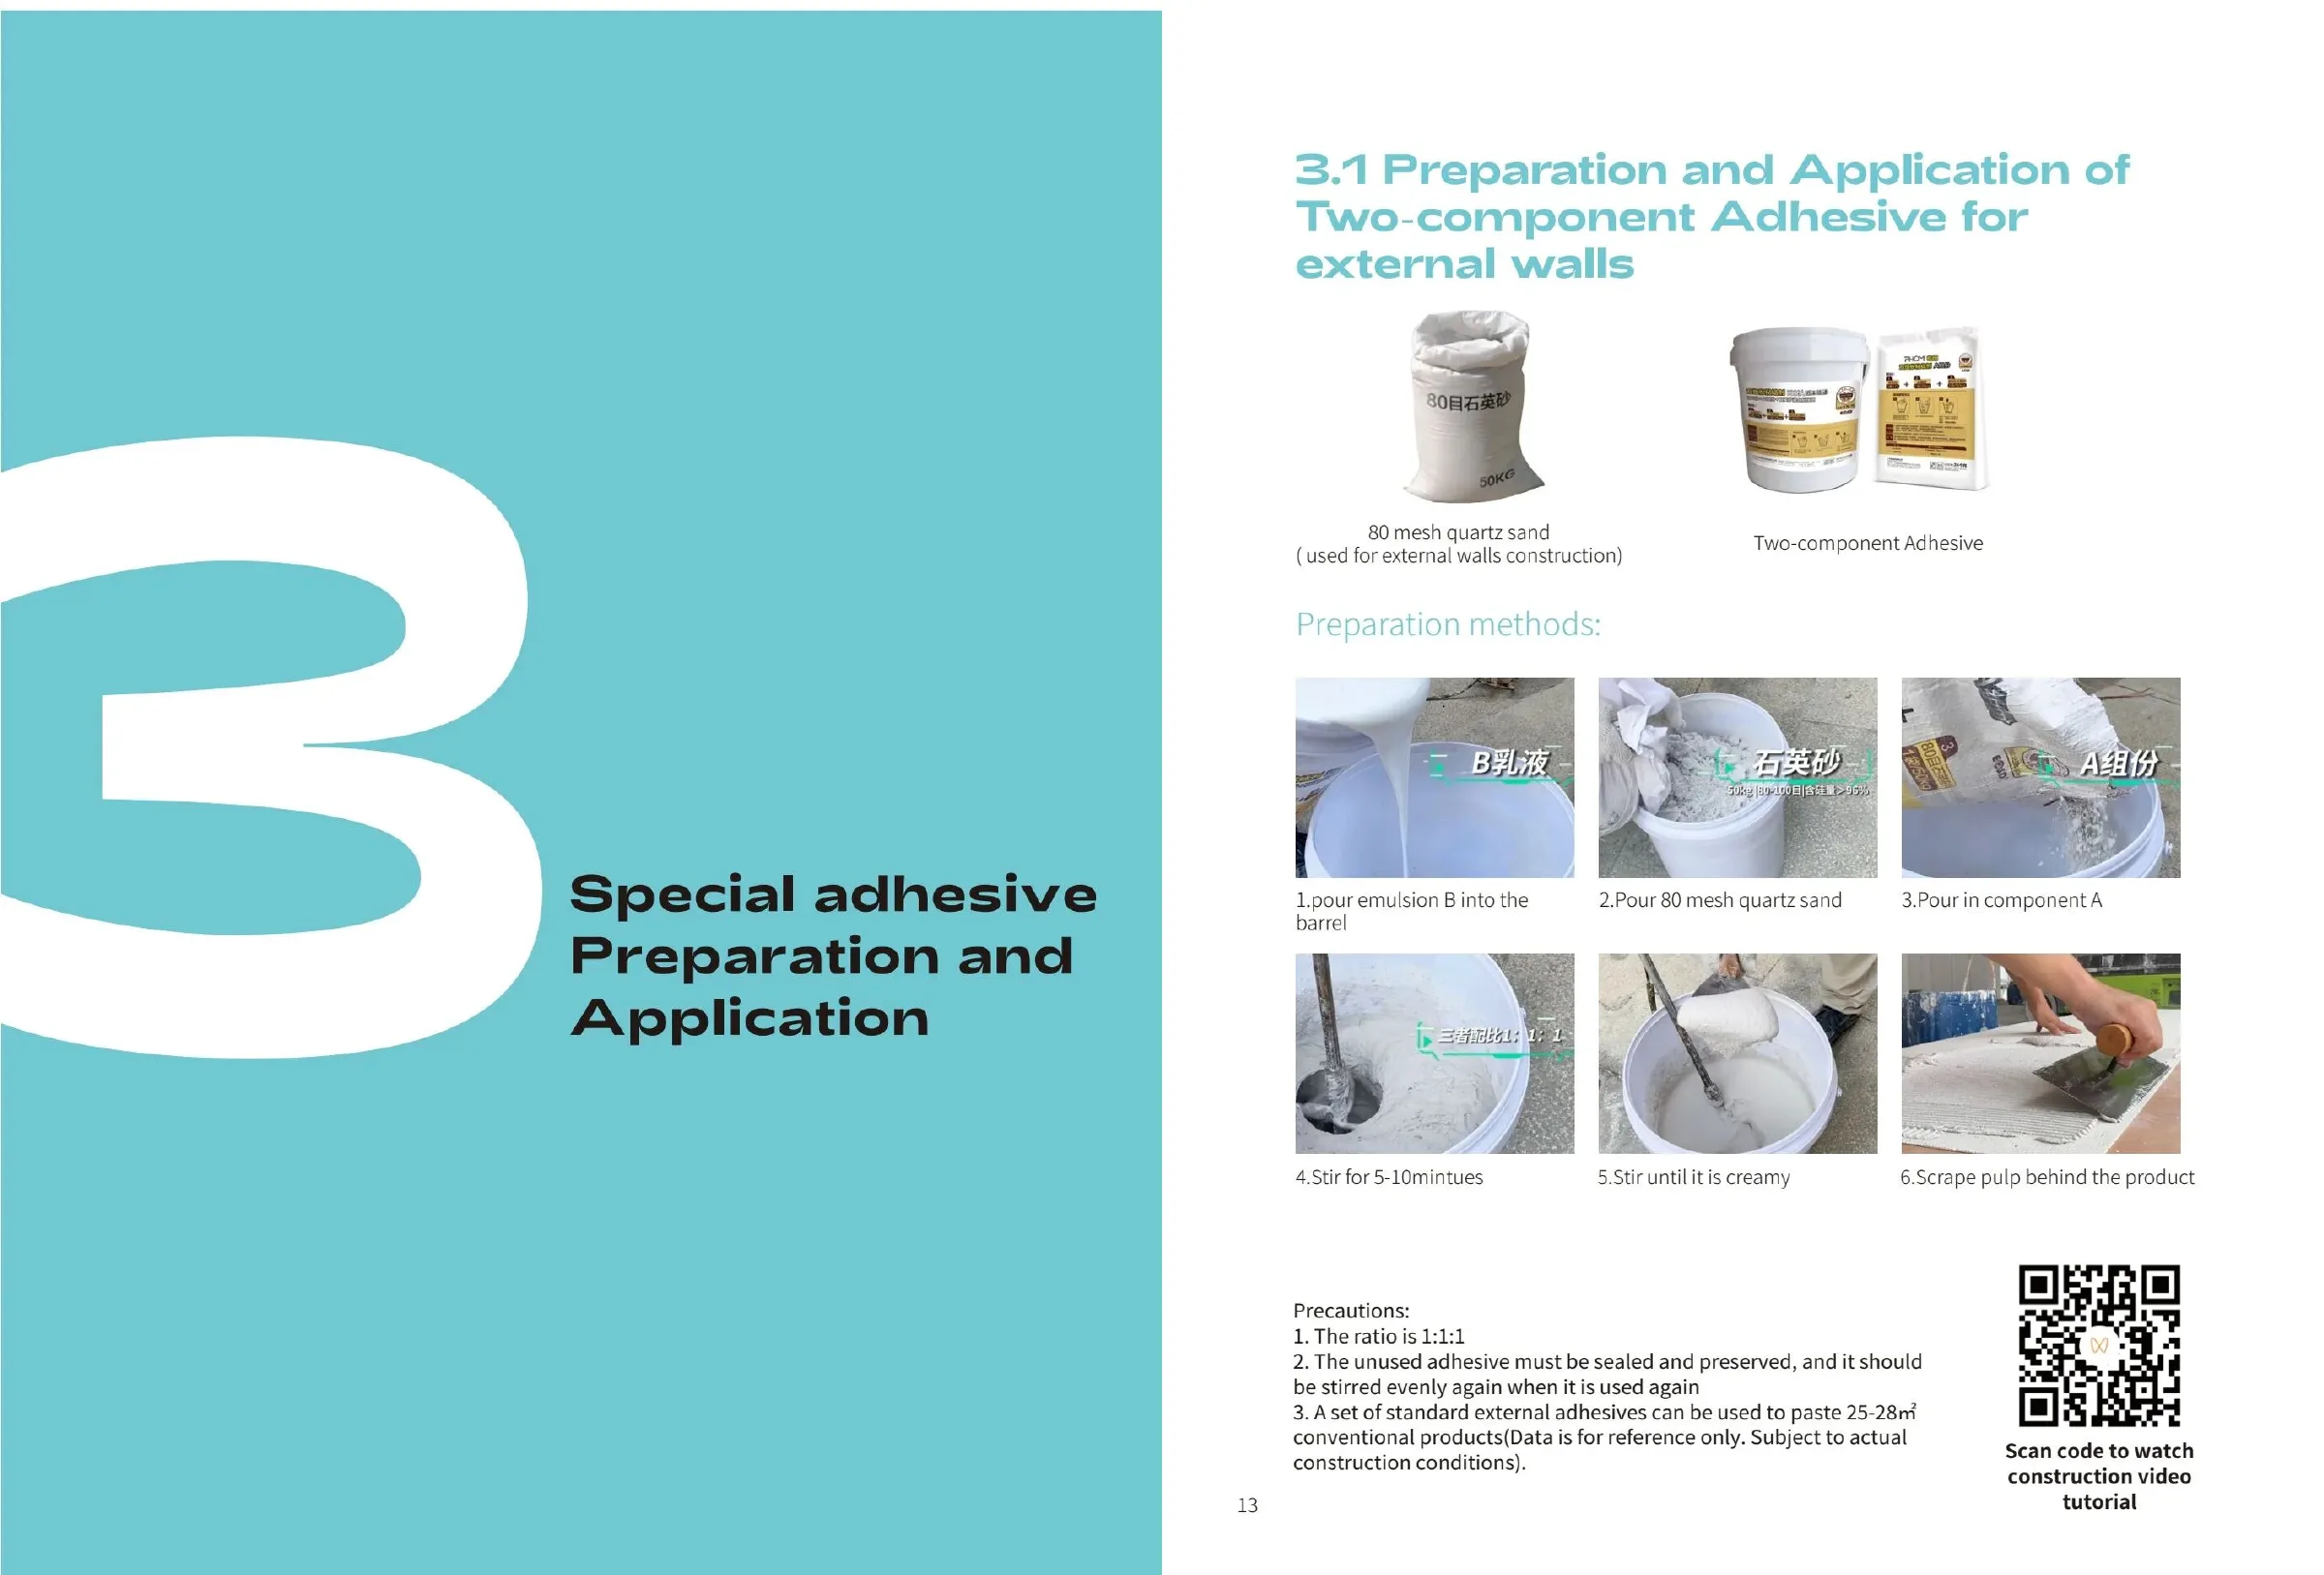
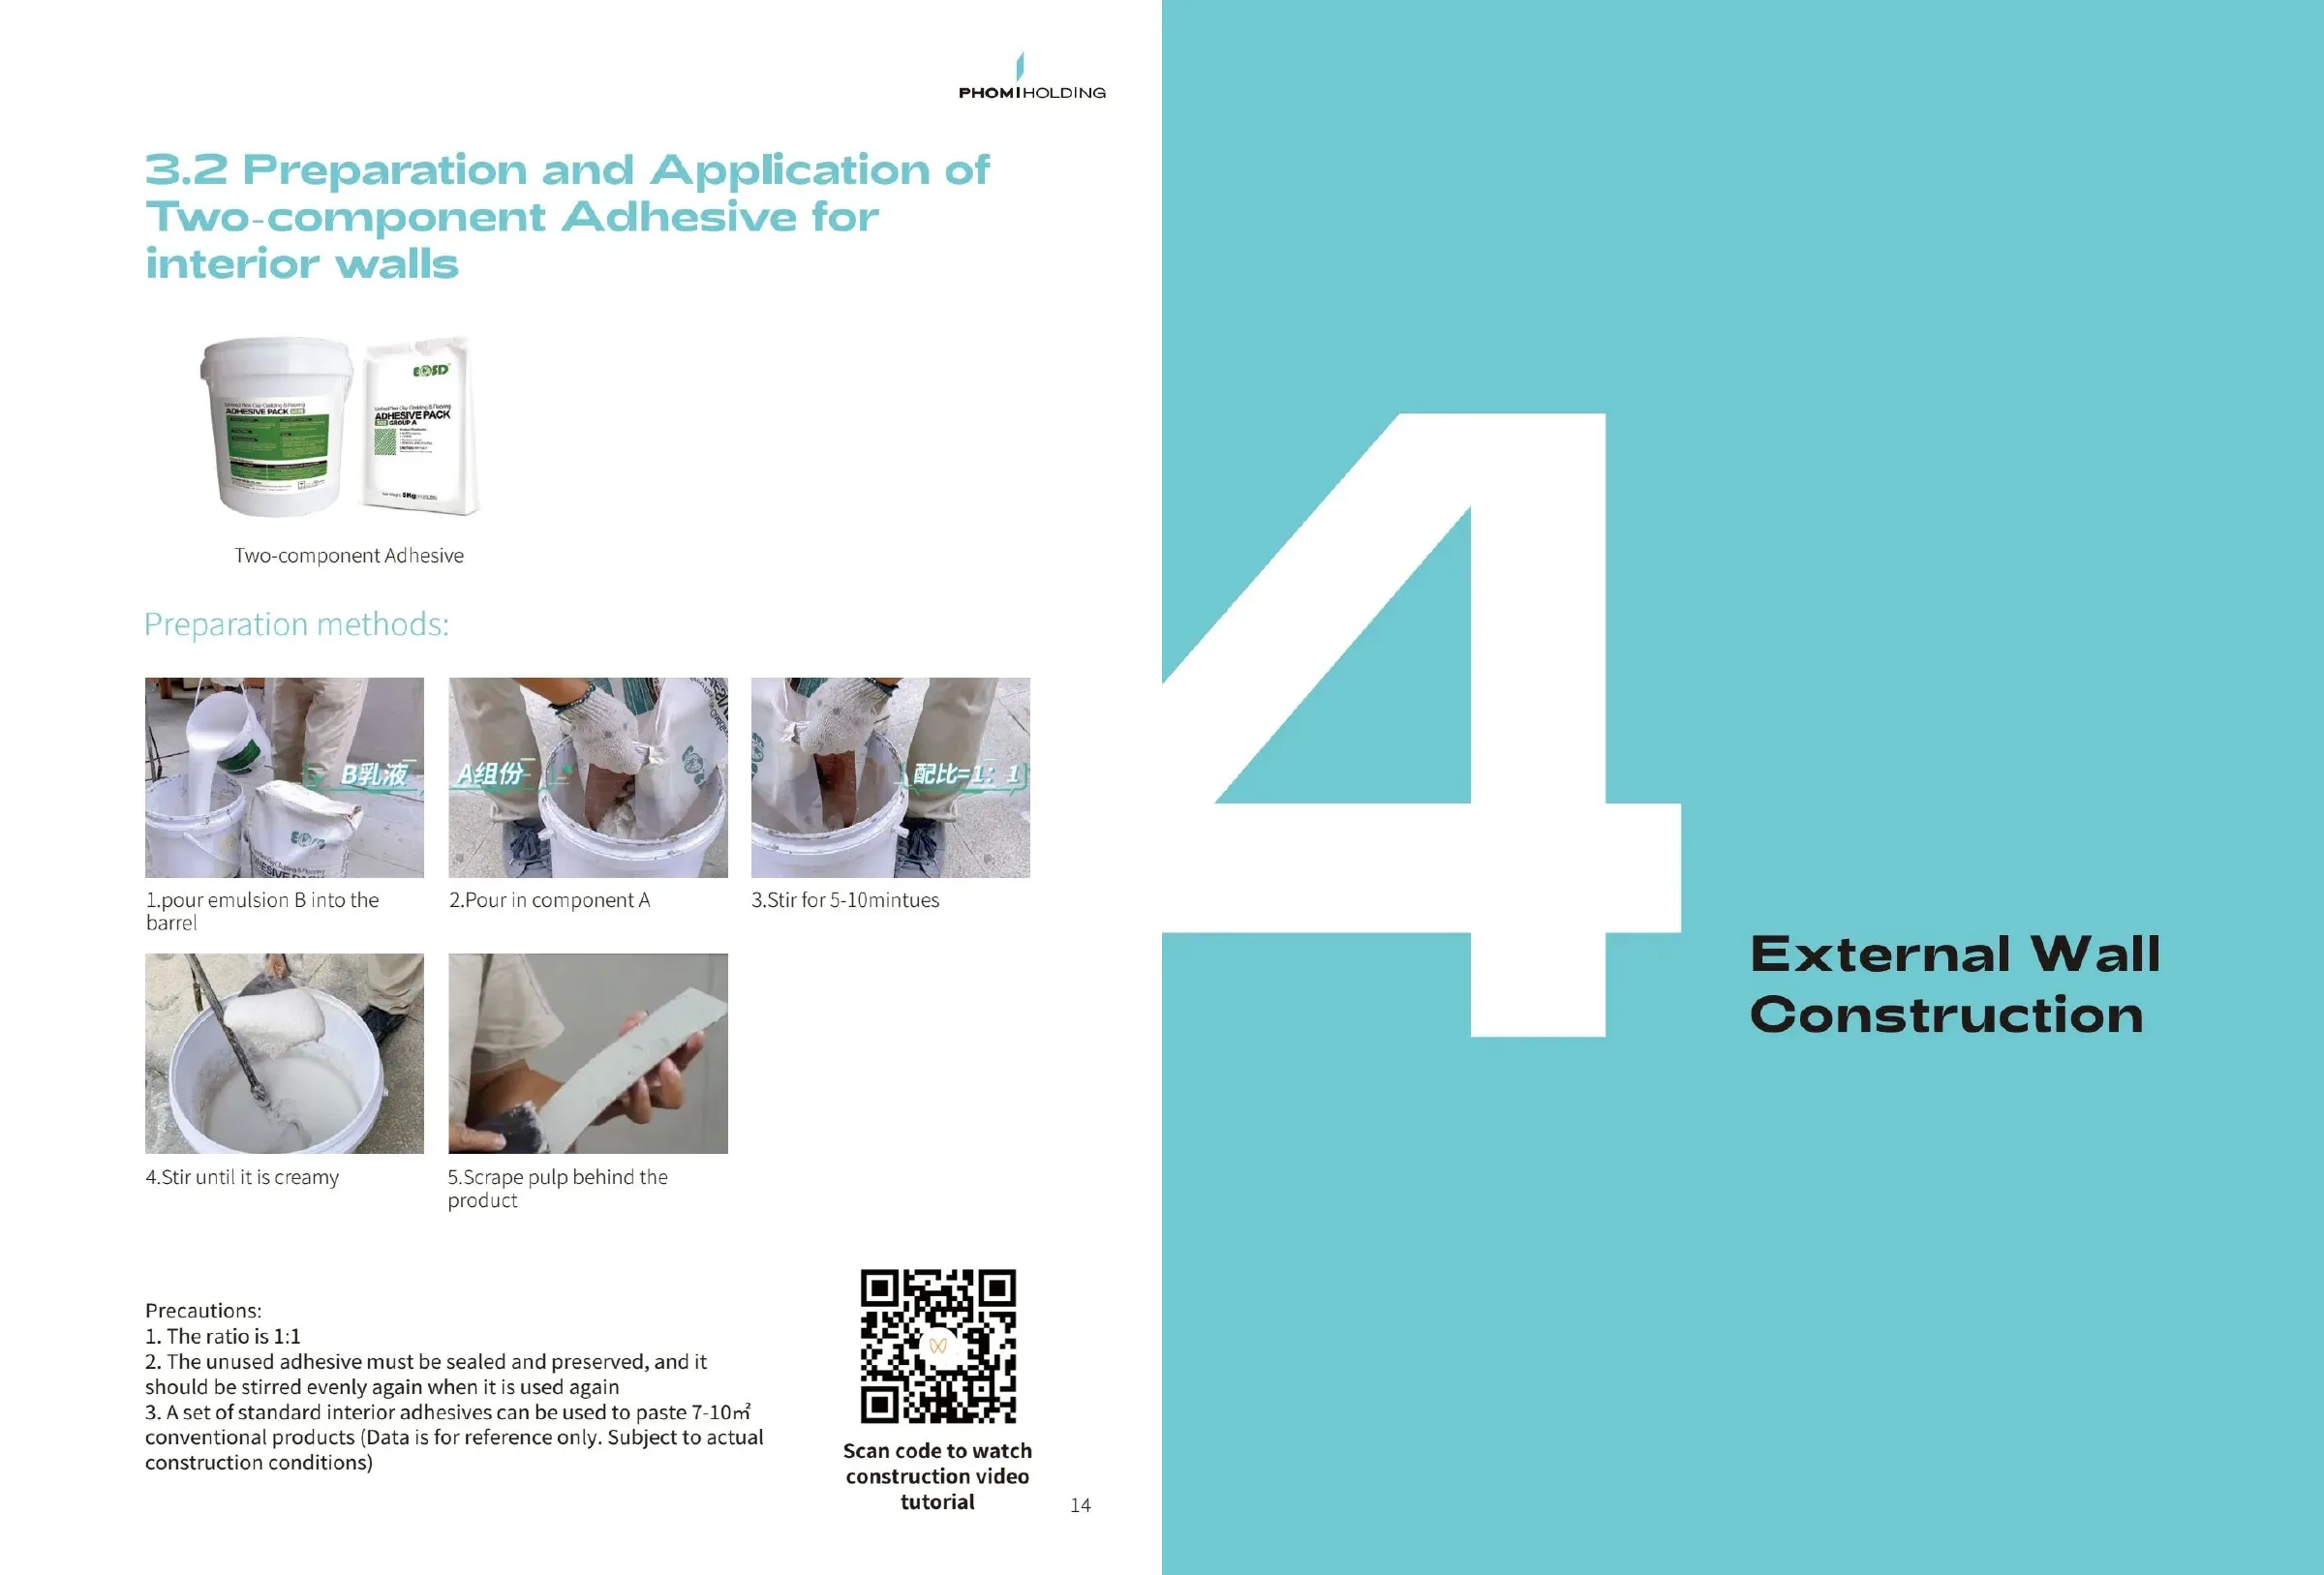
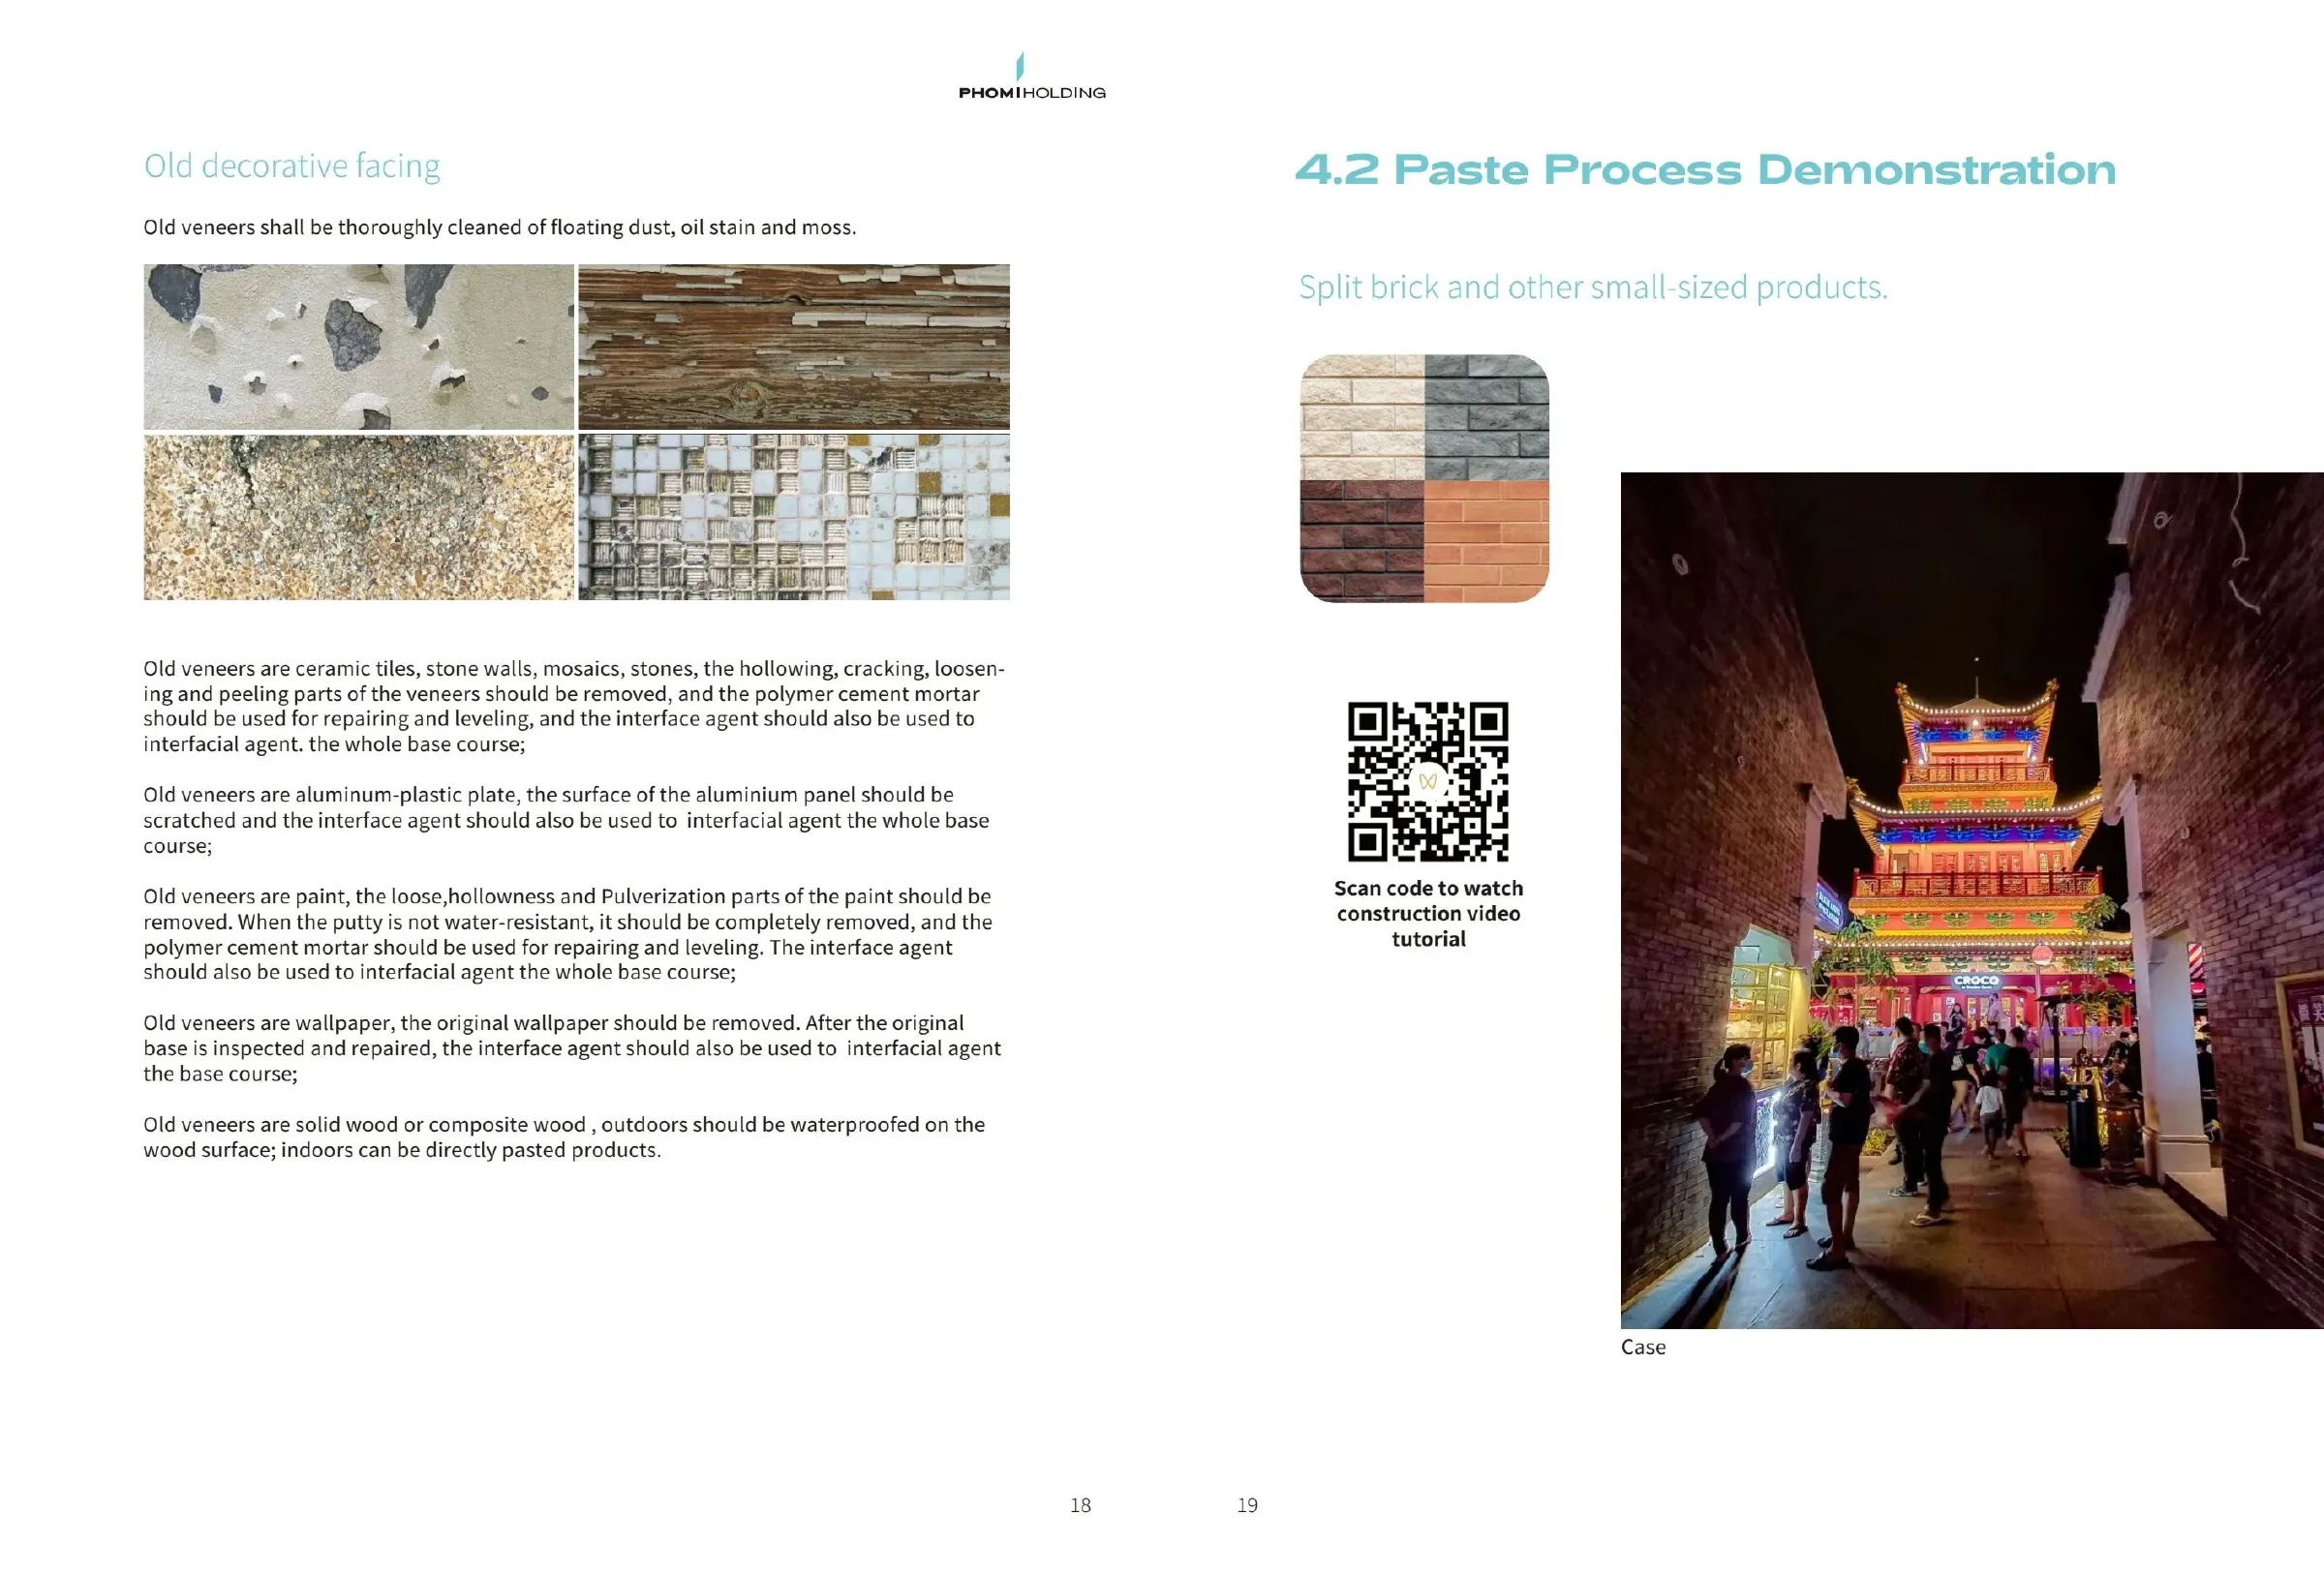
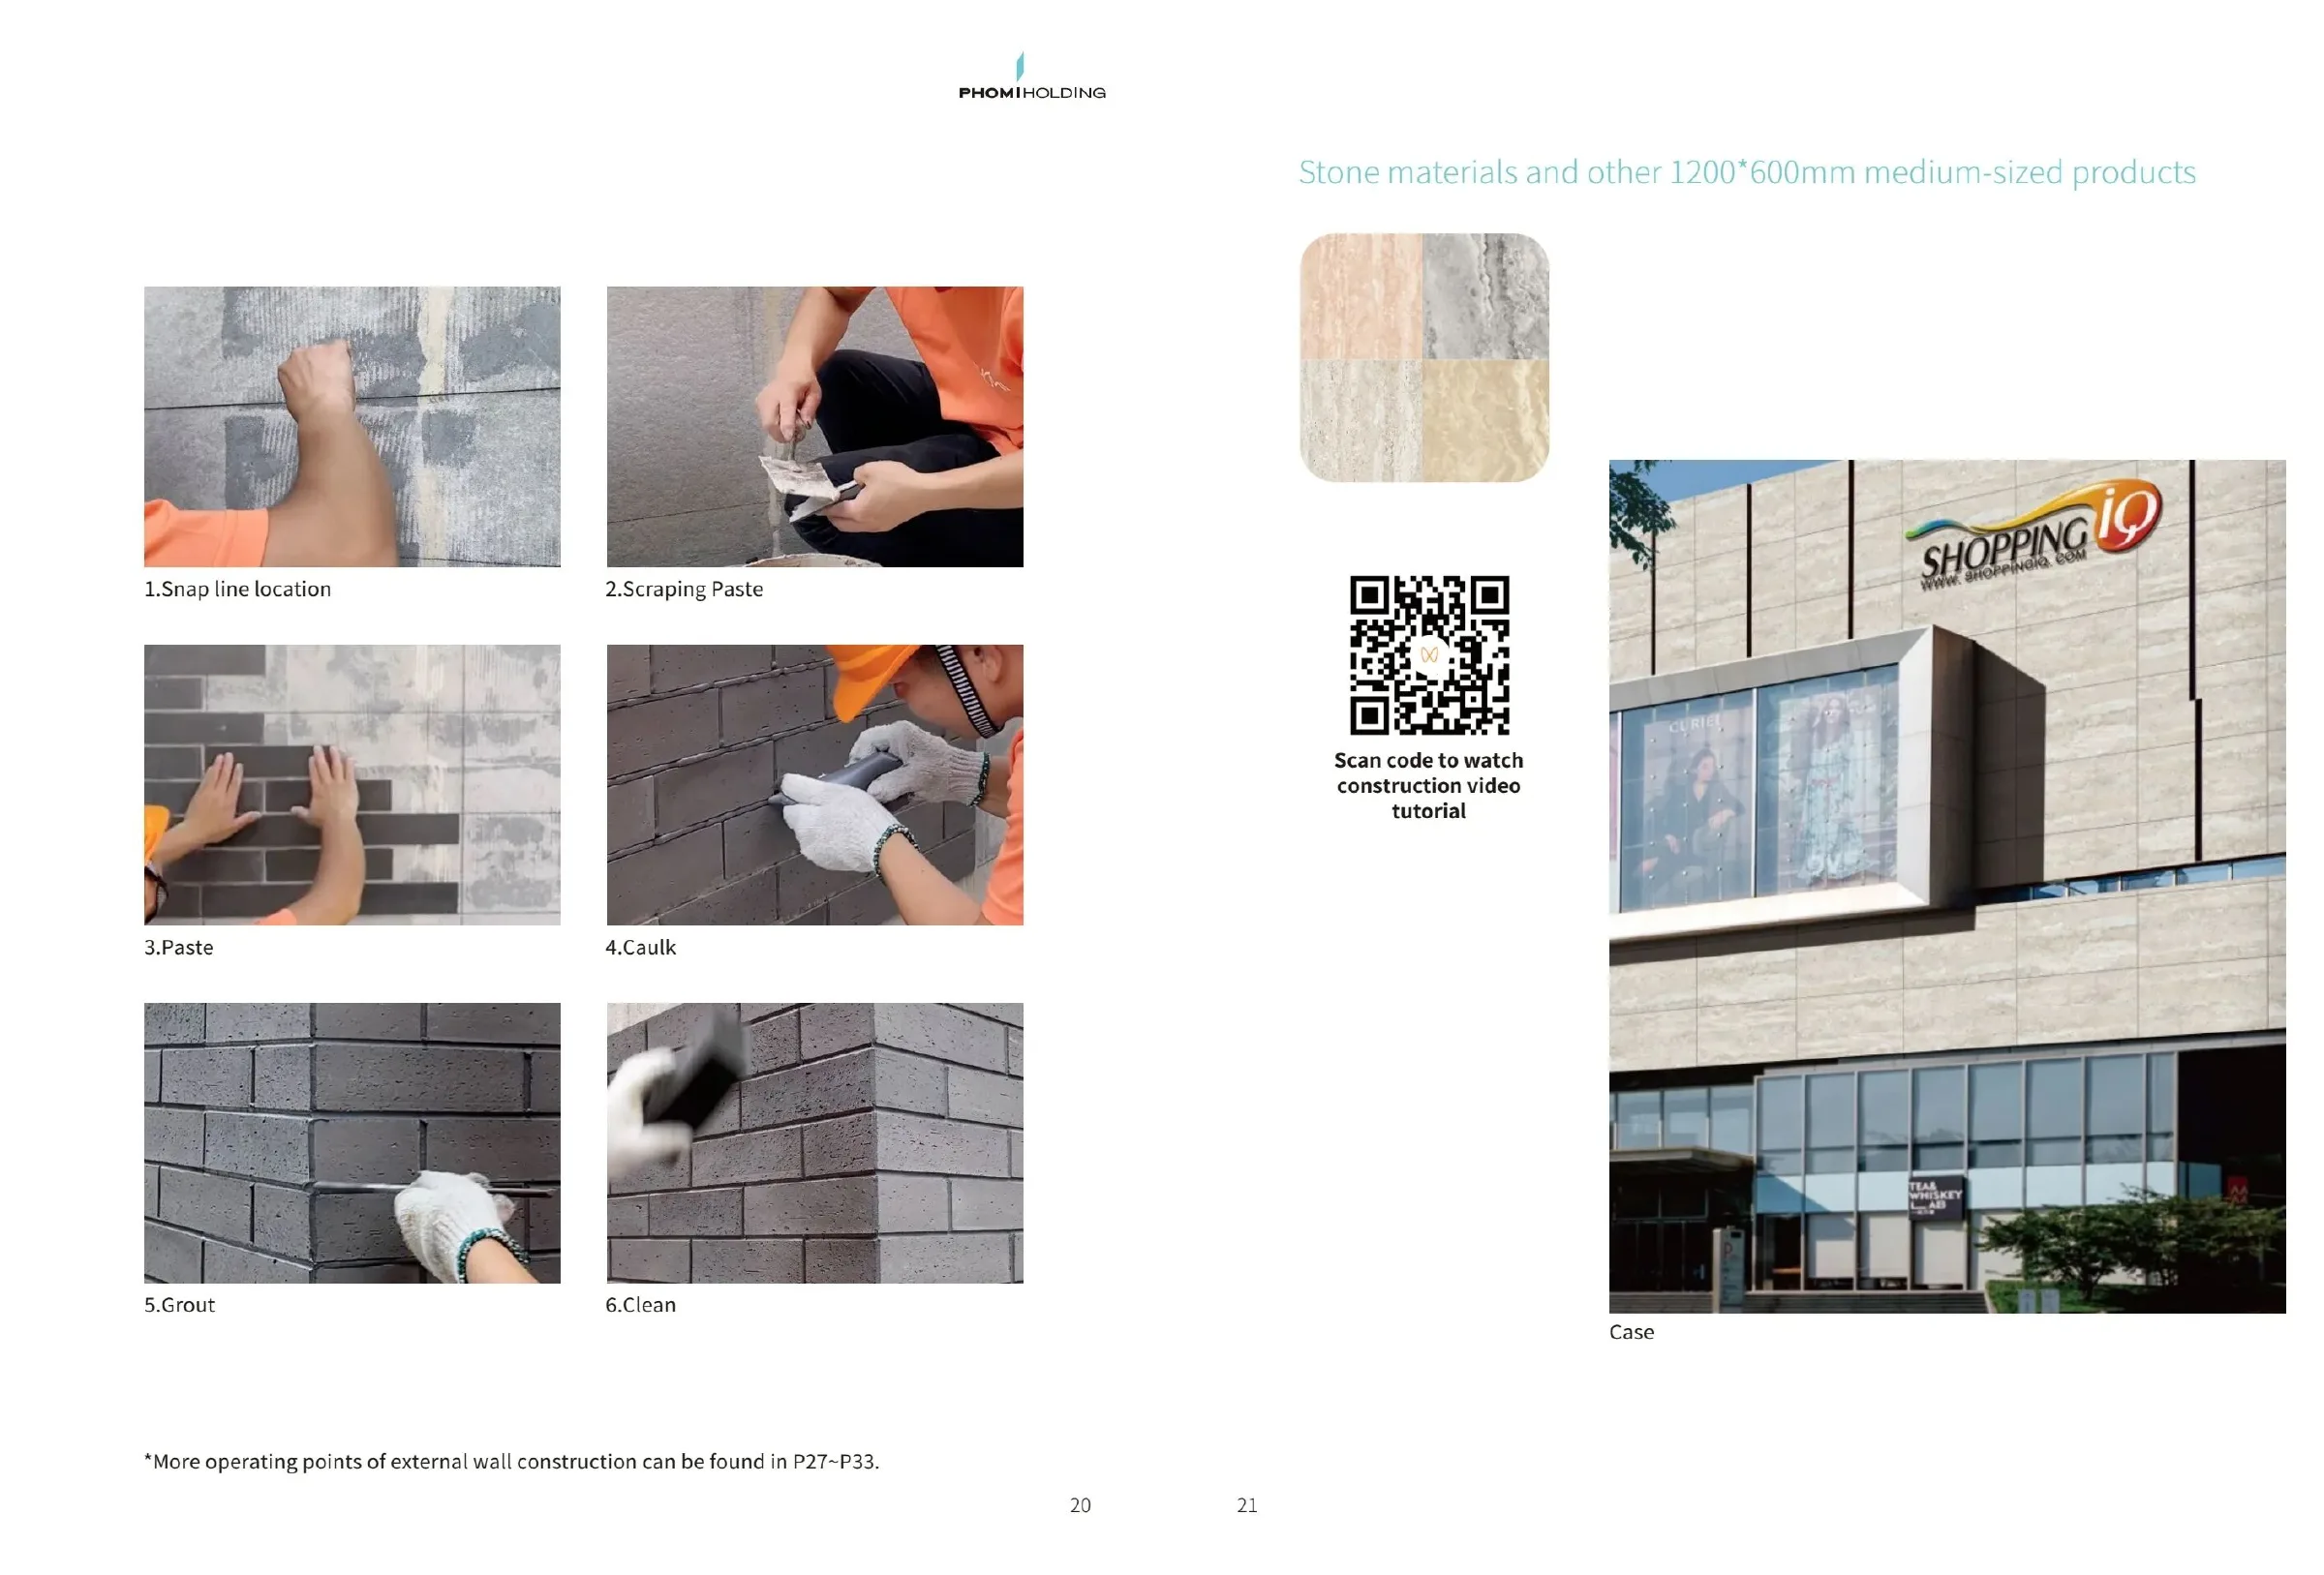
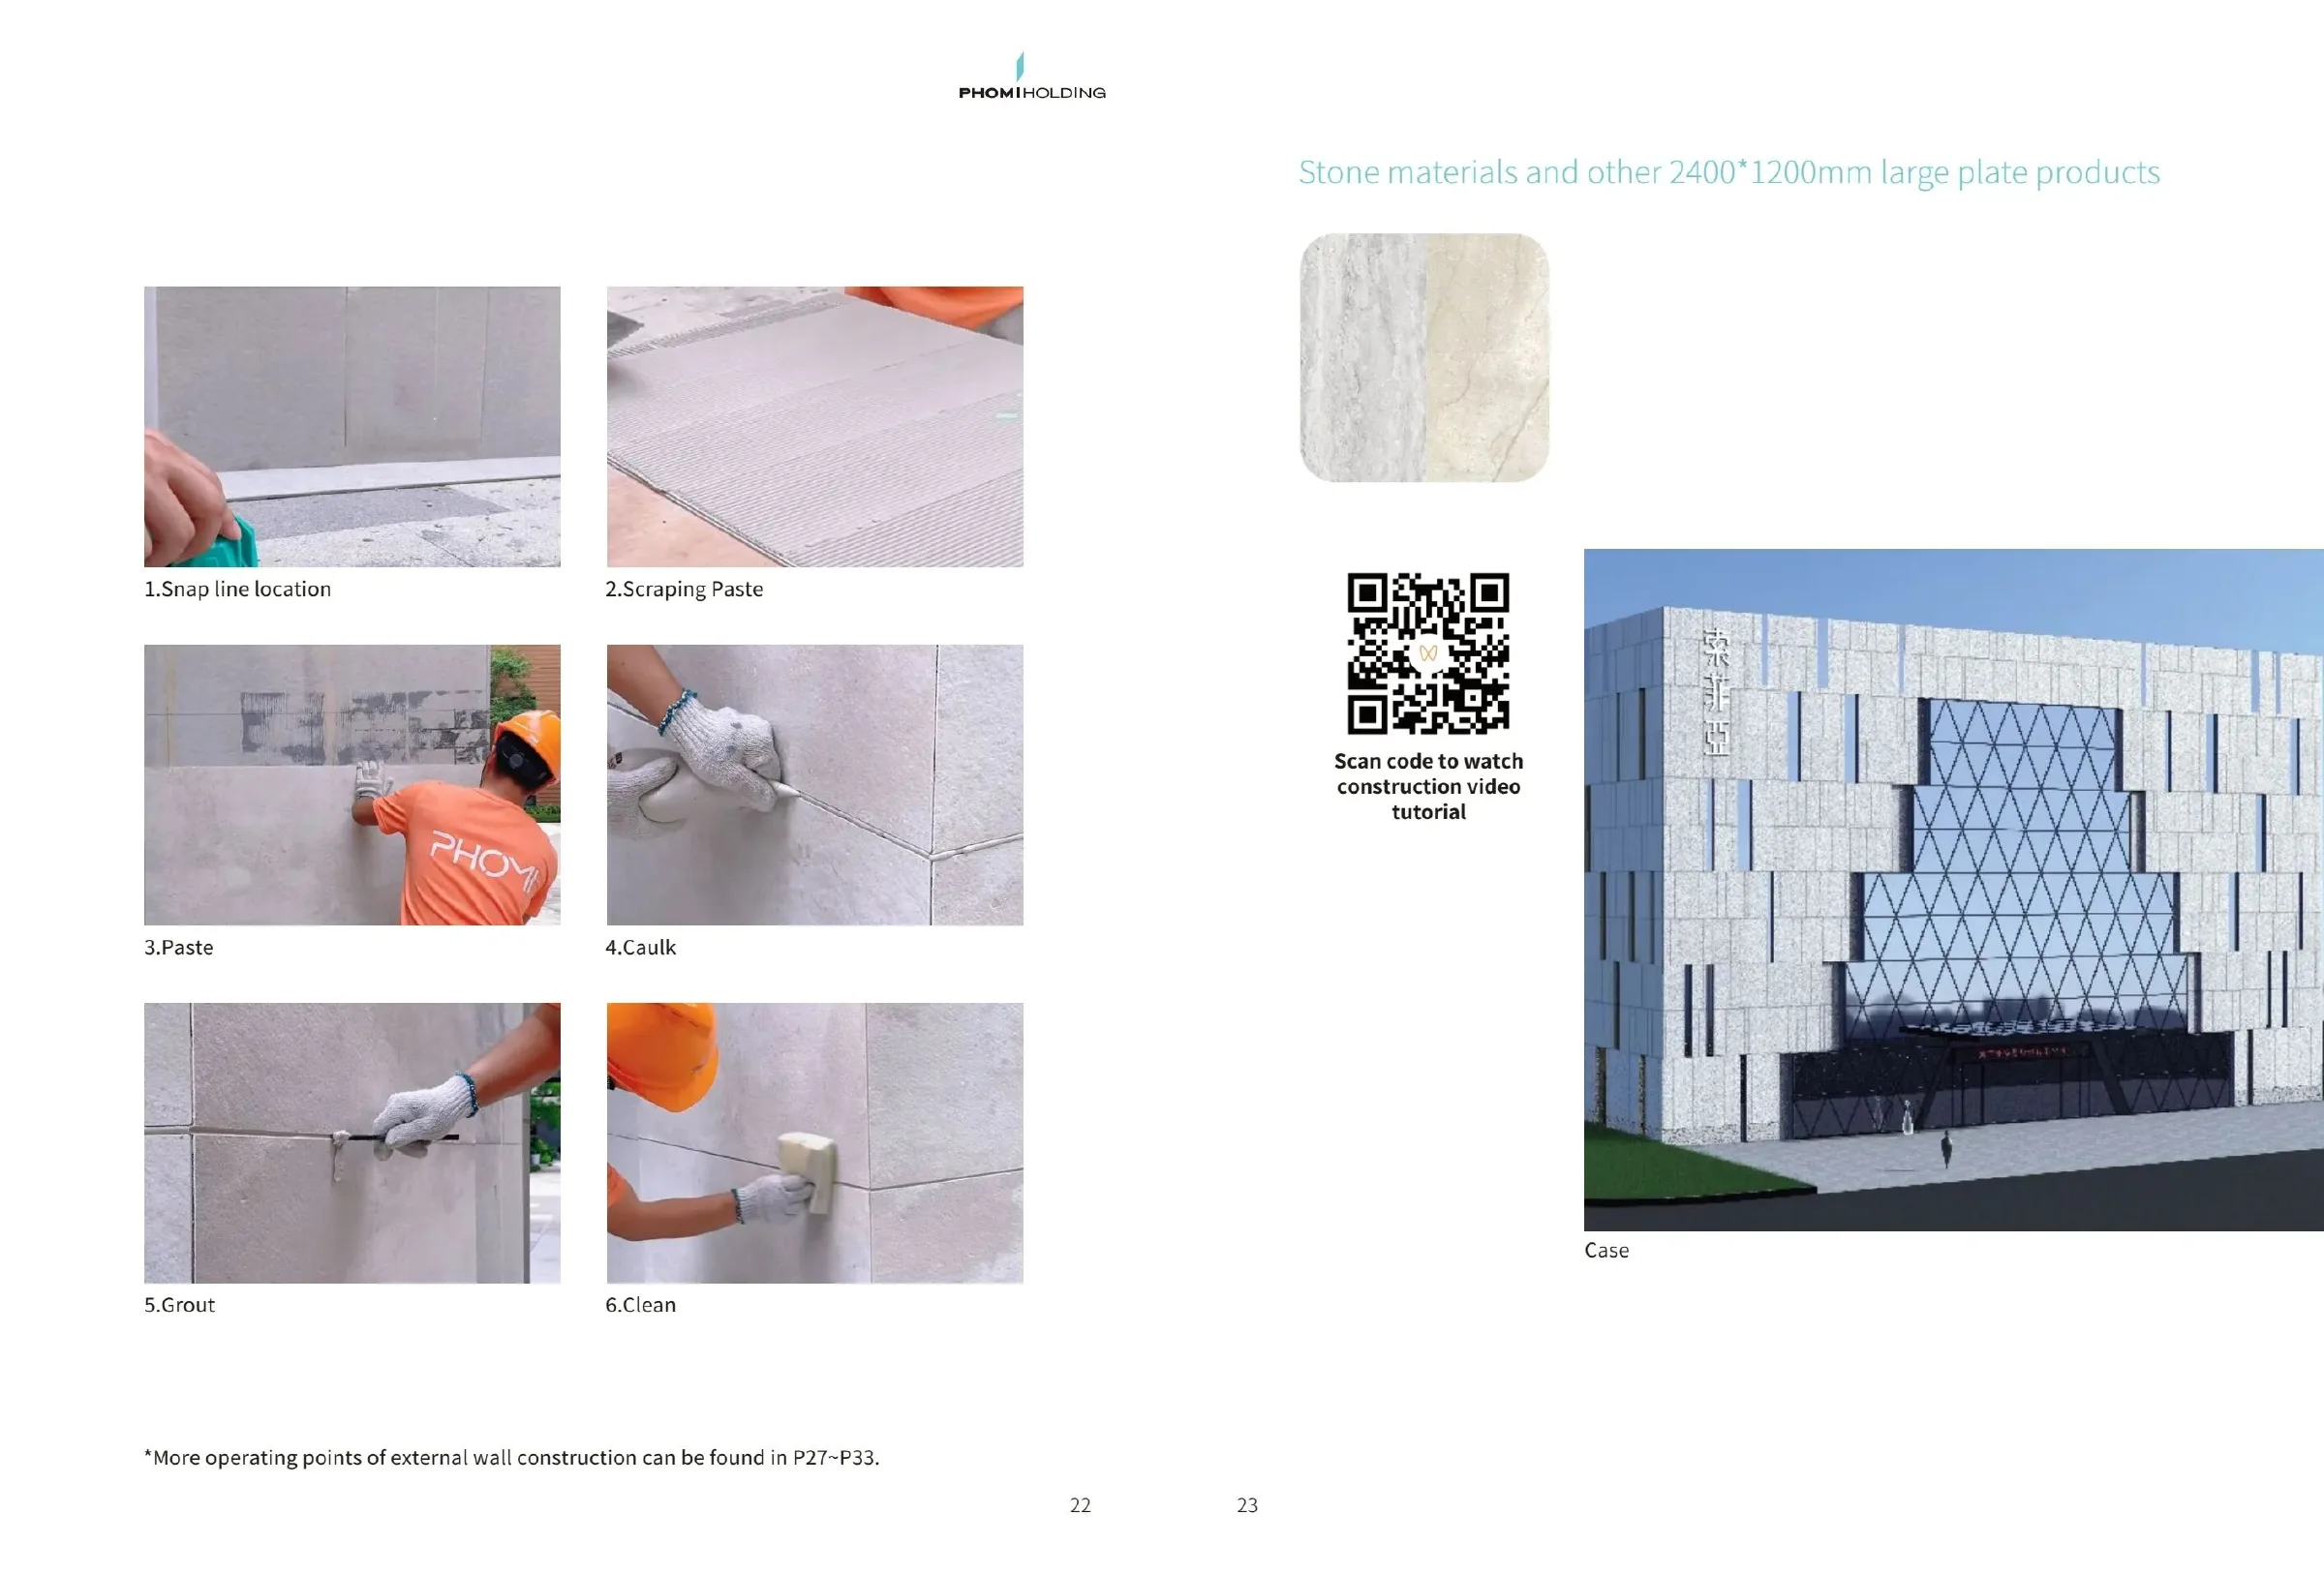
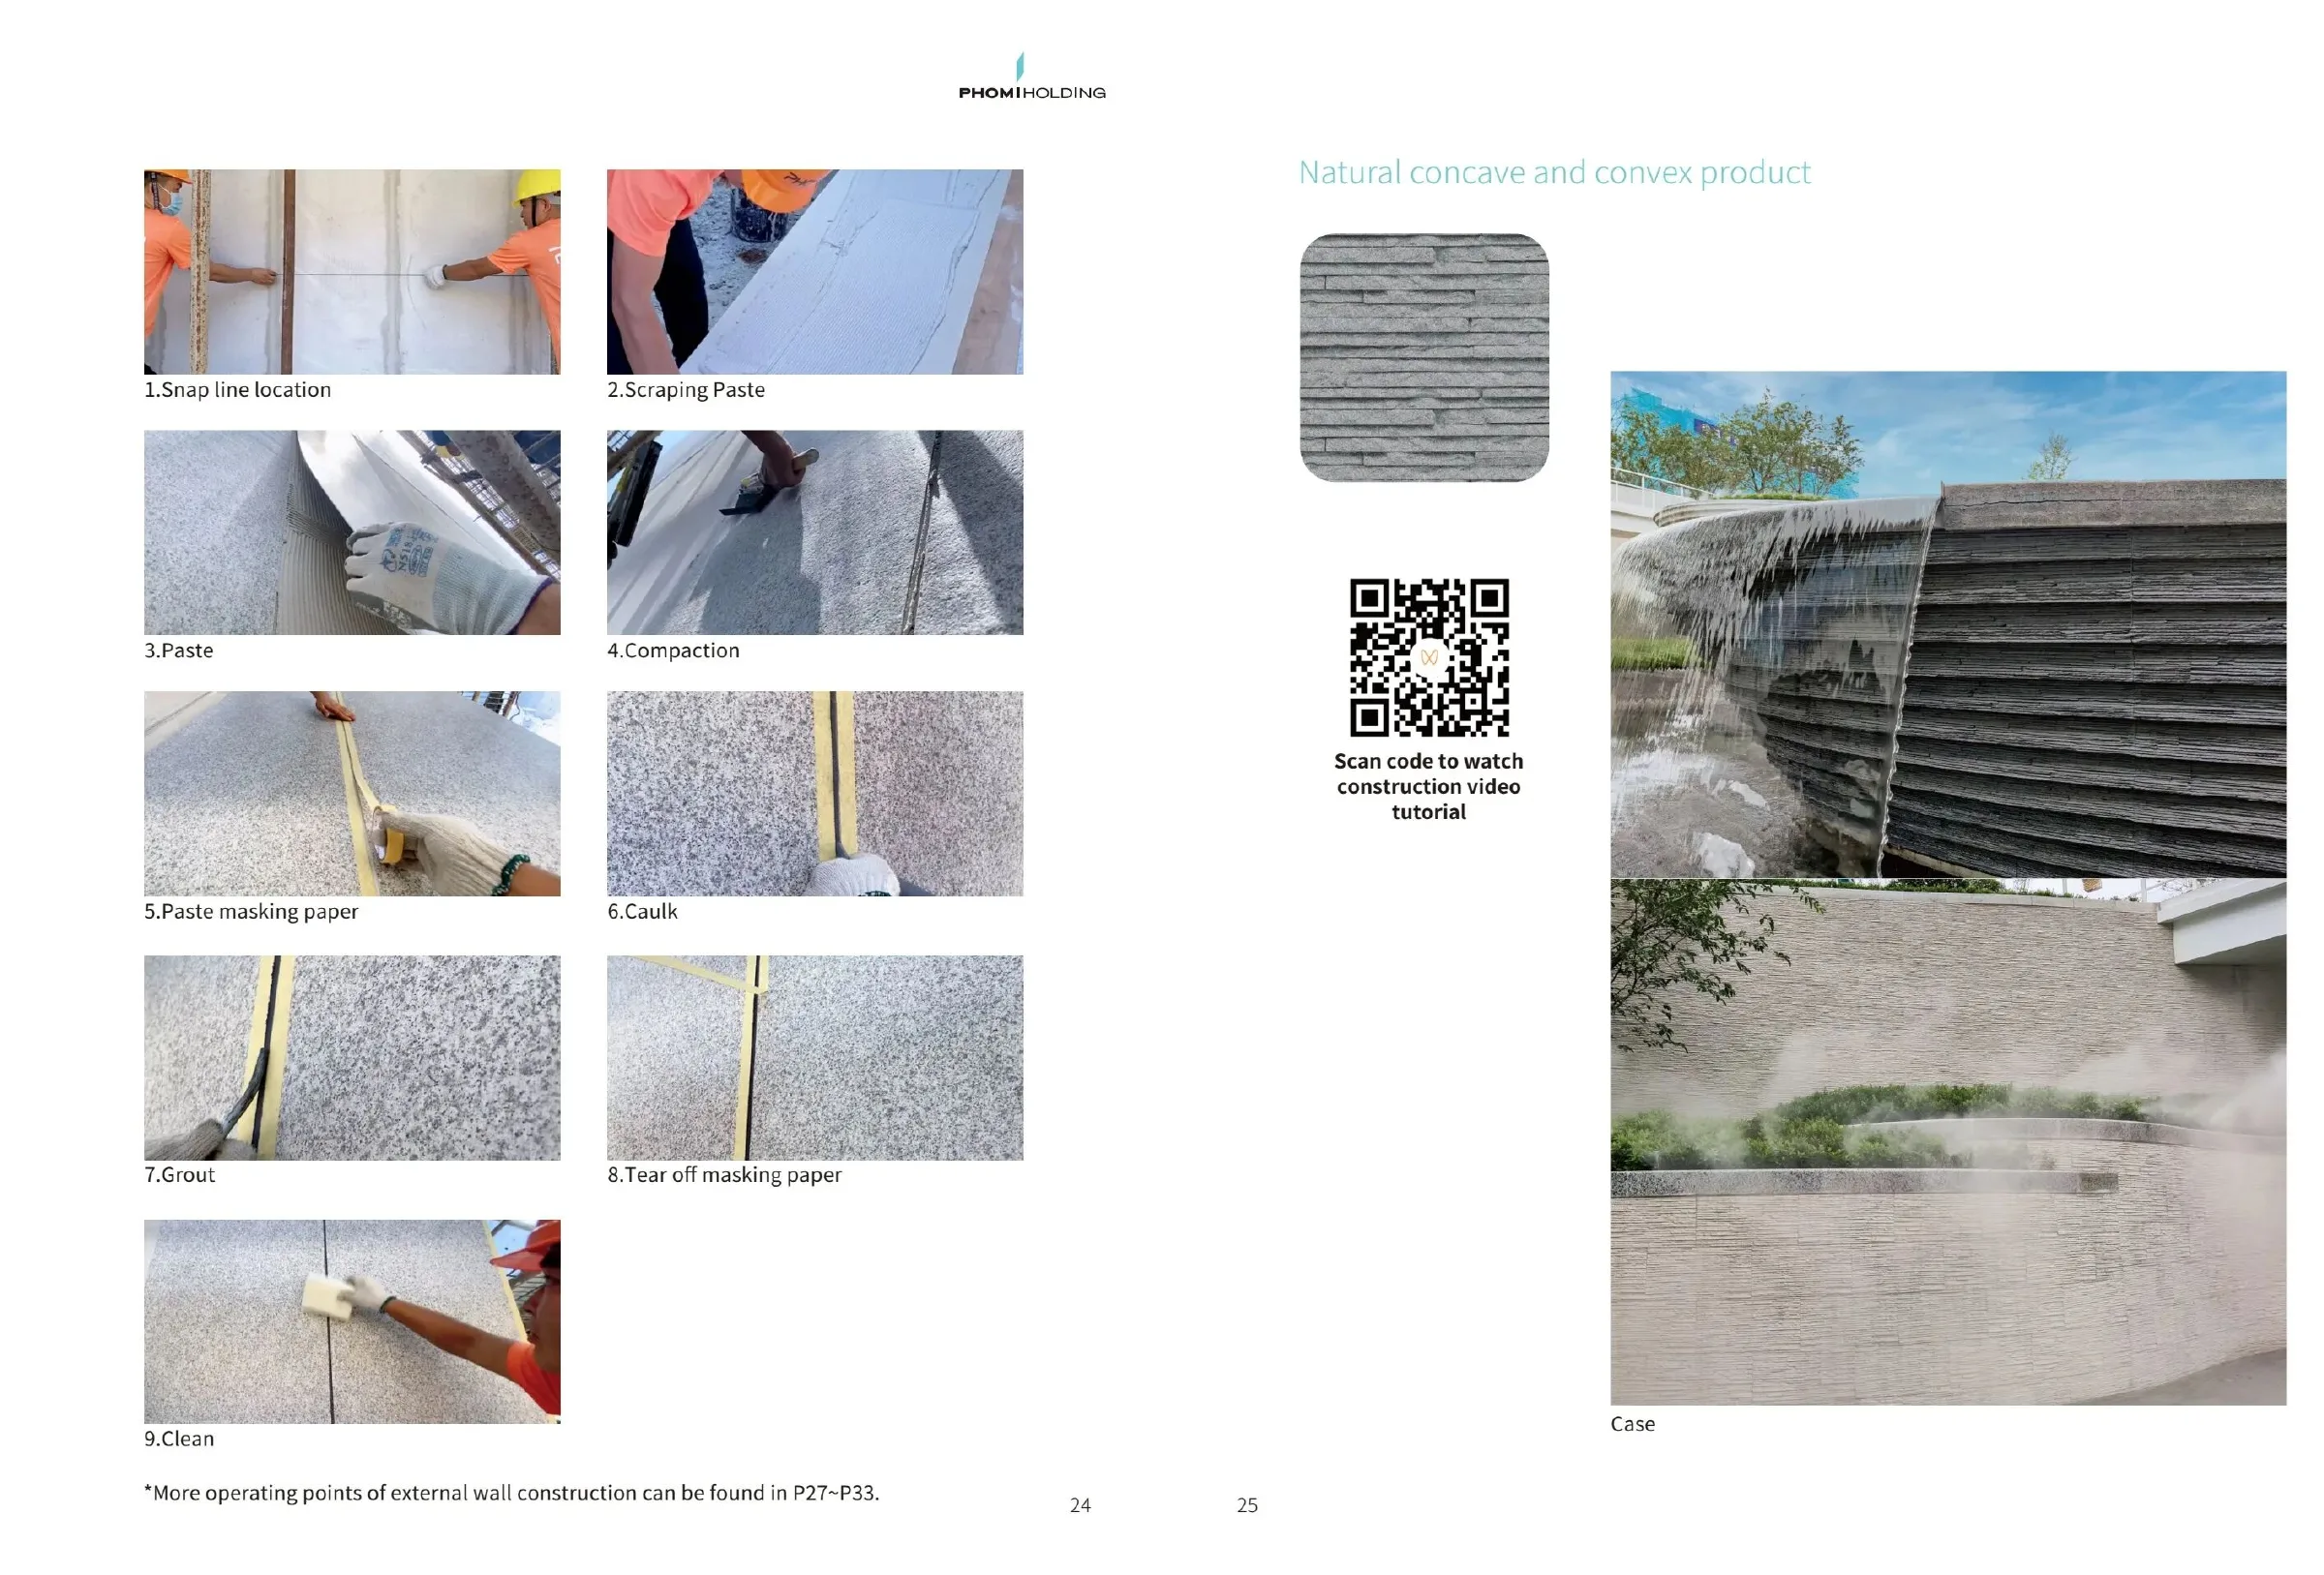
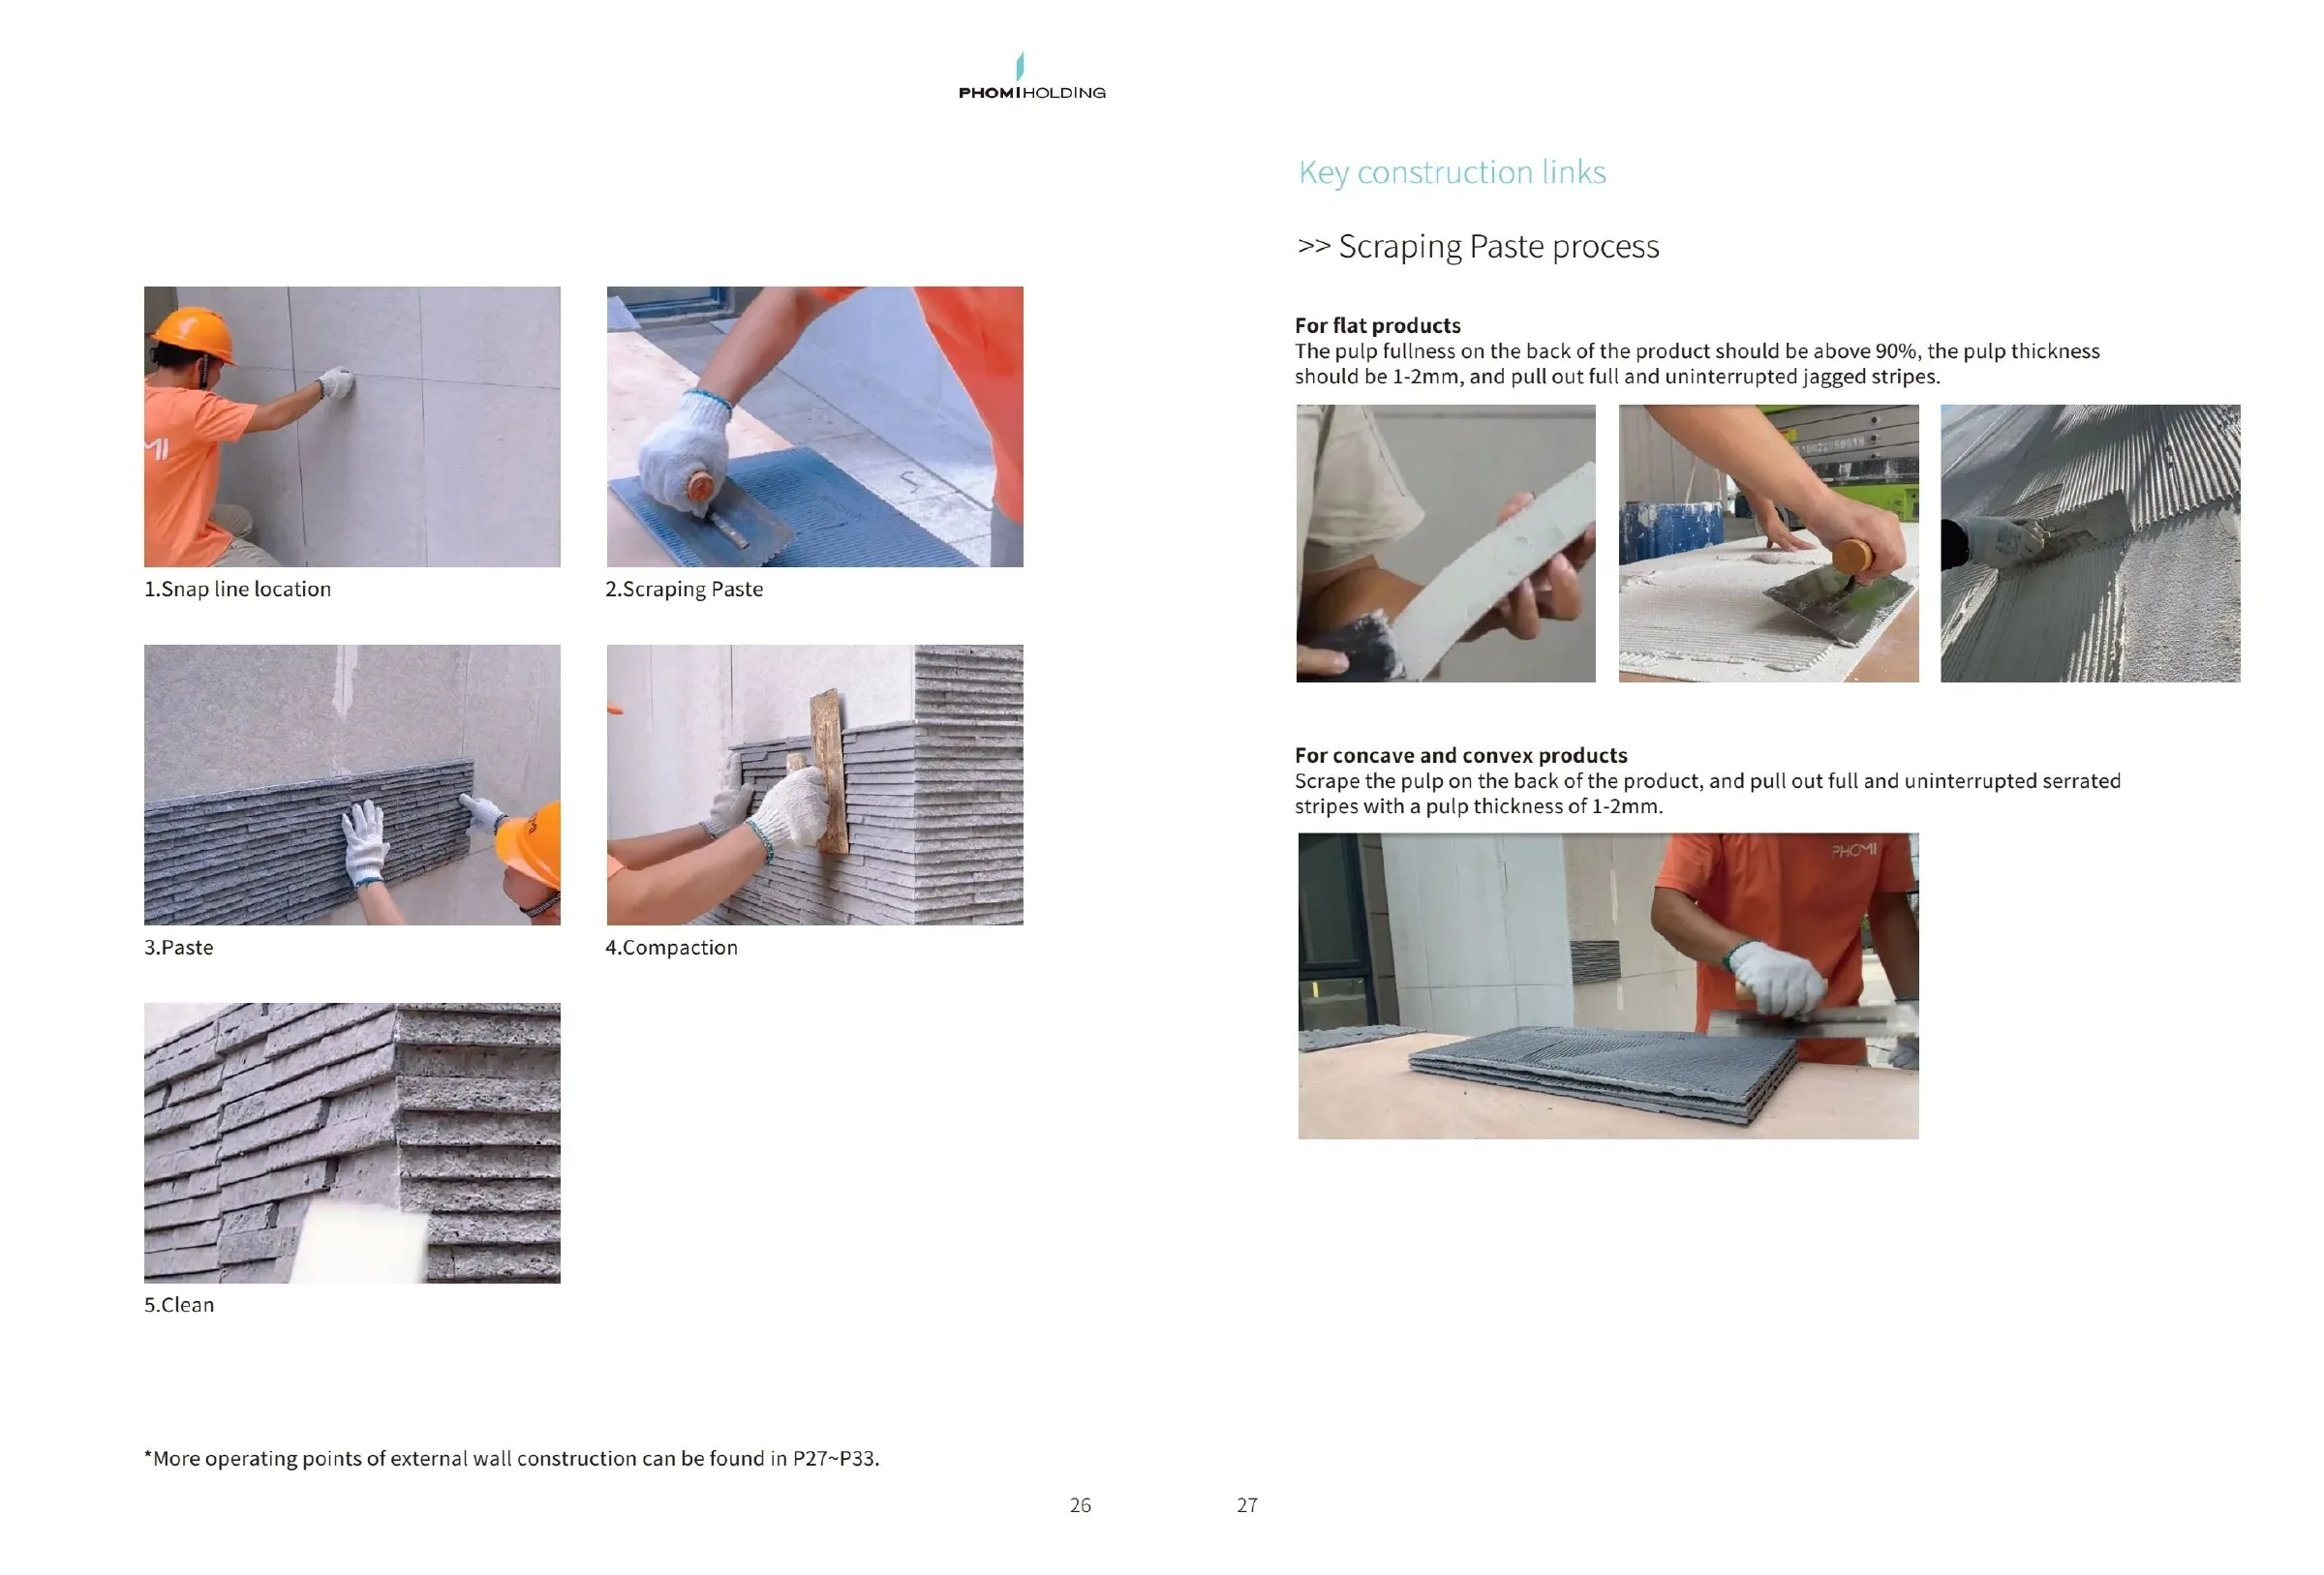
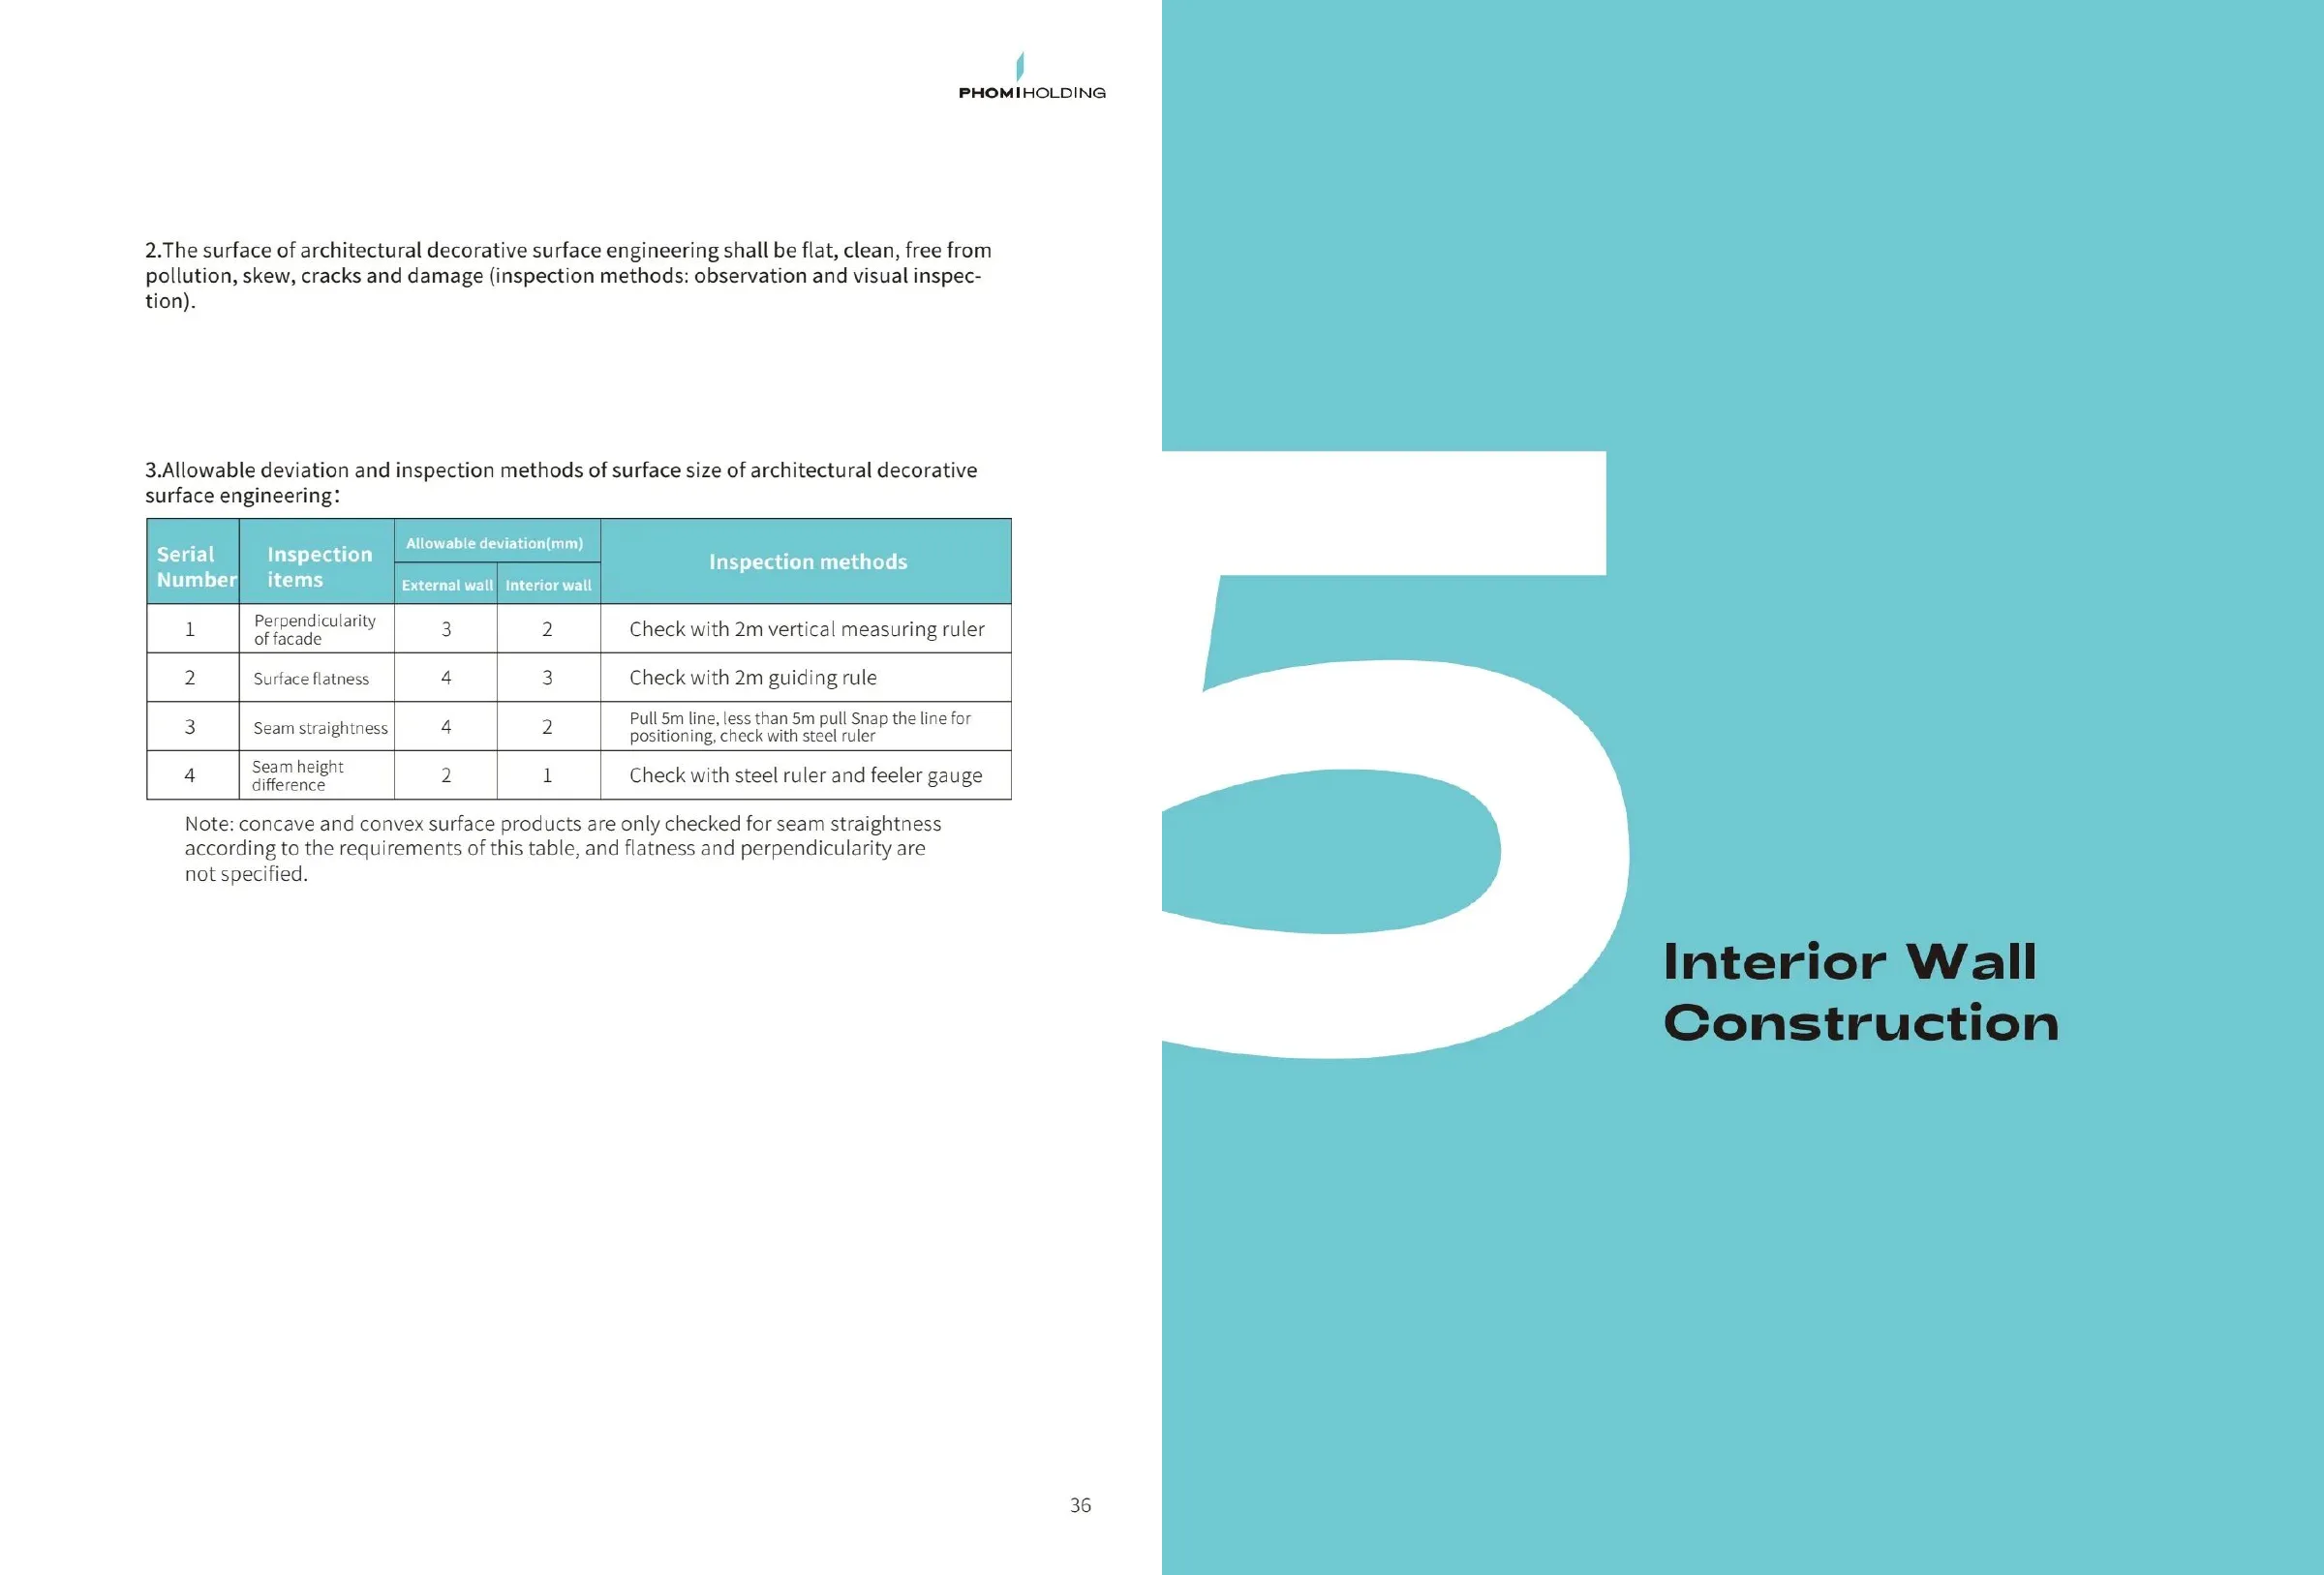
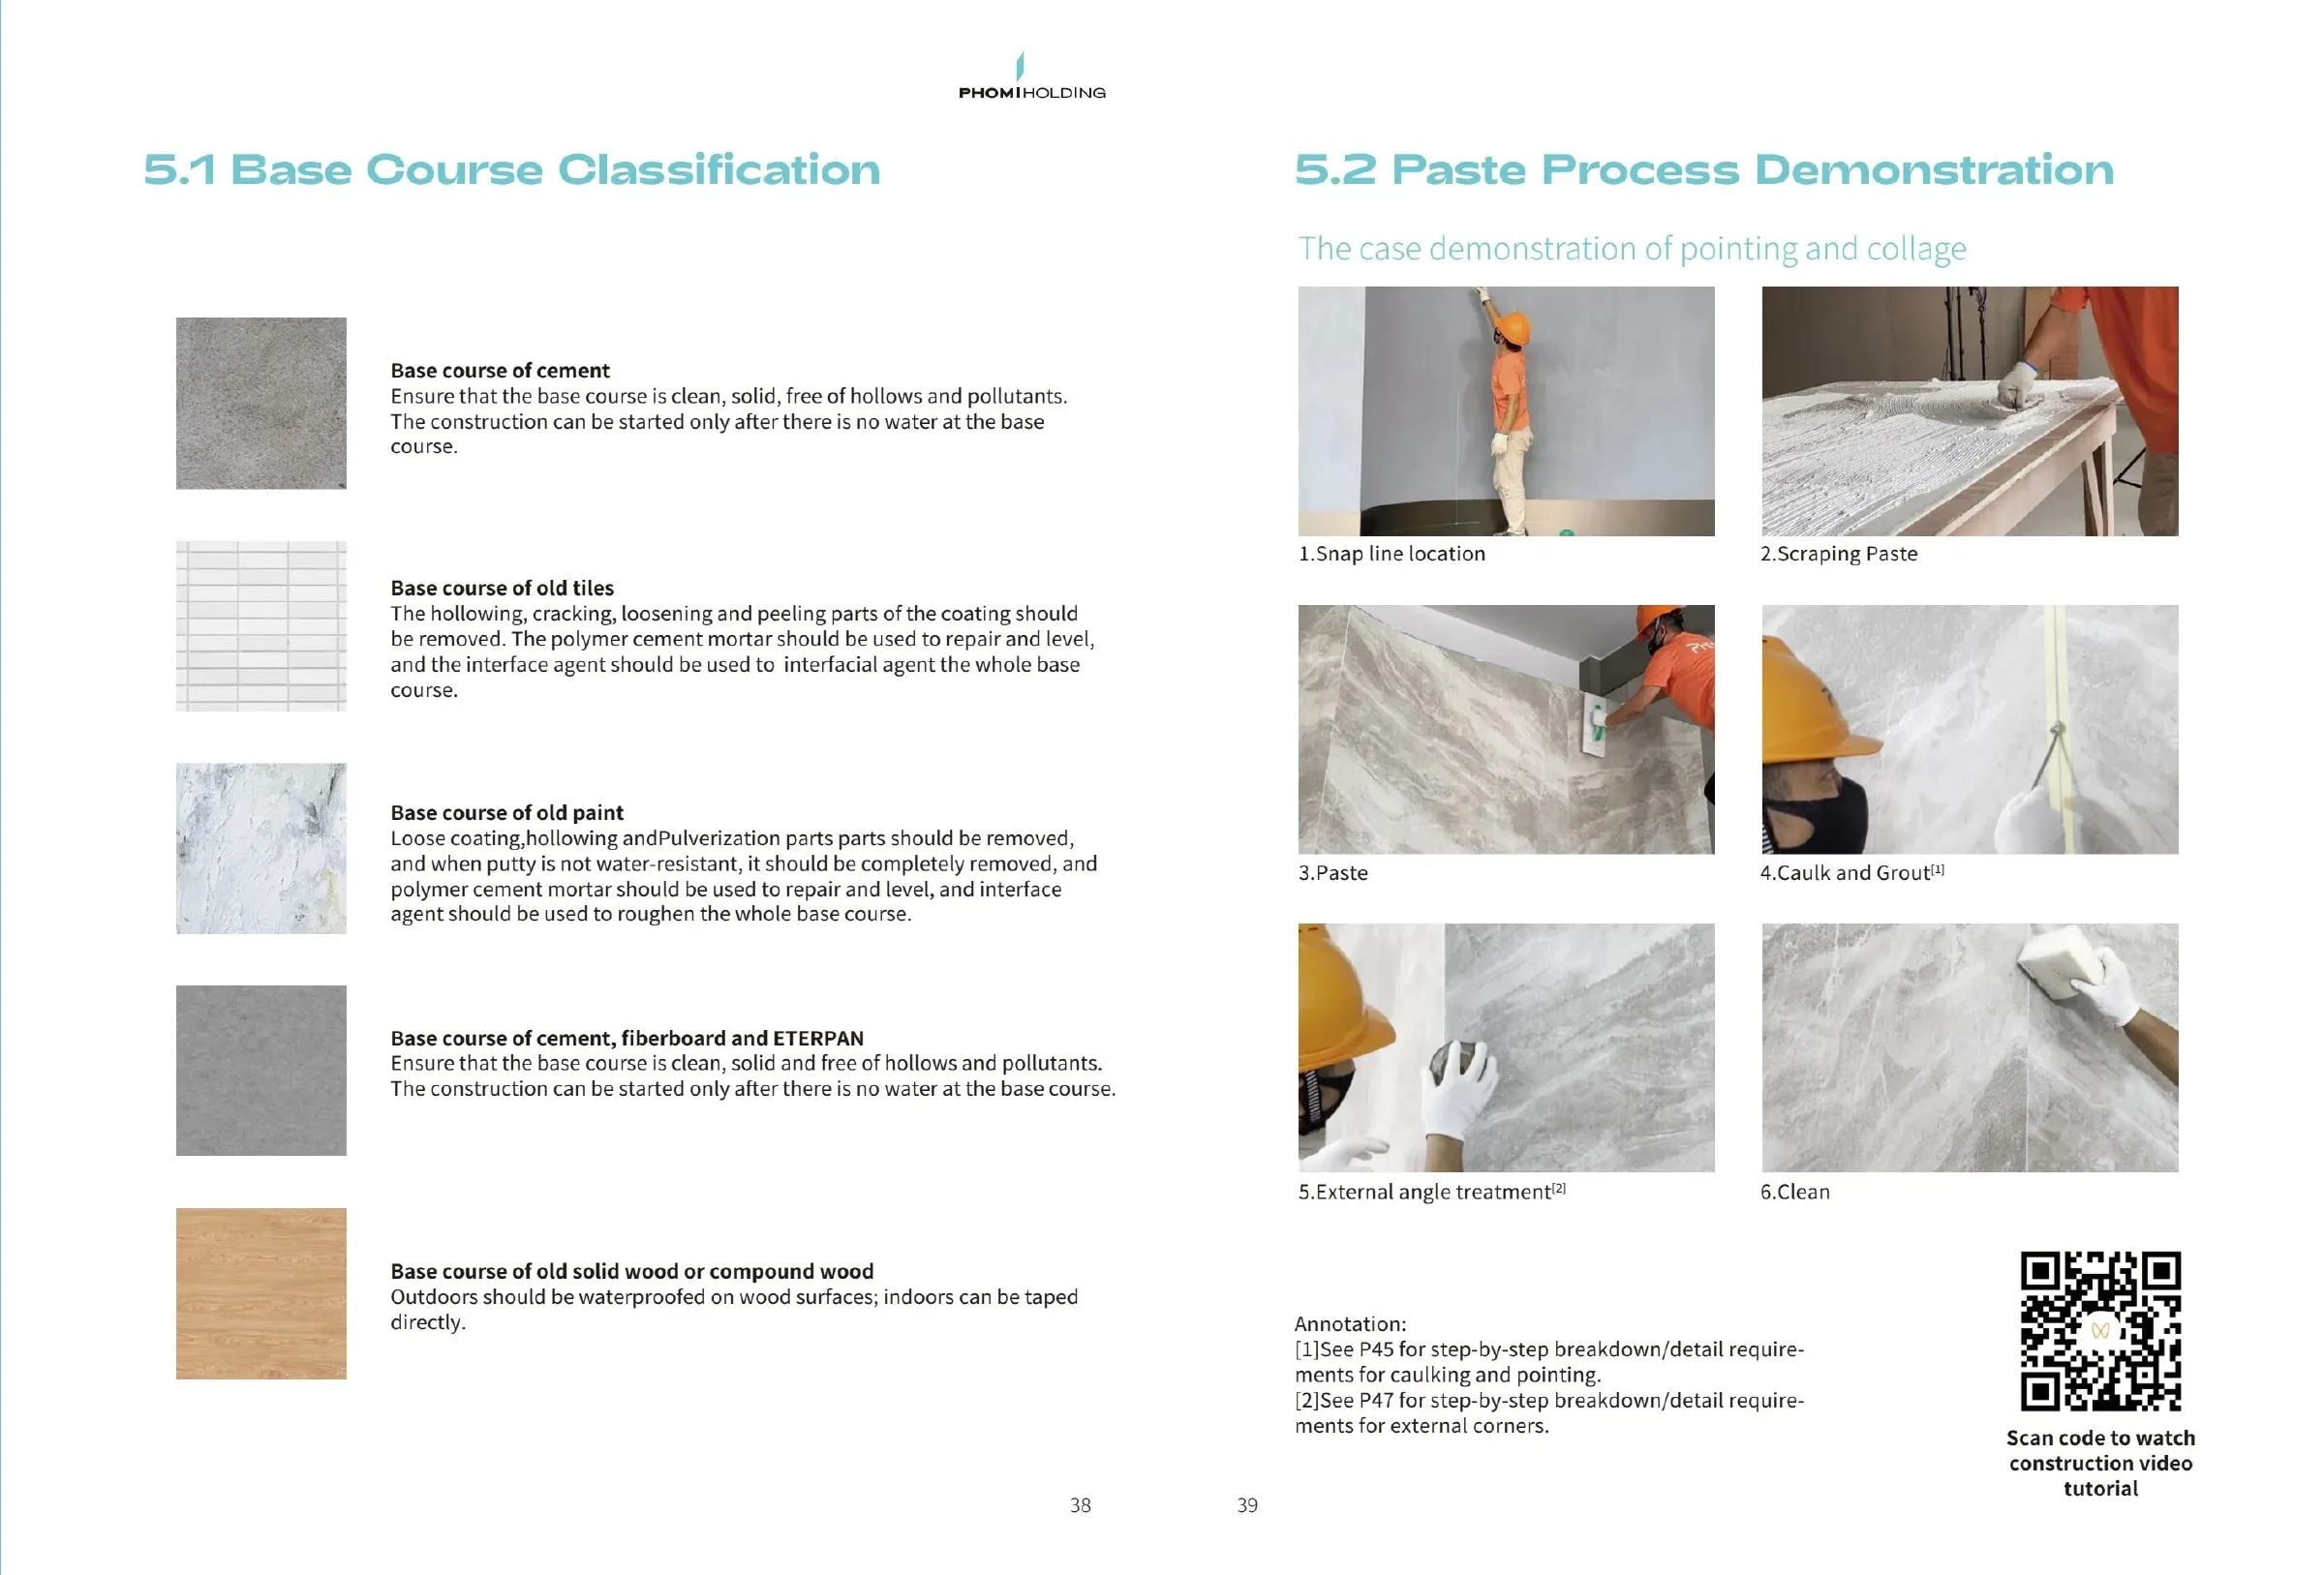
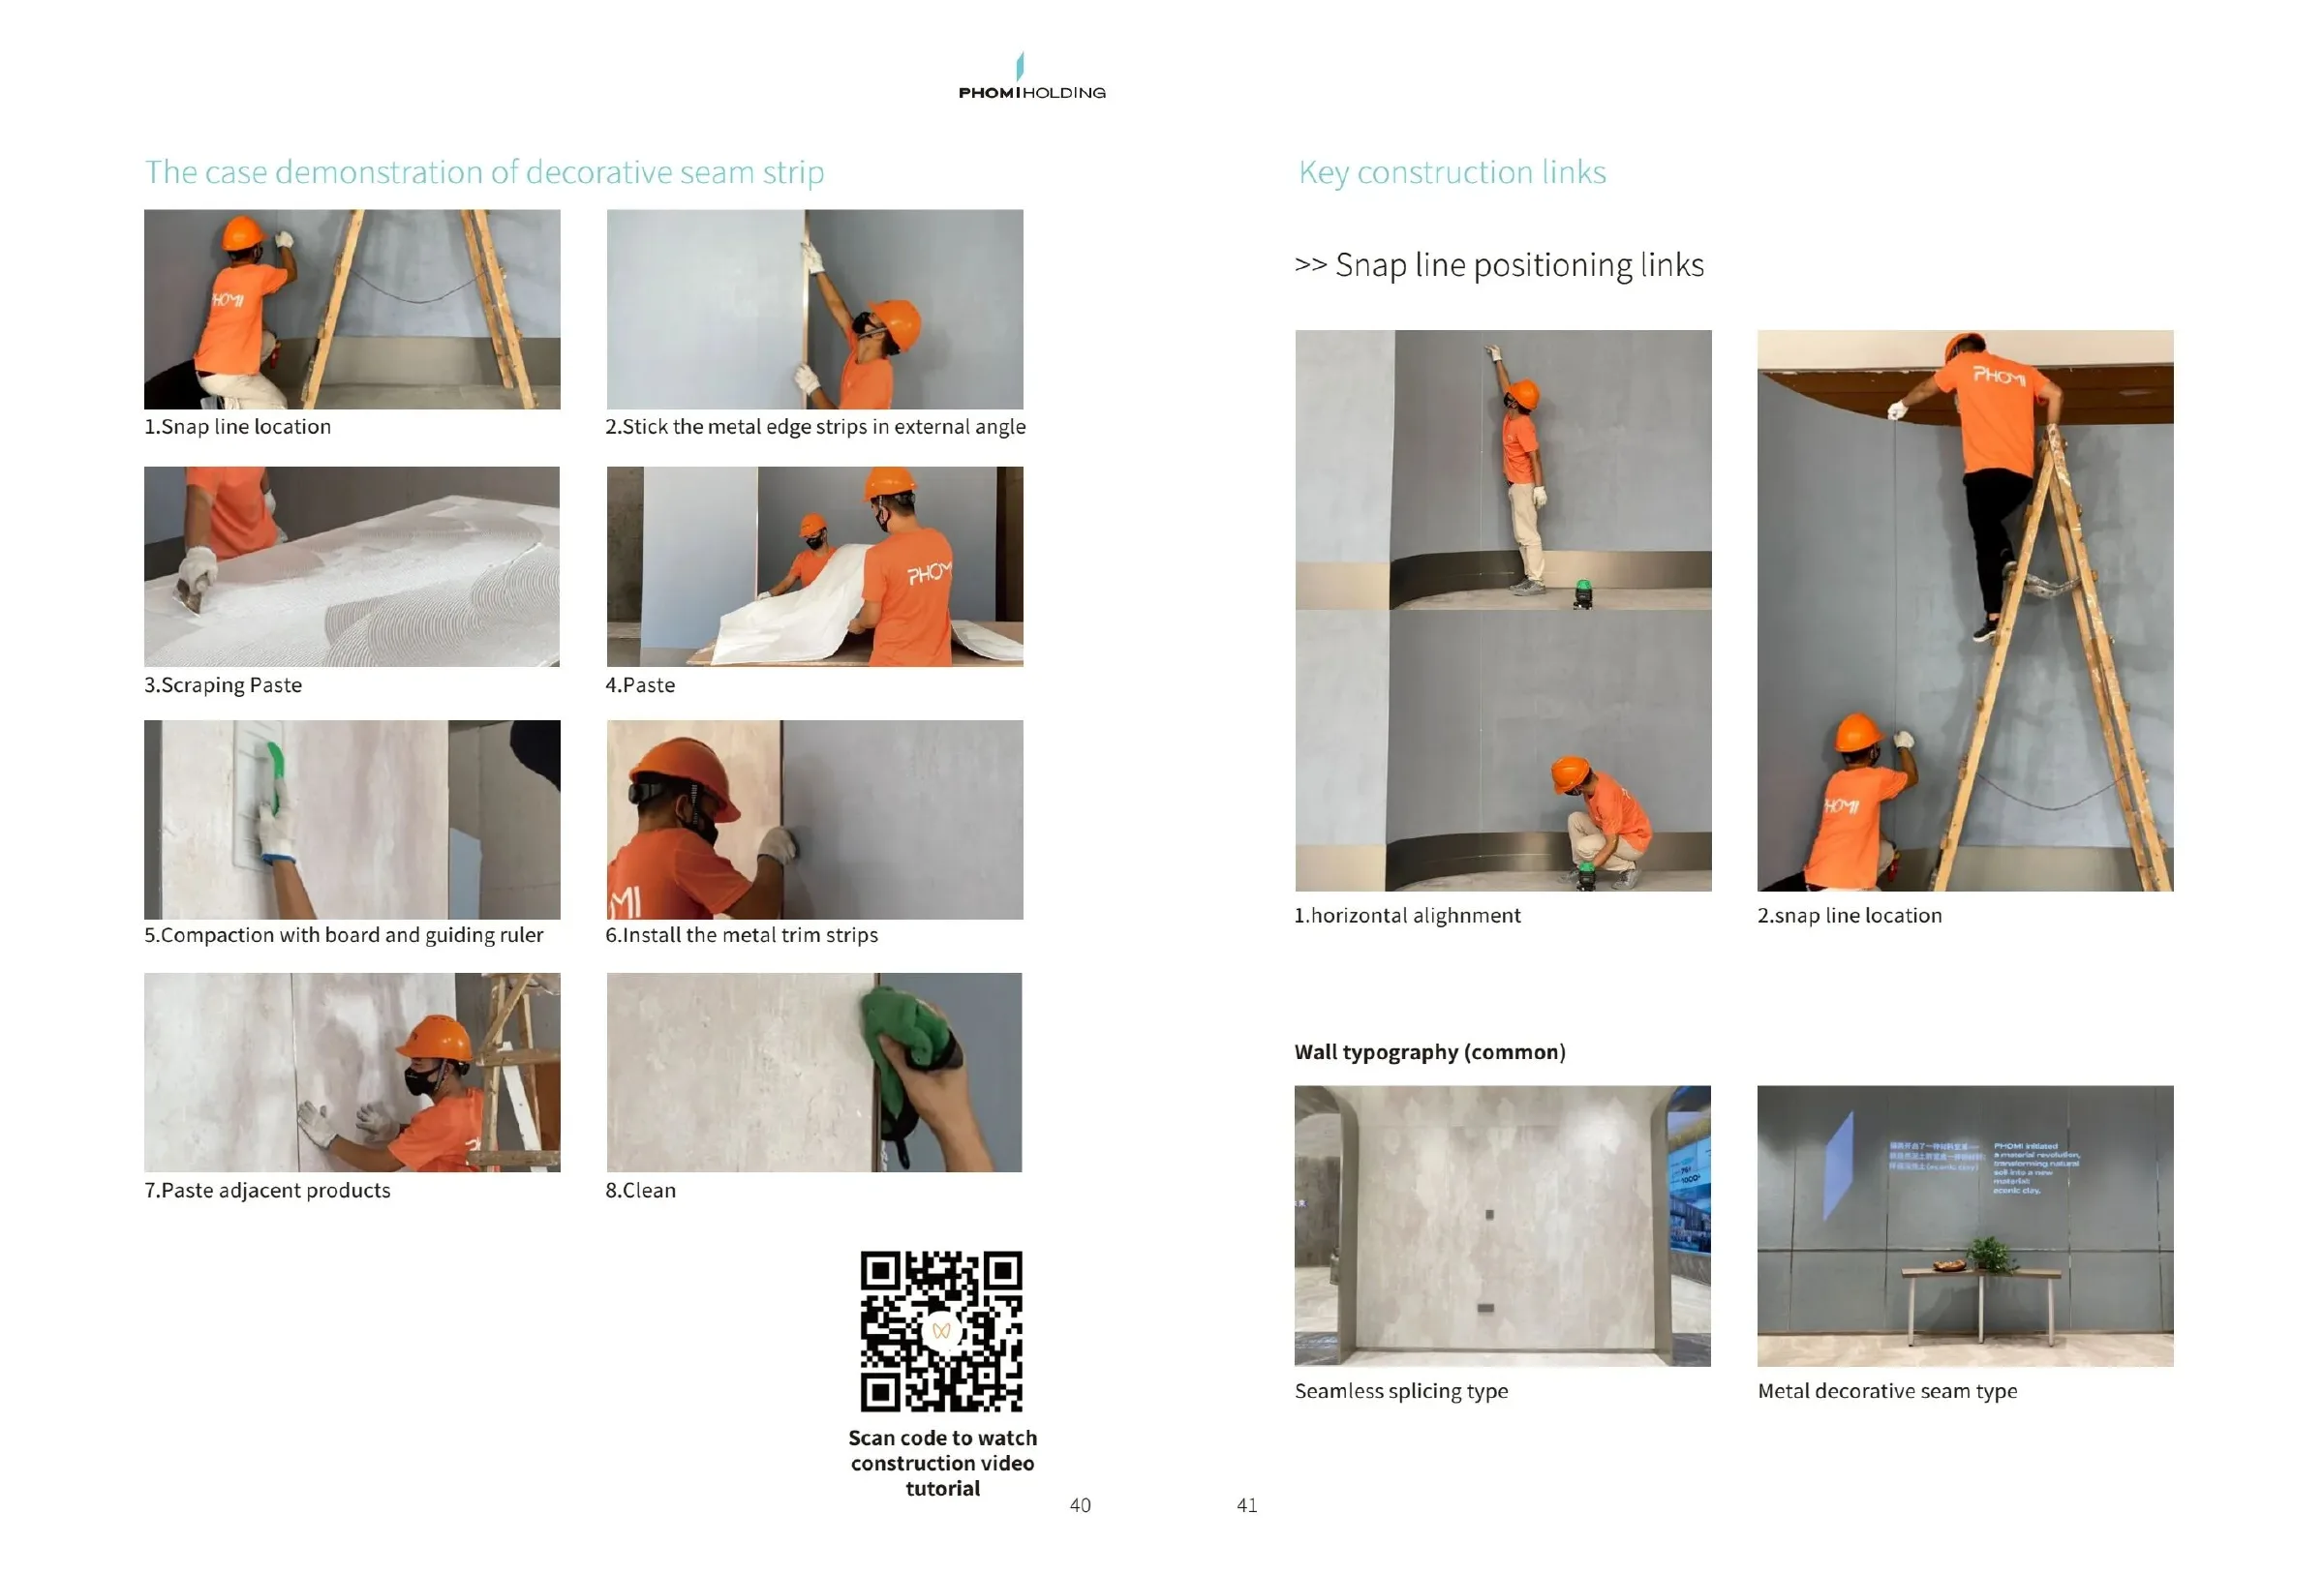
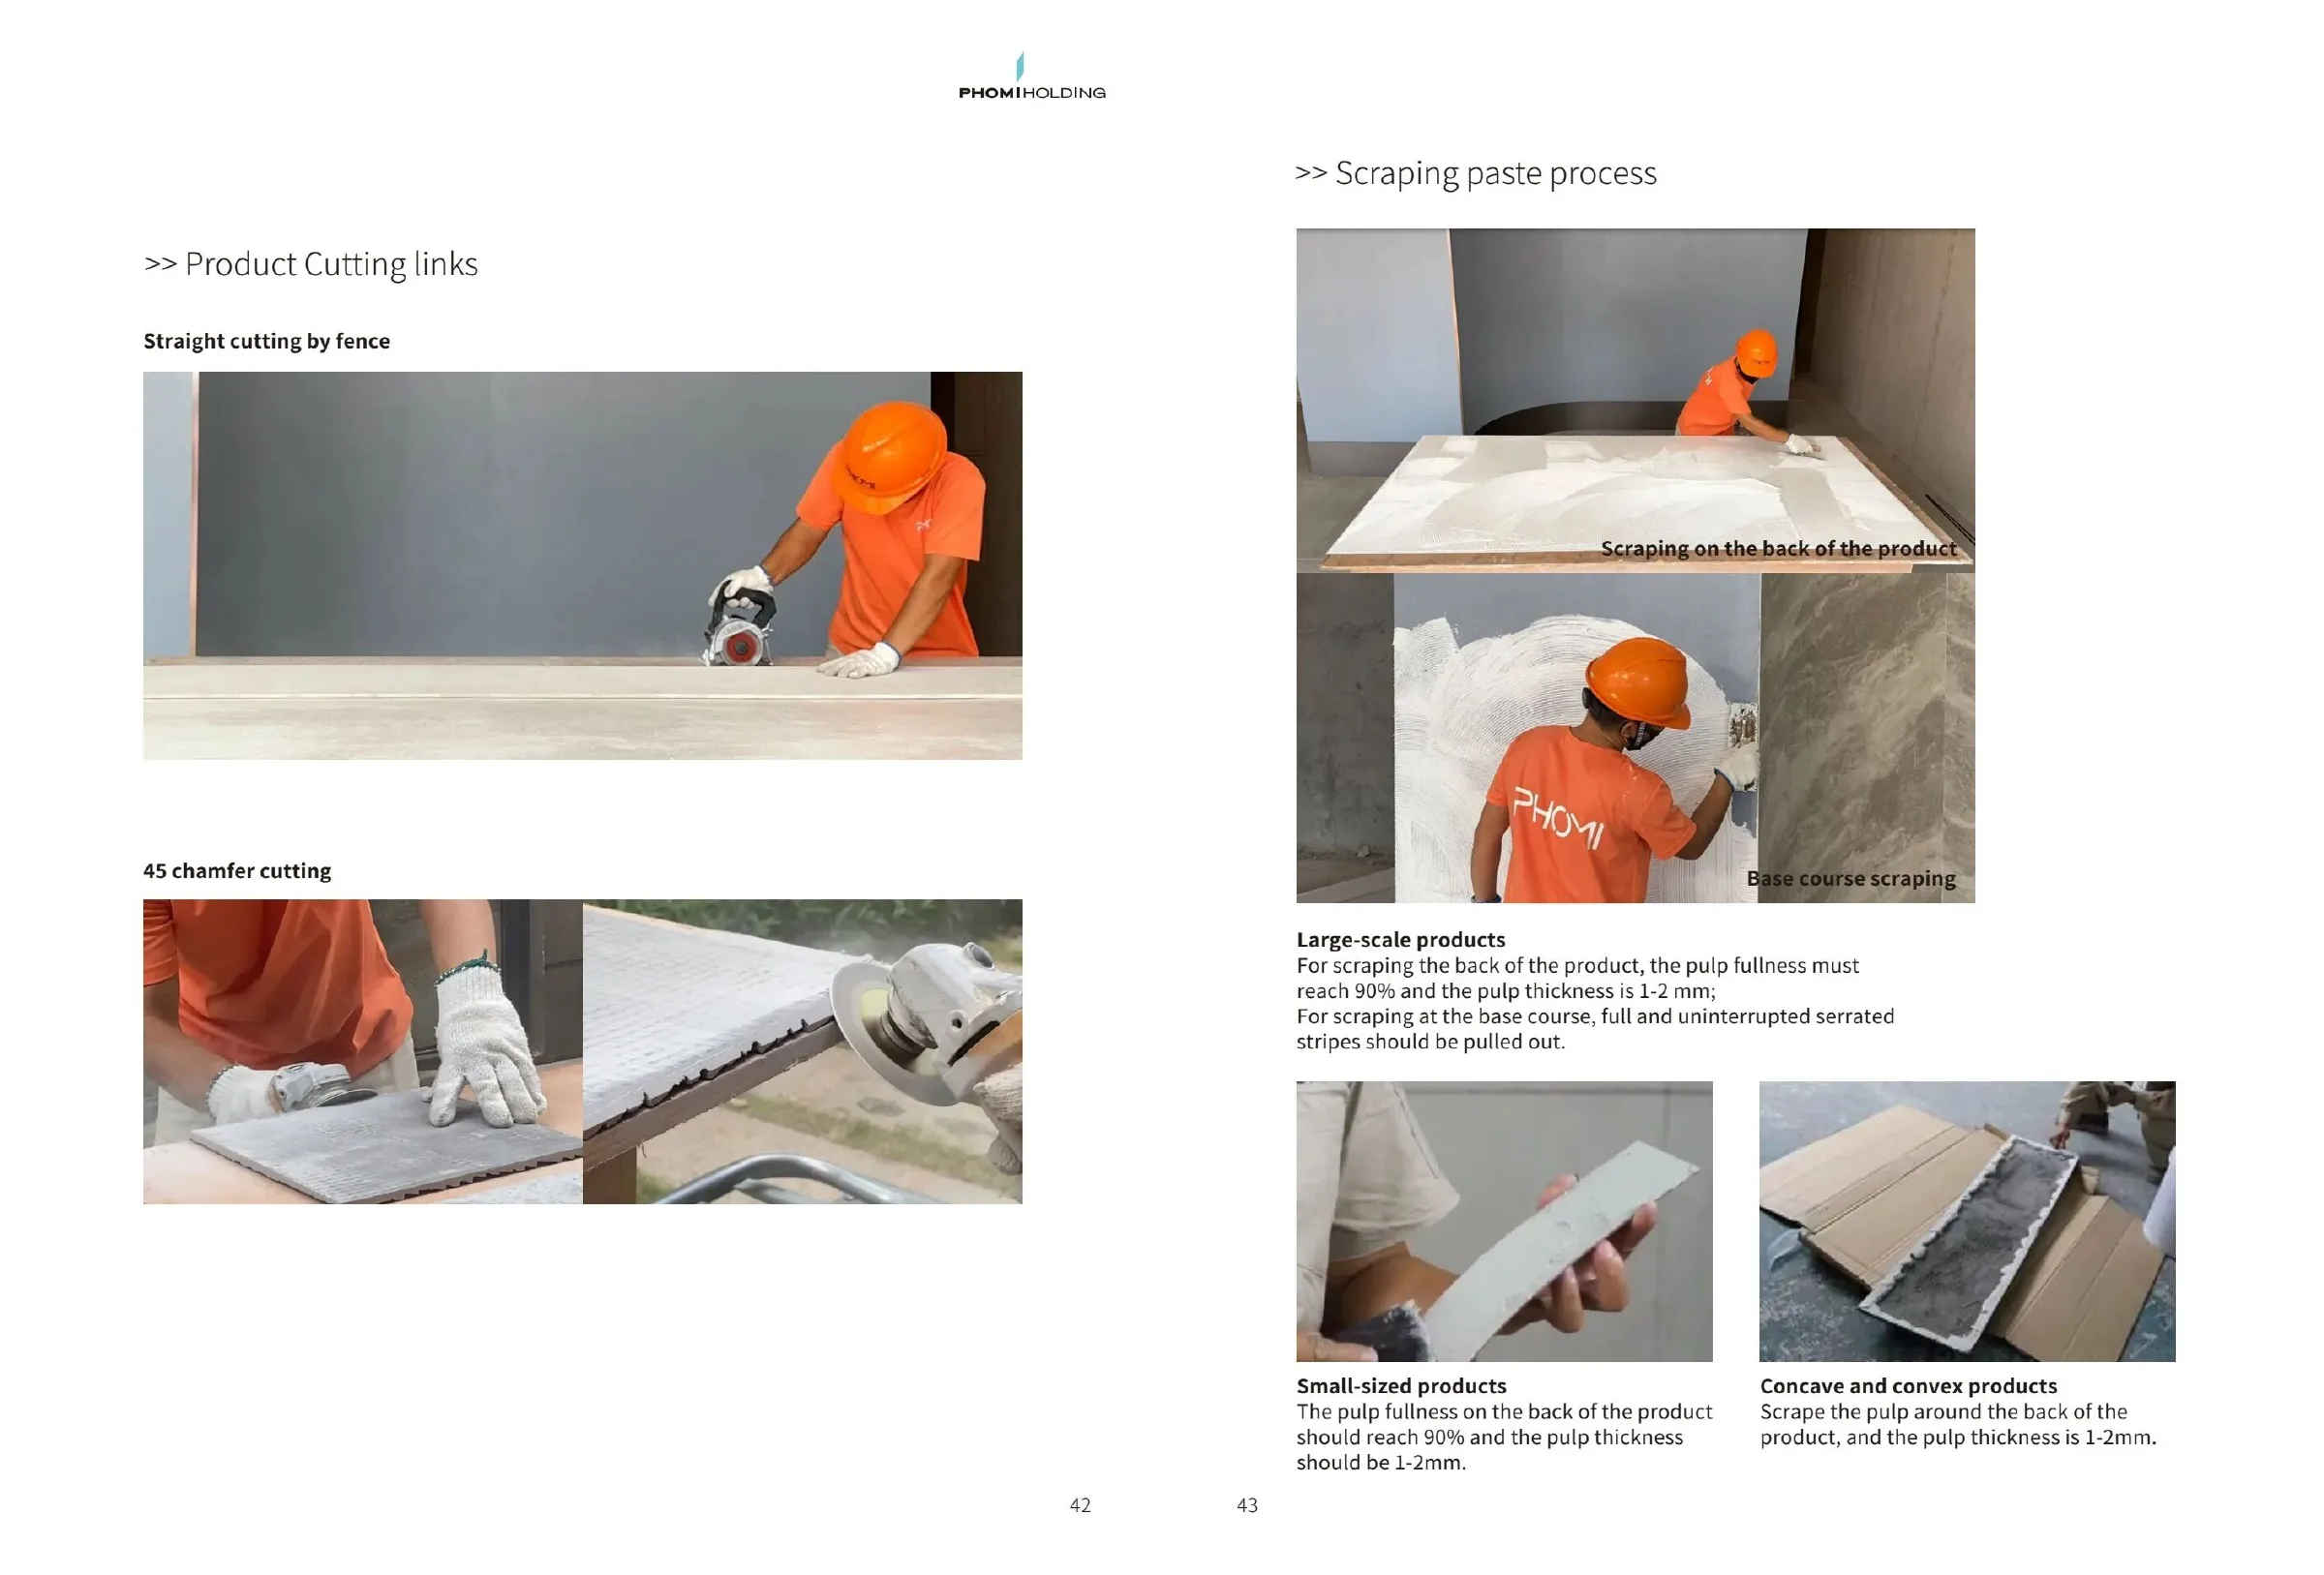
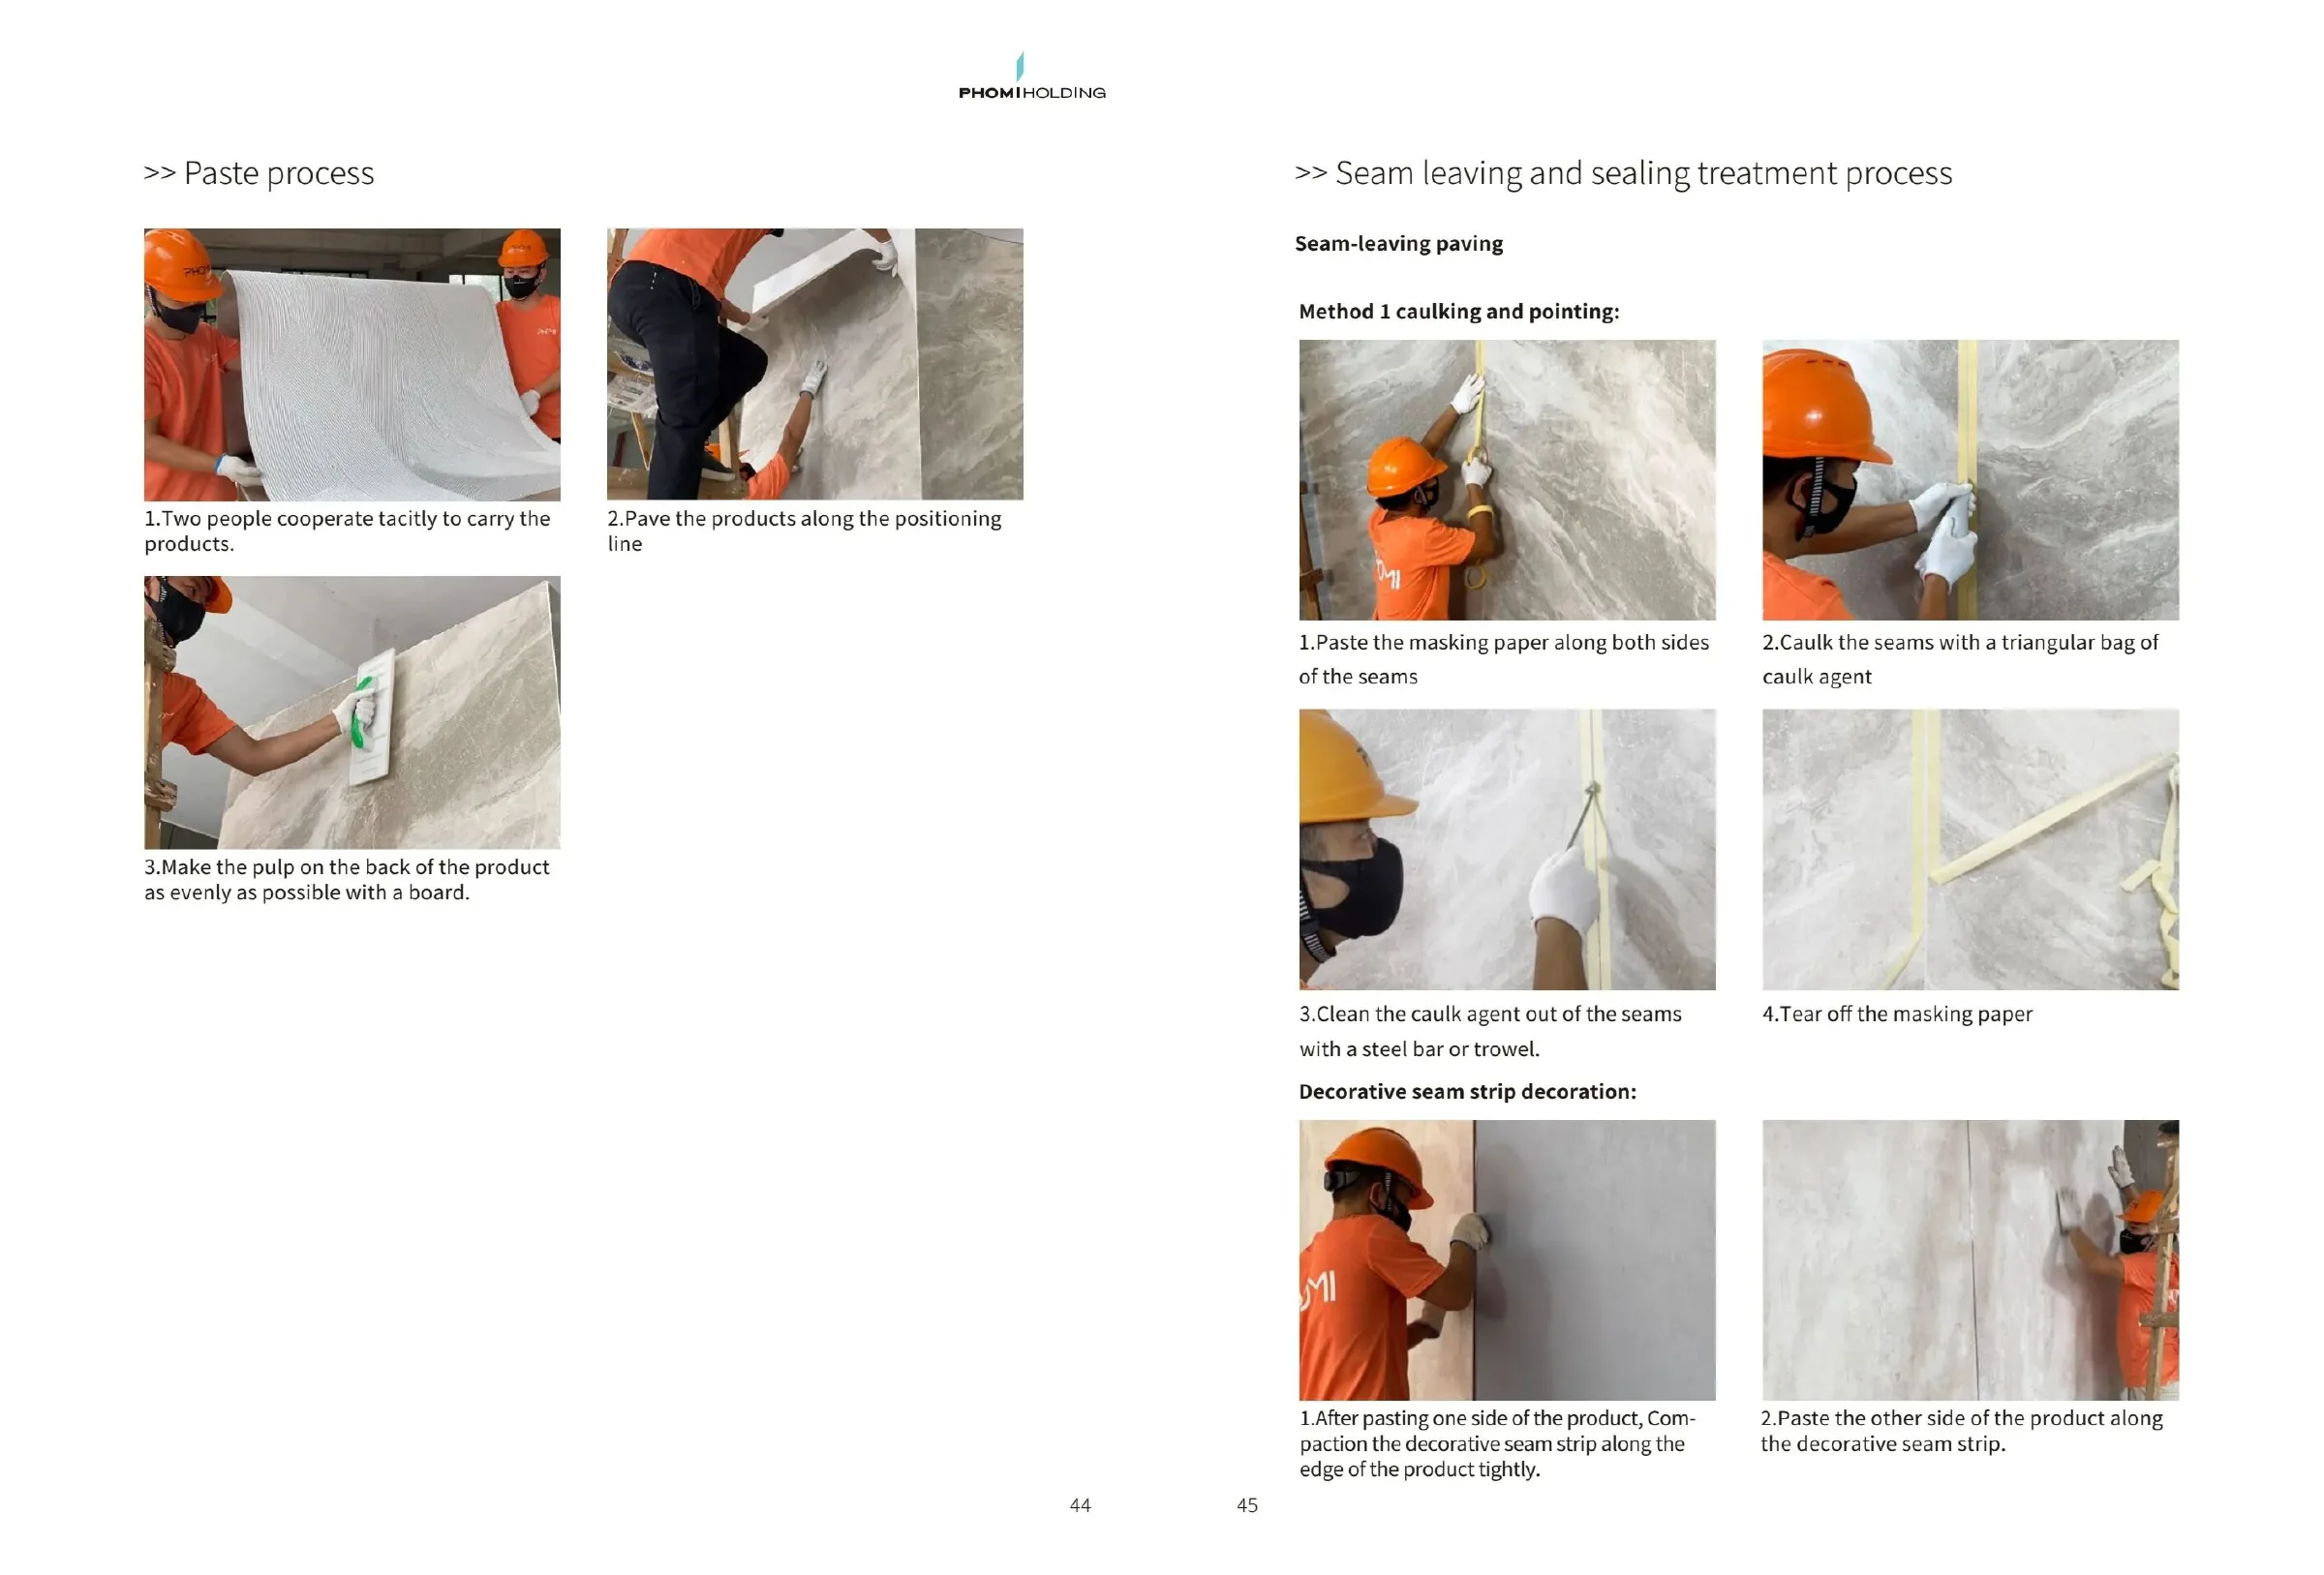
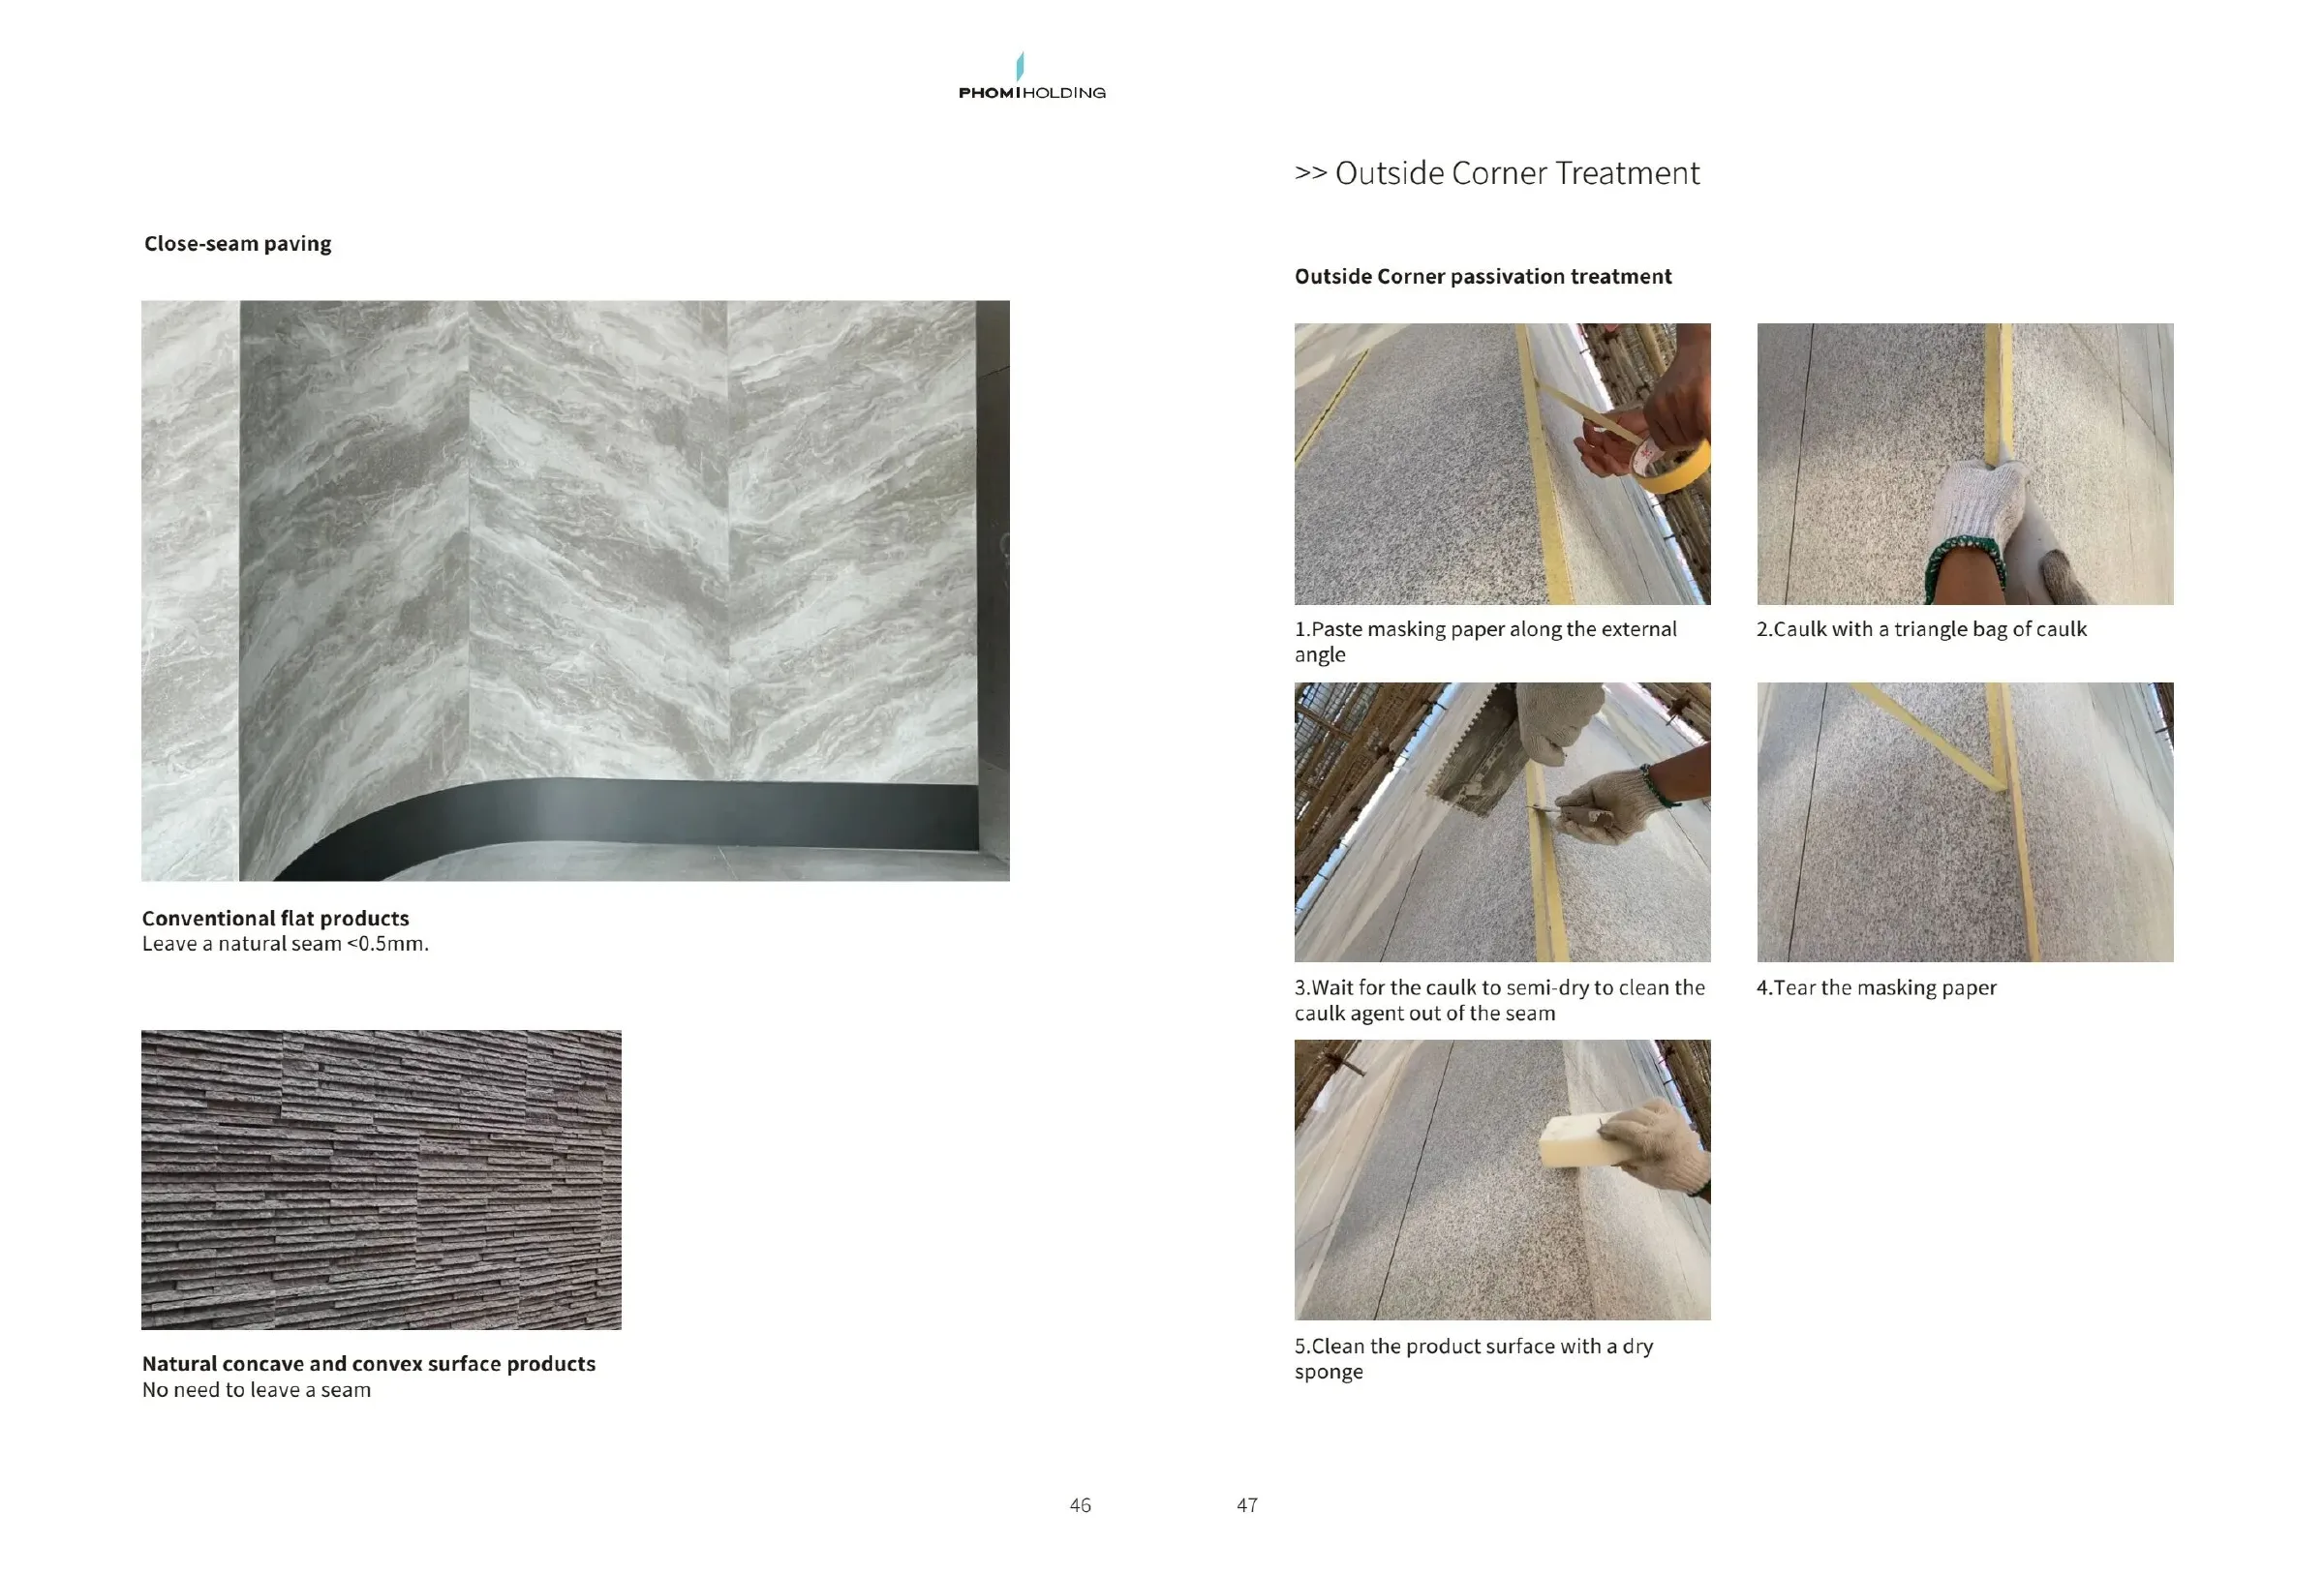
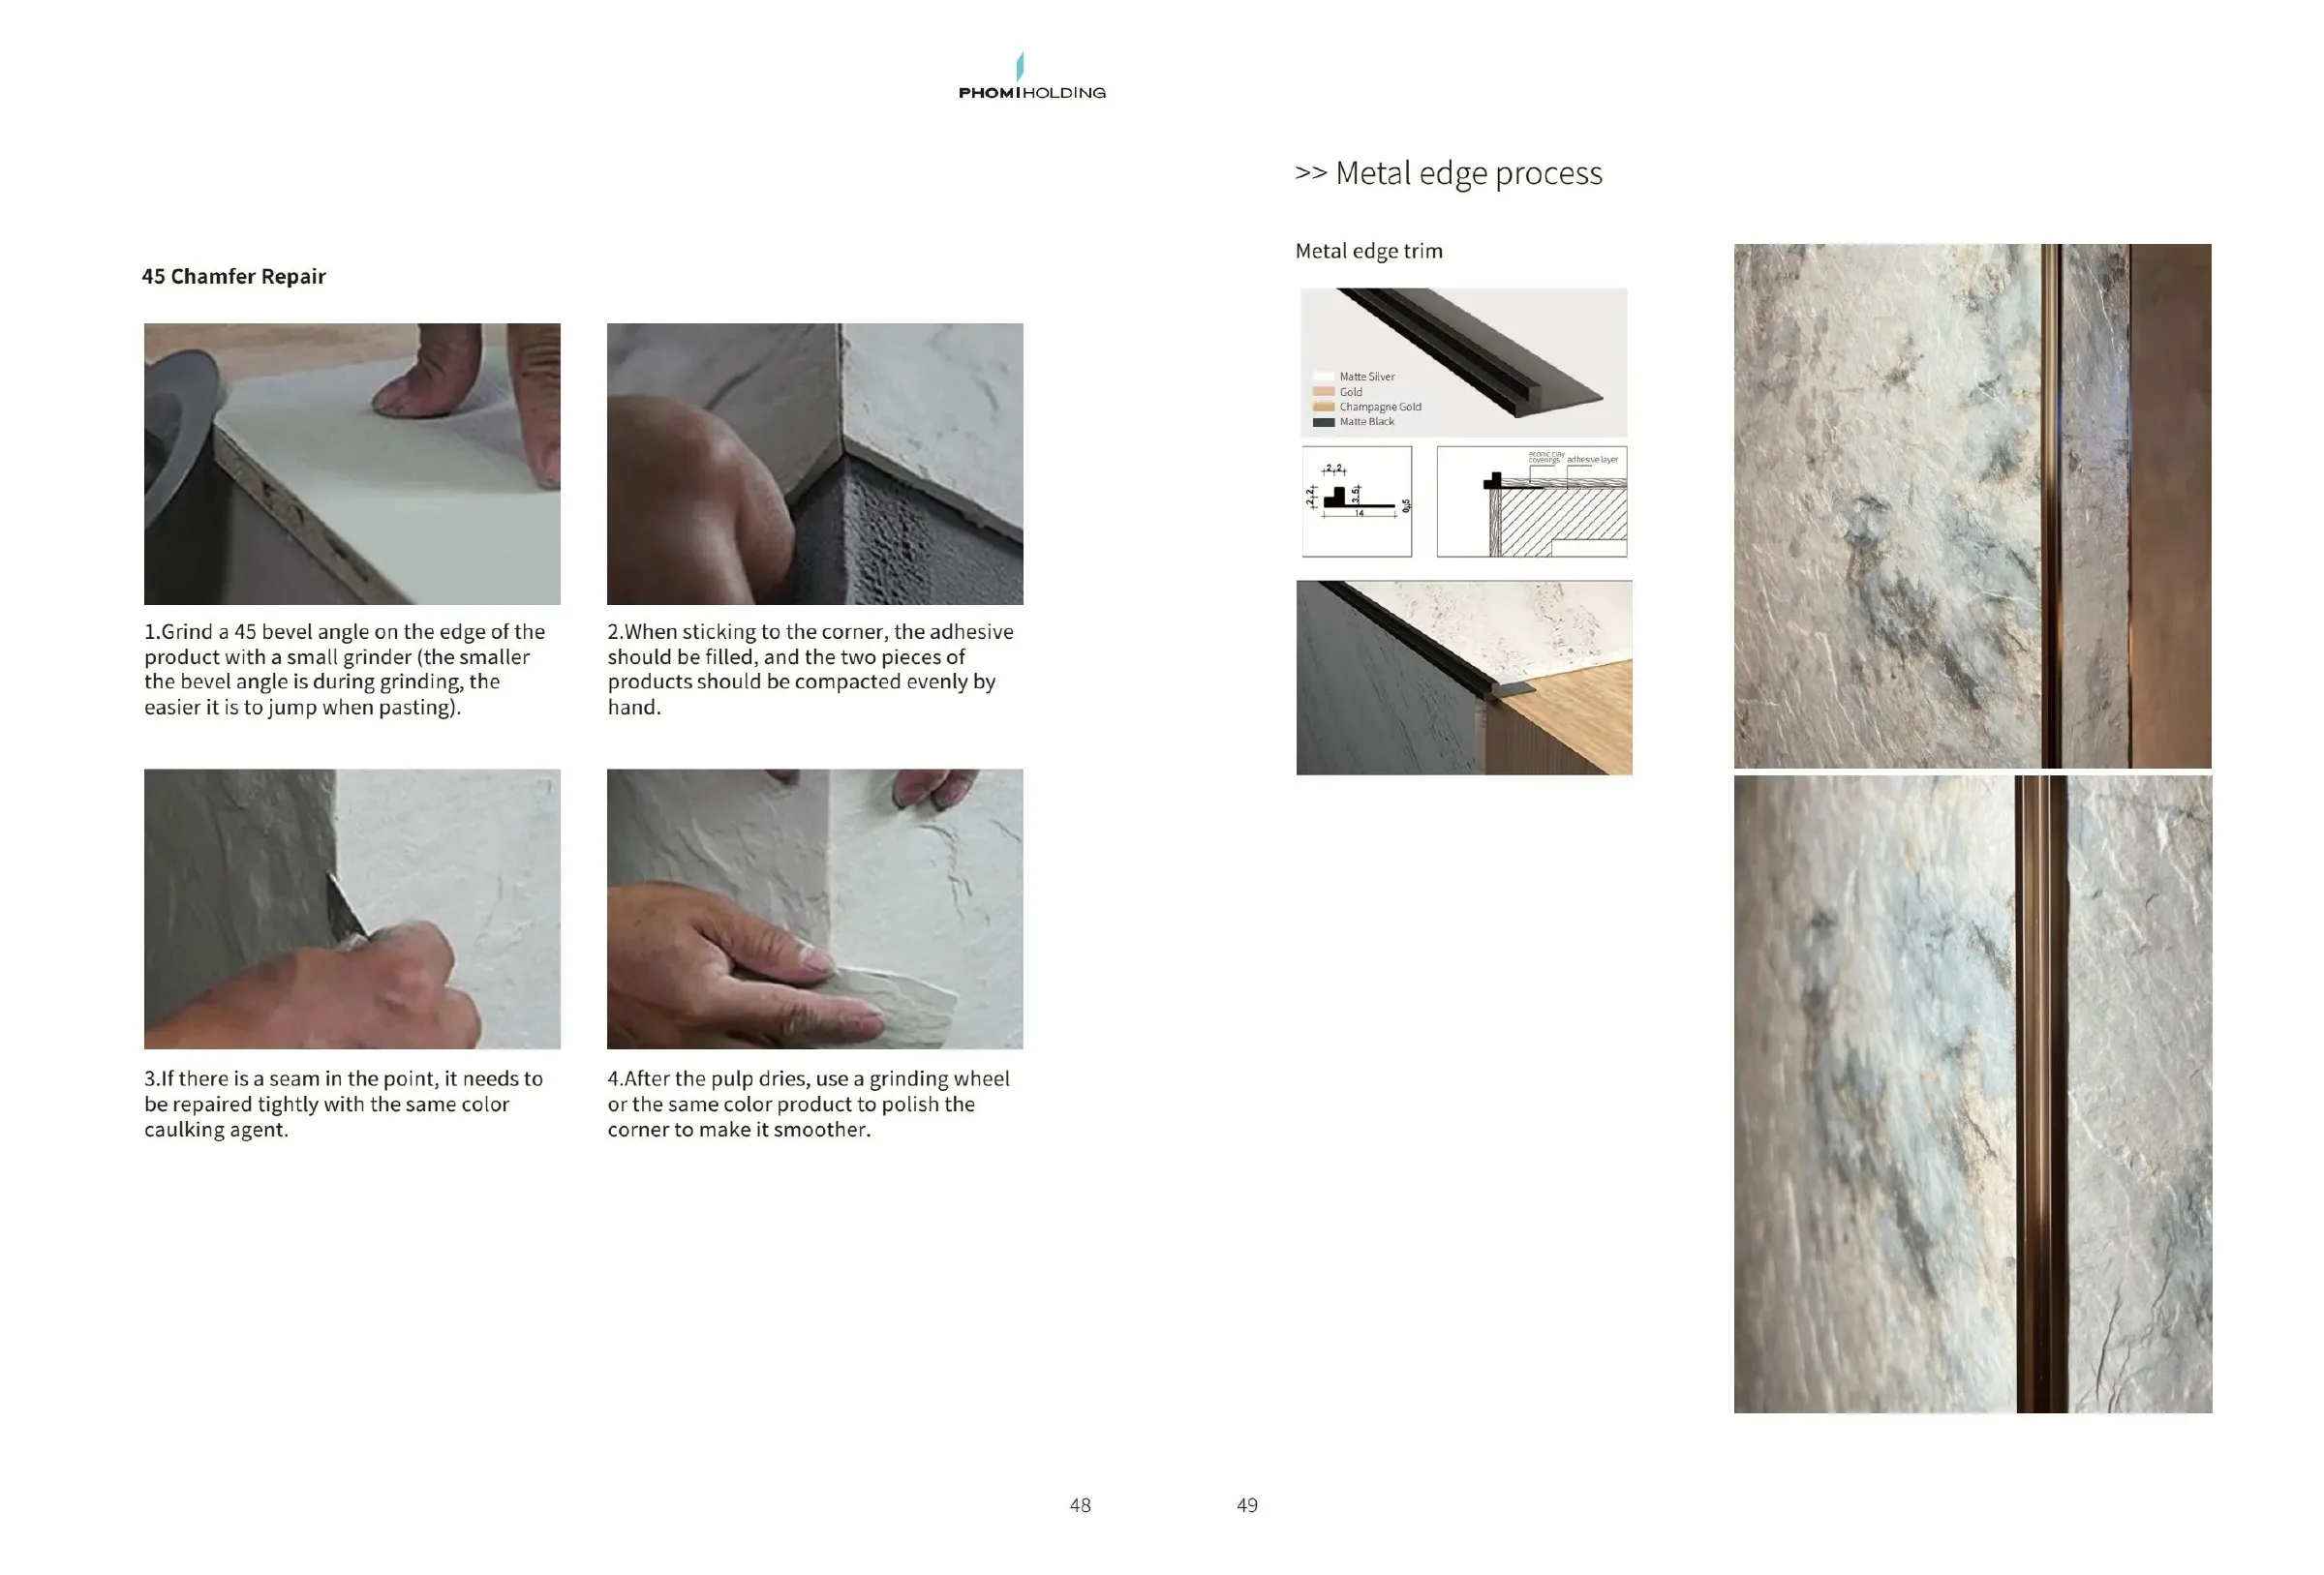
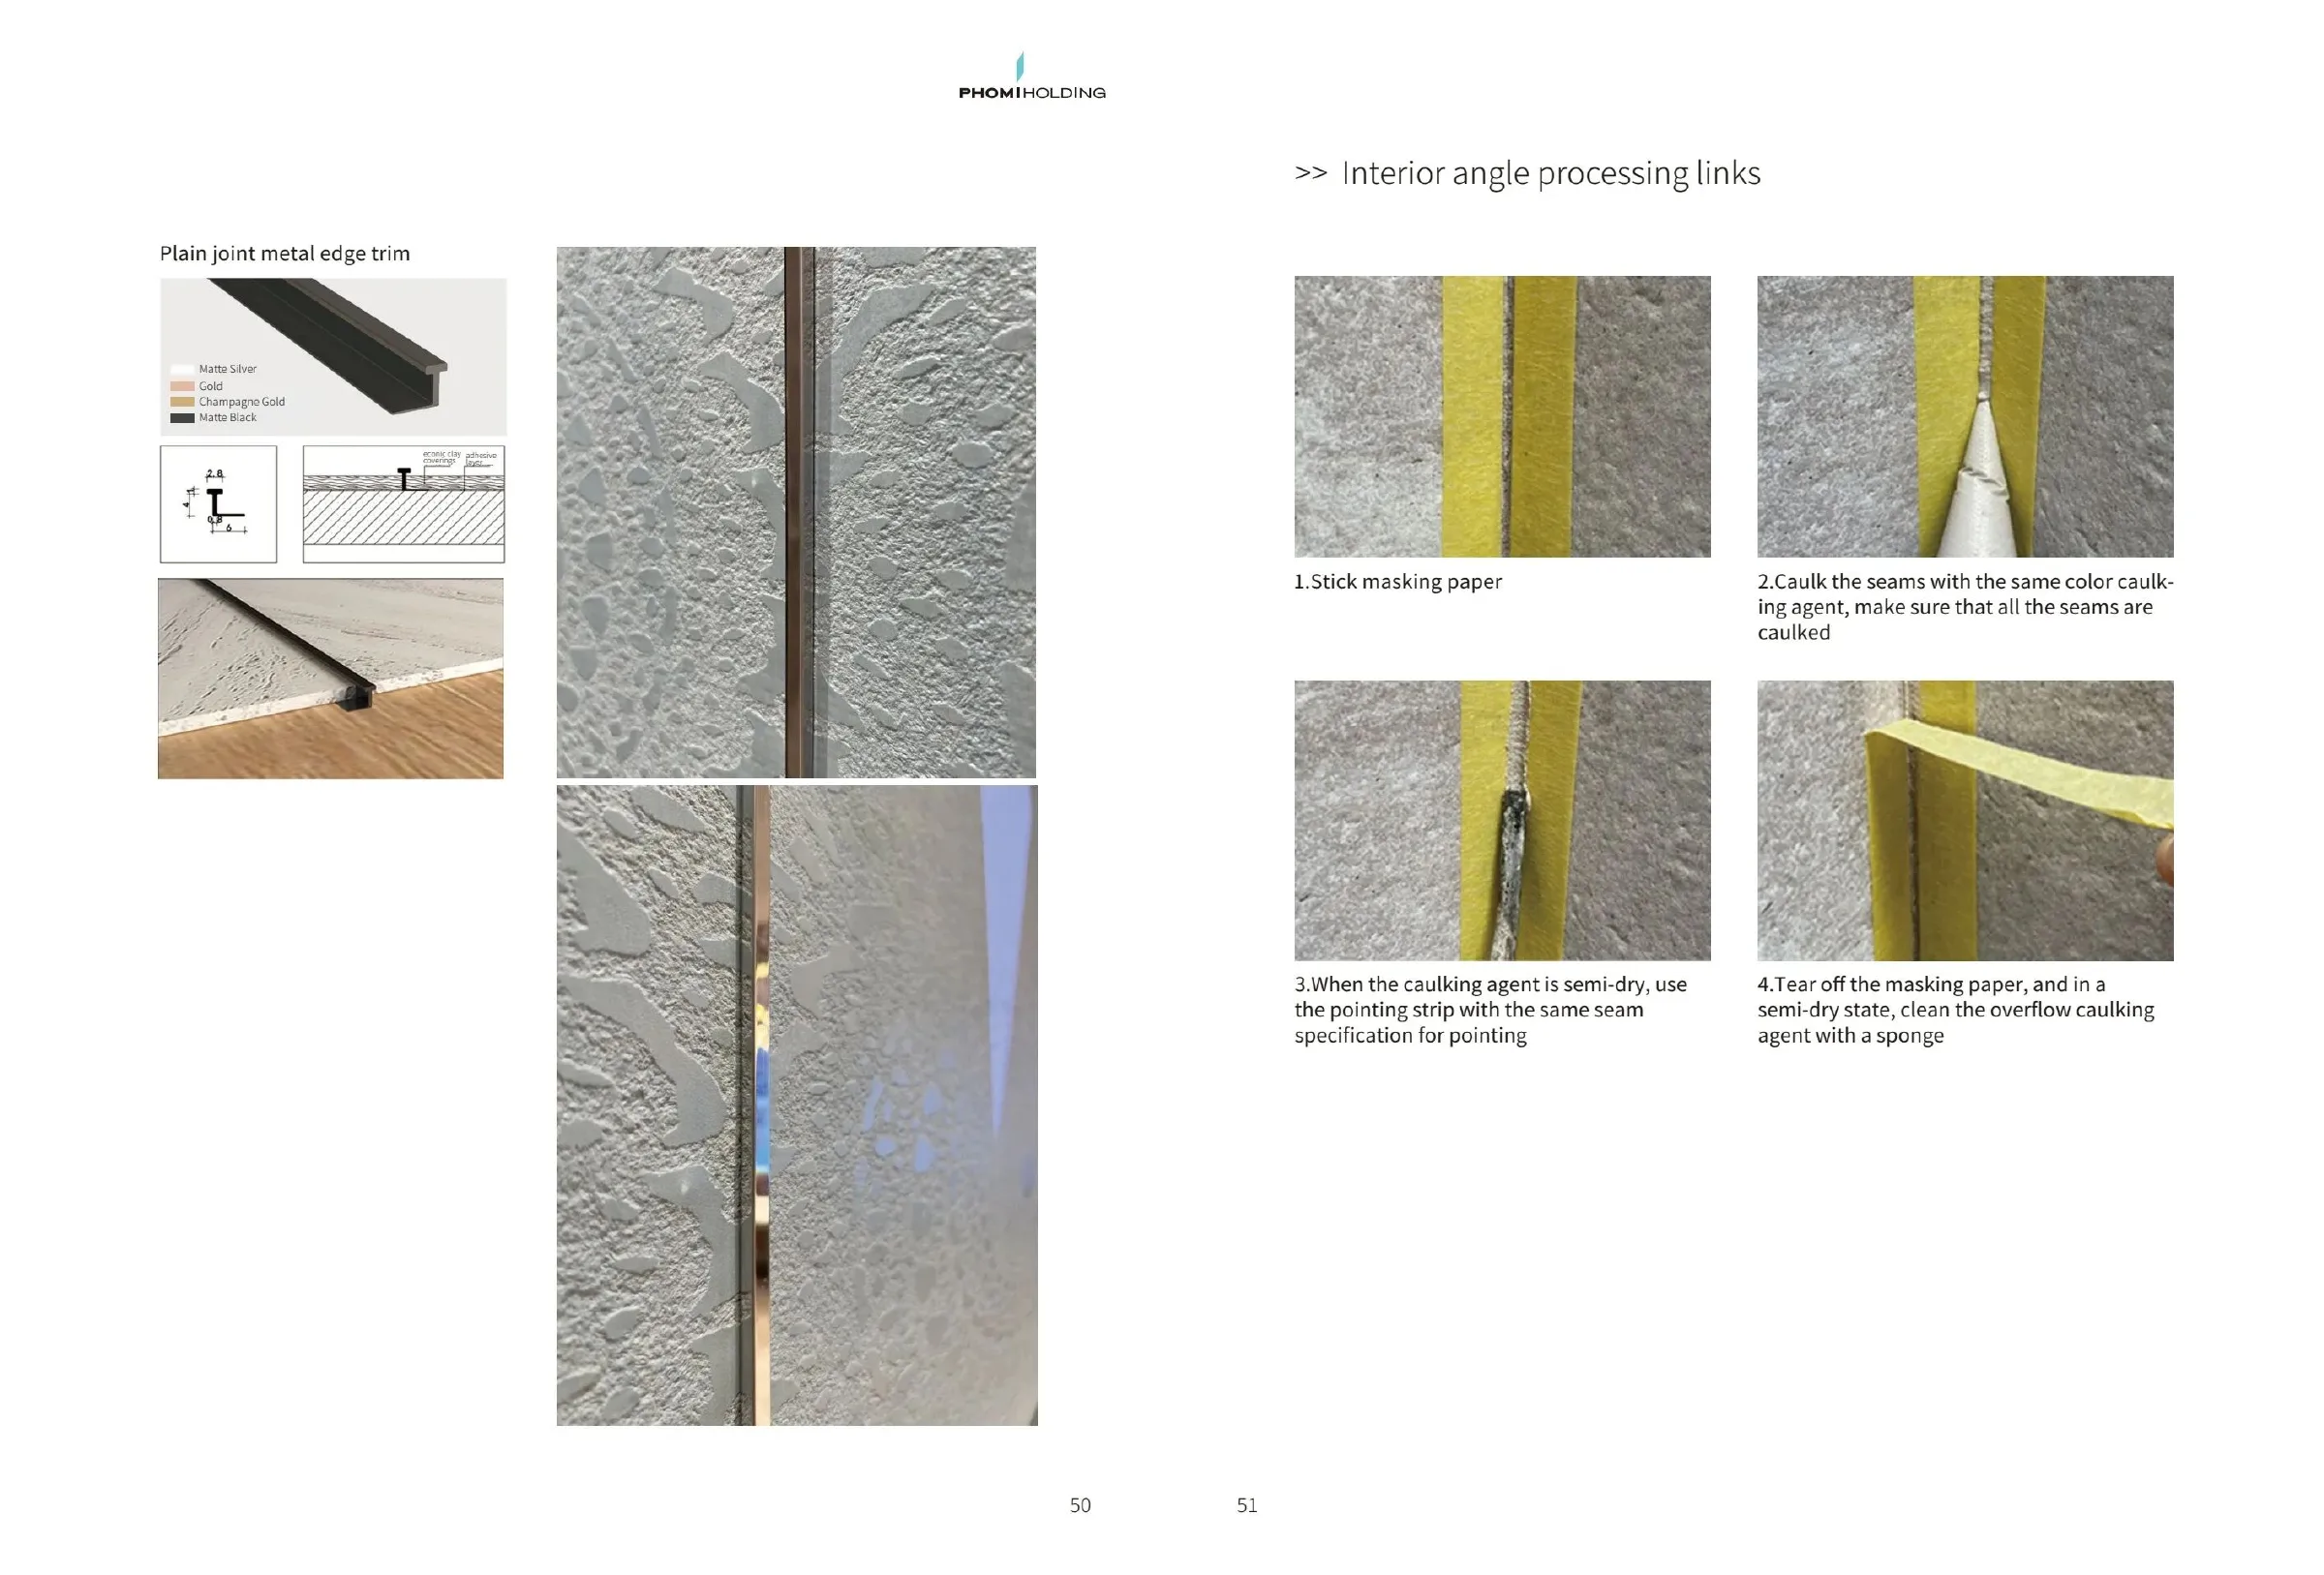
Preparation, choosing the substrate and adhesive, step-by-step installation, corner and opening details, and the eight most common mistakes that cost the most. At the end of the page is PHOMI’s original manual in English, with photos of every step.
01 / 08
How installation works
First, the big picture. The principle is the same as tiling: clean the wall, apply adhesive, set the panel.
1
Measure
the surface
2
Cut
the panel to size
3
Comb
adhesive onto the wall
4
Press
the panel into place
Figure 1. Four steps repeated for every panel.
It differs from ordinary tiling in three ways. A panel can be up to three metres long, so there are few joints. A thin panel follows the shape of the wall exactly and does not hide unevenness. A flexible panel does not need to be cut or covered with a trim at a corner.
The whole job in order
01
Substrate
The substrate must be load-bearing, dry, clean and flat. On a new insulated façade, this means a mesh-reinforced base coat and primer. An old wall is assessed separately.
02
Layout
Decide where the panel joints will go. The final result depends on this, especially around windows and doors.
03
Starting line and support batten
The bottom row determines the position of the next ones. Mark the starting line across the whole wall with a level, laser or string line. Fix a batten below the line to support the first row.
04
Adhesive on the wall
Comb an even layer of adhesive onto the wall with a notched trowel. Do enough for one panel at a time.
05
Panels from the bottom up
Press each panel against the wall across its whole surface and check with a level. Temporary pins, wedges or masking tape hold the panel until the adhesive sets. Do corners, window reveals and flashing junctions as you go, not at the end.
06
Cleaning and handover
Remove adhesive residue before it hardens. Then inspect the surface and hand over the project.
02 / 08
The wall to be finished
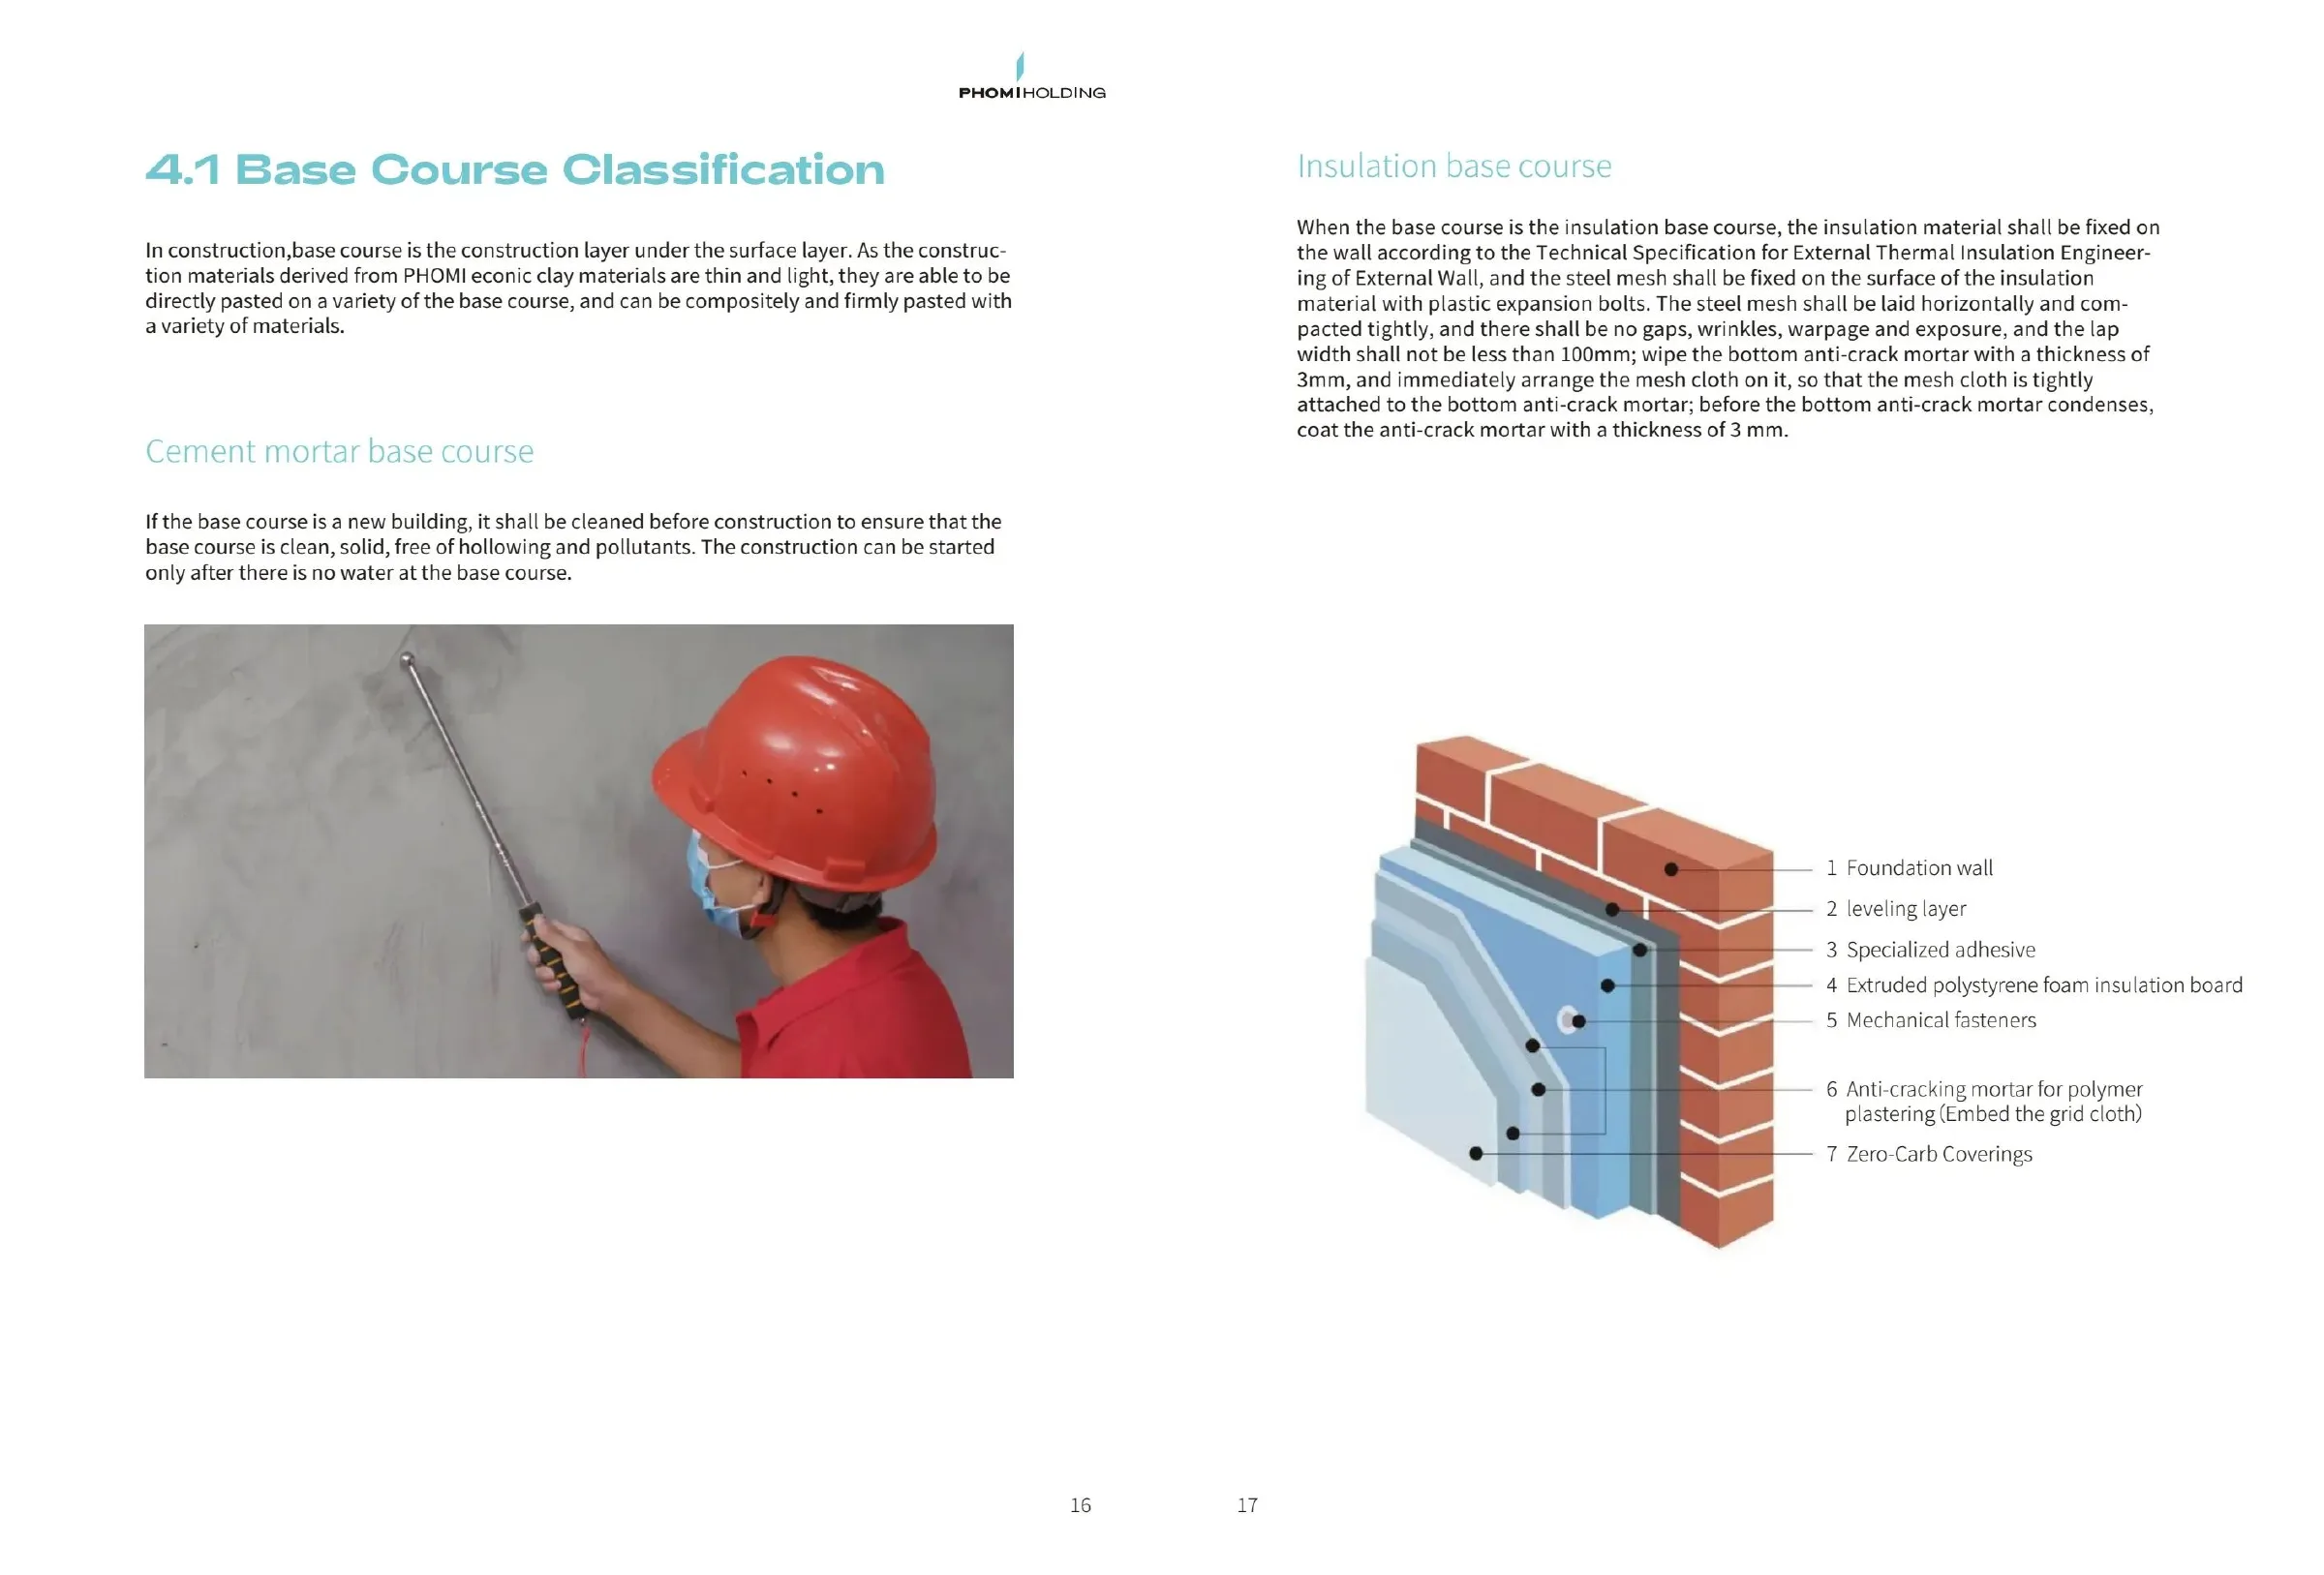
PHOMI is a finish layer. It does not replace insulation or the load-bearing structure, but is installed on top of them.
Façade layers
6
PHOMI panel3.2 mm, 3–6 kg/m²
5
Adhesive mortarcombed with a 4–6 mm notched trowel
4
Reinforcing mortar and meshglass-fibre mesh in the mortar, primer on top
3
Insulationmineral wool or EPS
2
Insulation adhesiveplus anchors according to the system guide
1
Load-bearing wallaerated concrete, masonry or concrete
Figure 2. Layers of an insulated façade from the bottom up. The figure is not to scale.
Layers 1–4 form a conventional insulated façade. PHOMI is bonded to the fourth layer. If the building already has sound rendered insulation, most of the work is done.
Interior wall layers
3
PHOMI panel3.2 mm
2
Ceresit CM 17C2 TE S1, 4–6 mm notched trowel for the PHOMI panel
1
Substrateplaster, concrete or plasterboard — load-bearing, dry, flat and suitably primed
Figure 3. Interior wall construction — three layers, not six.
Why flatness is decisive
A 3.2 mm panel follows the shape of the wall exactly. It levels nothing and brings out every unevenness. If the wall undulates, so will the finished surface. If adjacent panels are on different planes, the transition stays visible and can be felt by hand.
03 / 08
Adhesive
The adhesive is what holds the panel on the wall. The wrong adhesive is one of the most expensive mistakes on this job.
A wall moves: it warms in summer, cools in winter, and the building settles. A rigid adhesive cannot tolerate movement and may crack. A flexible adhesive moves with the substrate. That is why the highly flexible tile adhesive Ceresit CM 17 must be used indoors. The packaging is marked C2 TE S1: C2 = strong adhesion, T = does not slip down the wall, E = extended open time, S1 = flexible.
Ceresit CM 17 — adhesive for indoor use
Property
Value
What it means
Class
C2 TE S1
Strong bond, no slip, flexible
Operating temperature
+5…+25 °C
Air and substrate, including at night
Water per 25 kg bag
7,25–7,75 l
Water into the bucket first, then the mix.
Standing time after mixing
approx. 5 min
Mix, let stand and mix again. The mix is then ready.
Pot life
up to 2 h
Mixed adhesive stays usable for this long
Placement time
up to 30 min
The panel must be placed on the adhesive within this time
Grouting
12 h (on walls)
Grouting on walls can then begin
Suitable substrates
—
Concrete, plaster, aerated concrete, clinker, old ceramic and stone tiles, OSB from 22 mm
Coverage, 4 mm notched trowel
1,5 kg/m²
approx. 16 m² per 25 kg bag
Coverage, 6 mm notched trowel
2,1 kg/m²
approx. 12 m² per 25 kg bag
Coverage, 8 mm notched trowel
2,7 kg/m²
approx. 9 m² per 25 kg bag
Level first, not with the adhesive layer
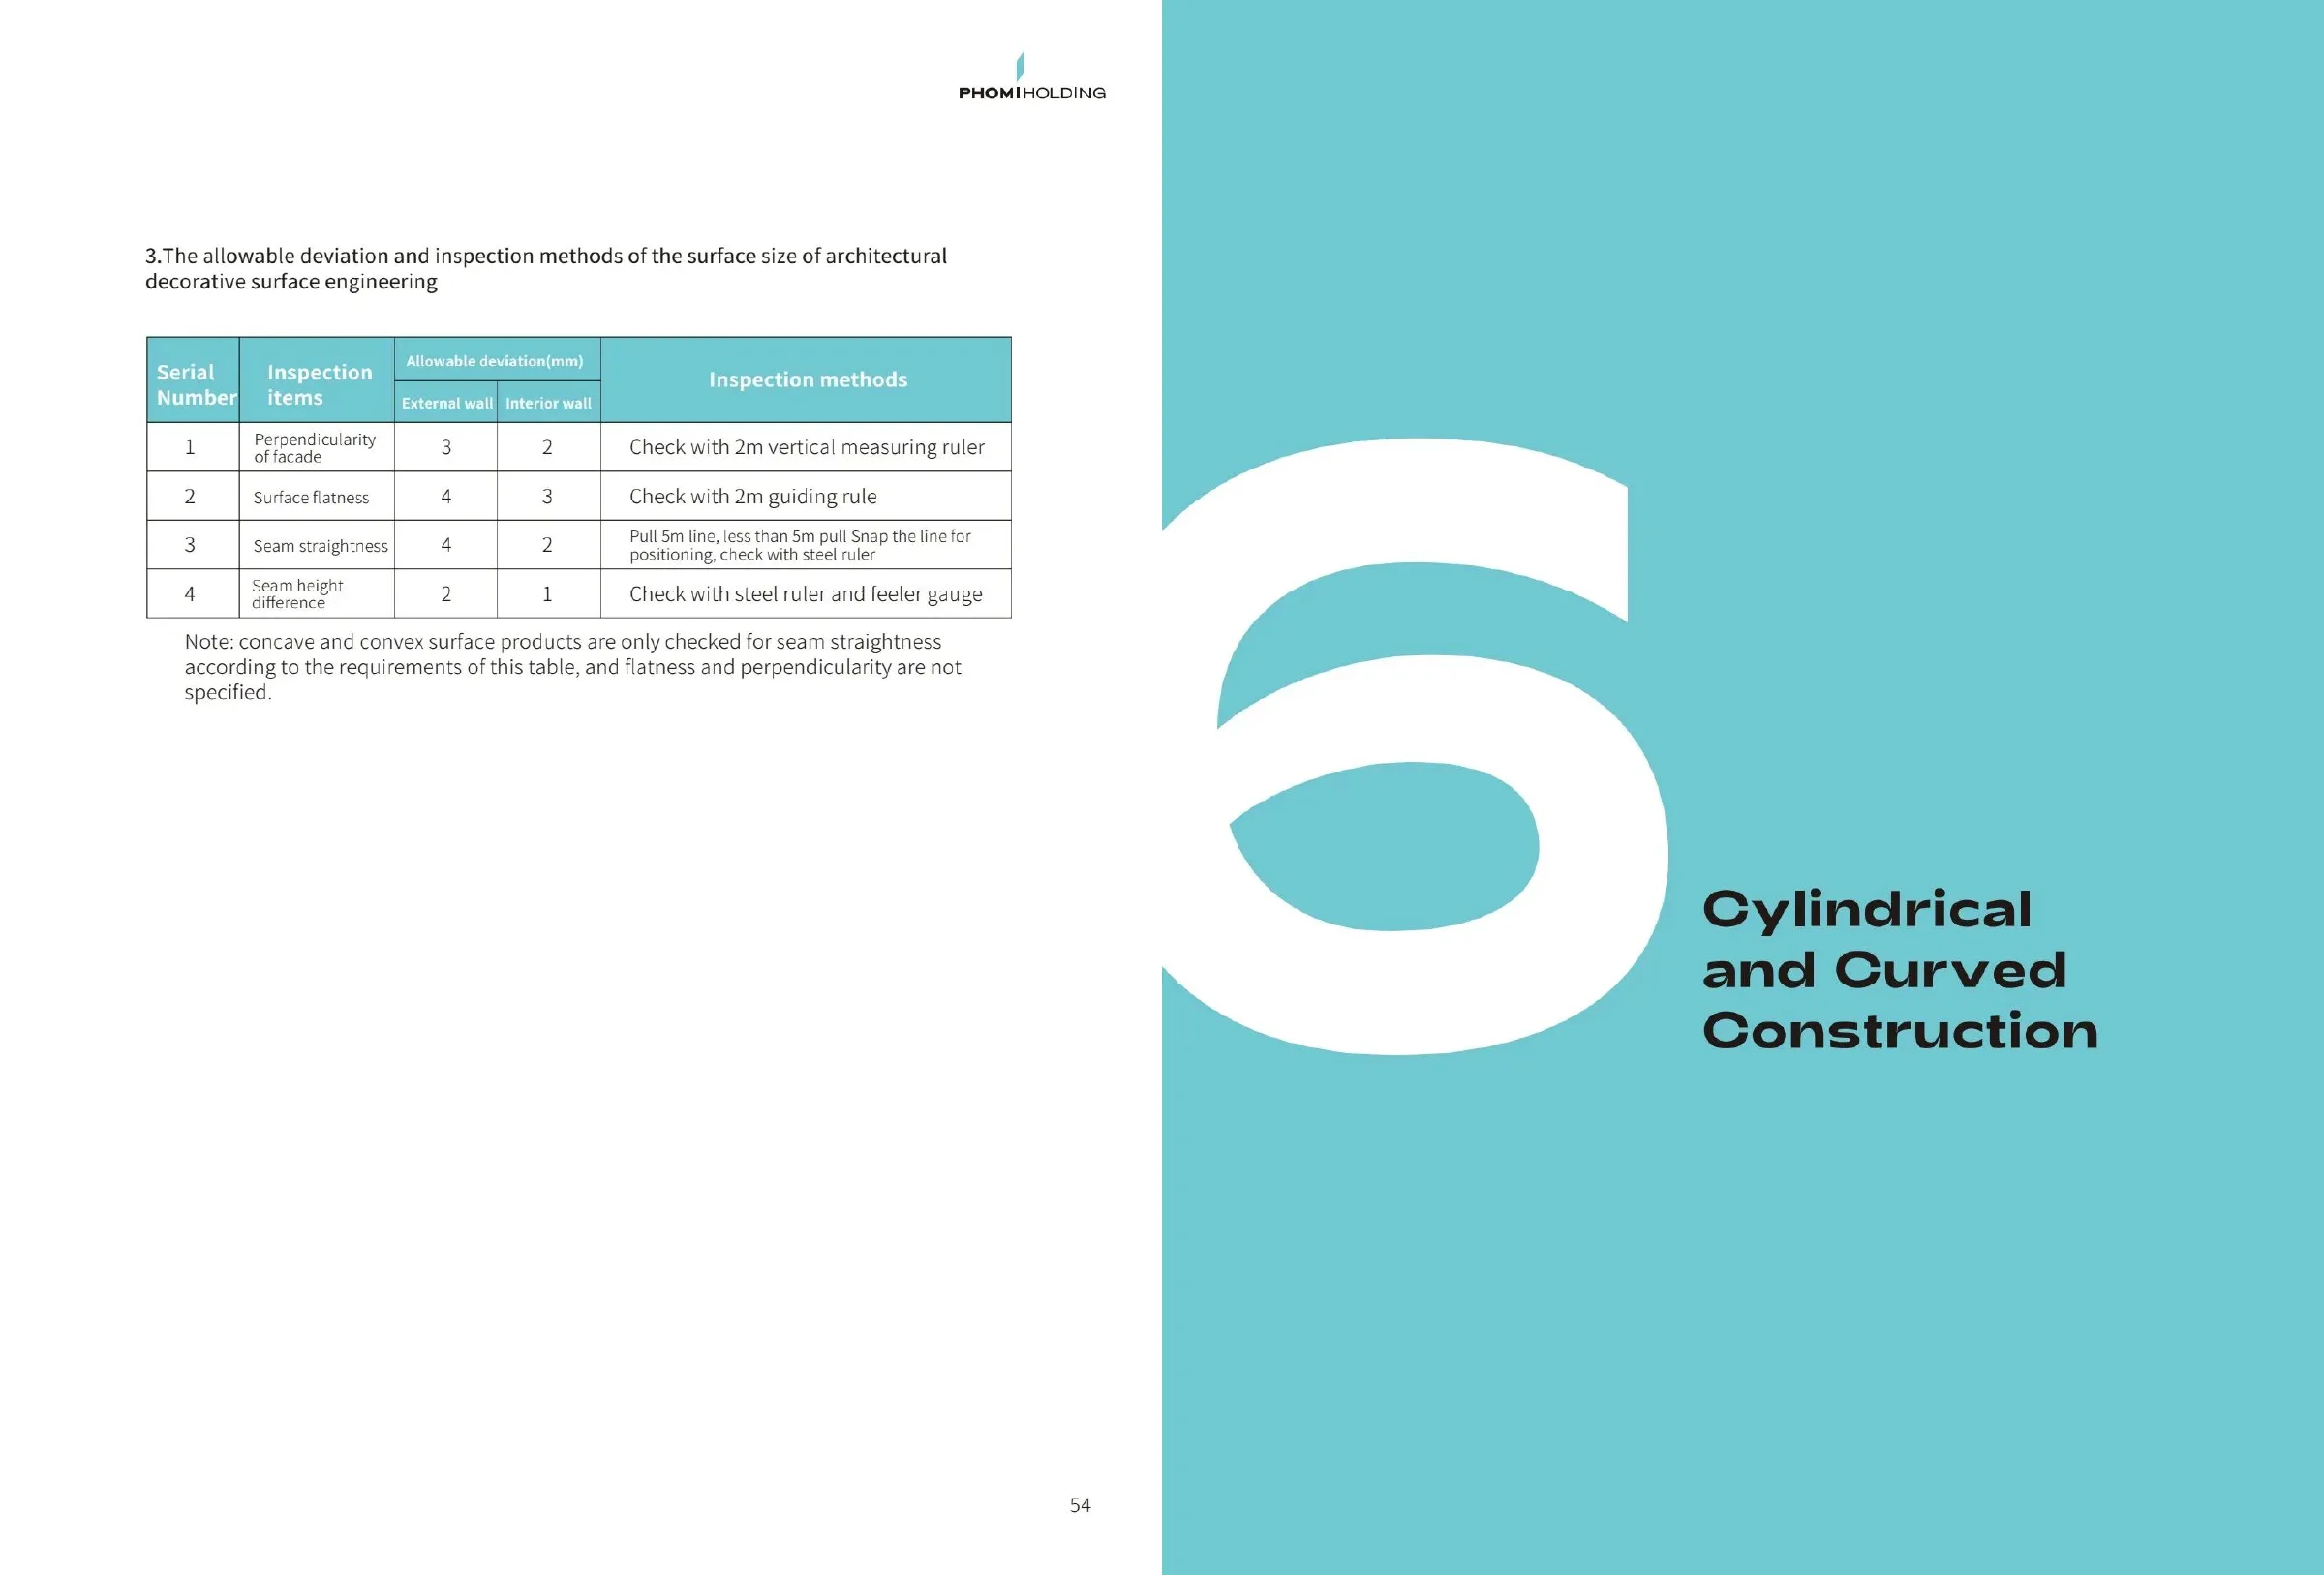
You may be tempted to fill a hollow with a thicker layer of adhesive. This does not work: the adhesive shrinks as it dries, the unevenness stays visible and adhesion suffers. Check the wall with a 2-metre straightedge and level it before installing the first panel.
Use adhesive mortar on façades
Outdoors, use adhesive mortar instead of ordinary tile adhesive. The right mortar depends on the project. Check with us before ordering materials. On a façade, the wrong adhesive can only be corrected by removing the entire surface. Do not substitute tile adhesive for the adhesive mortar on your own, even if it seems suitable.
04 / 08
Preparation
Most mistakes are made before the first panel is installed.
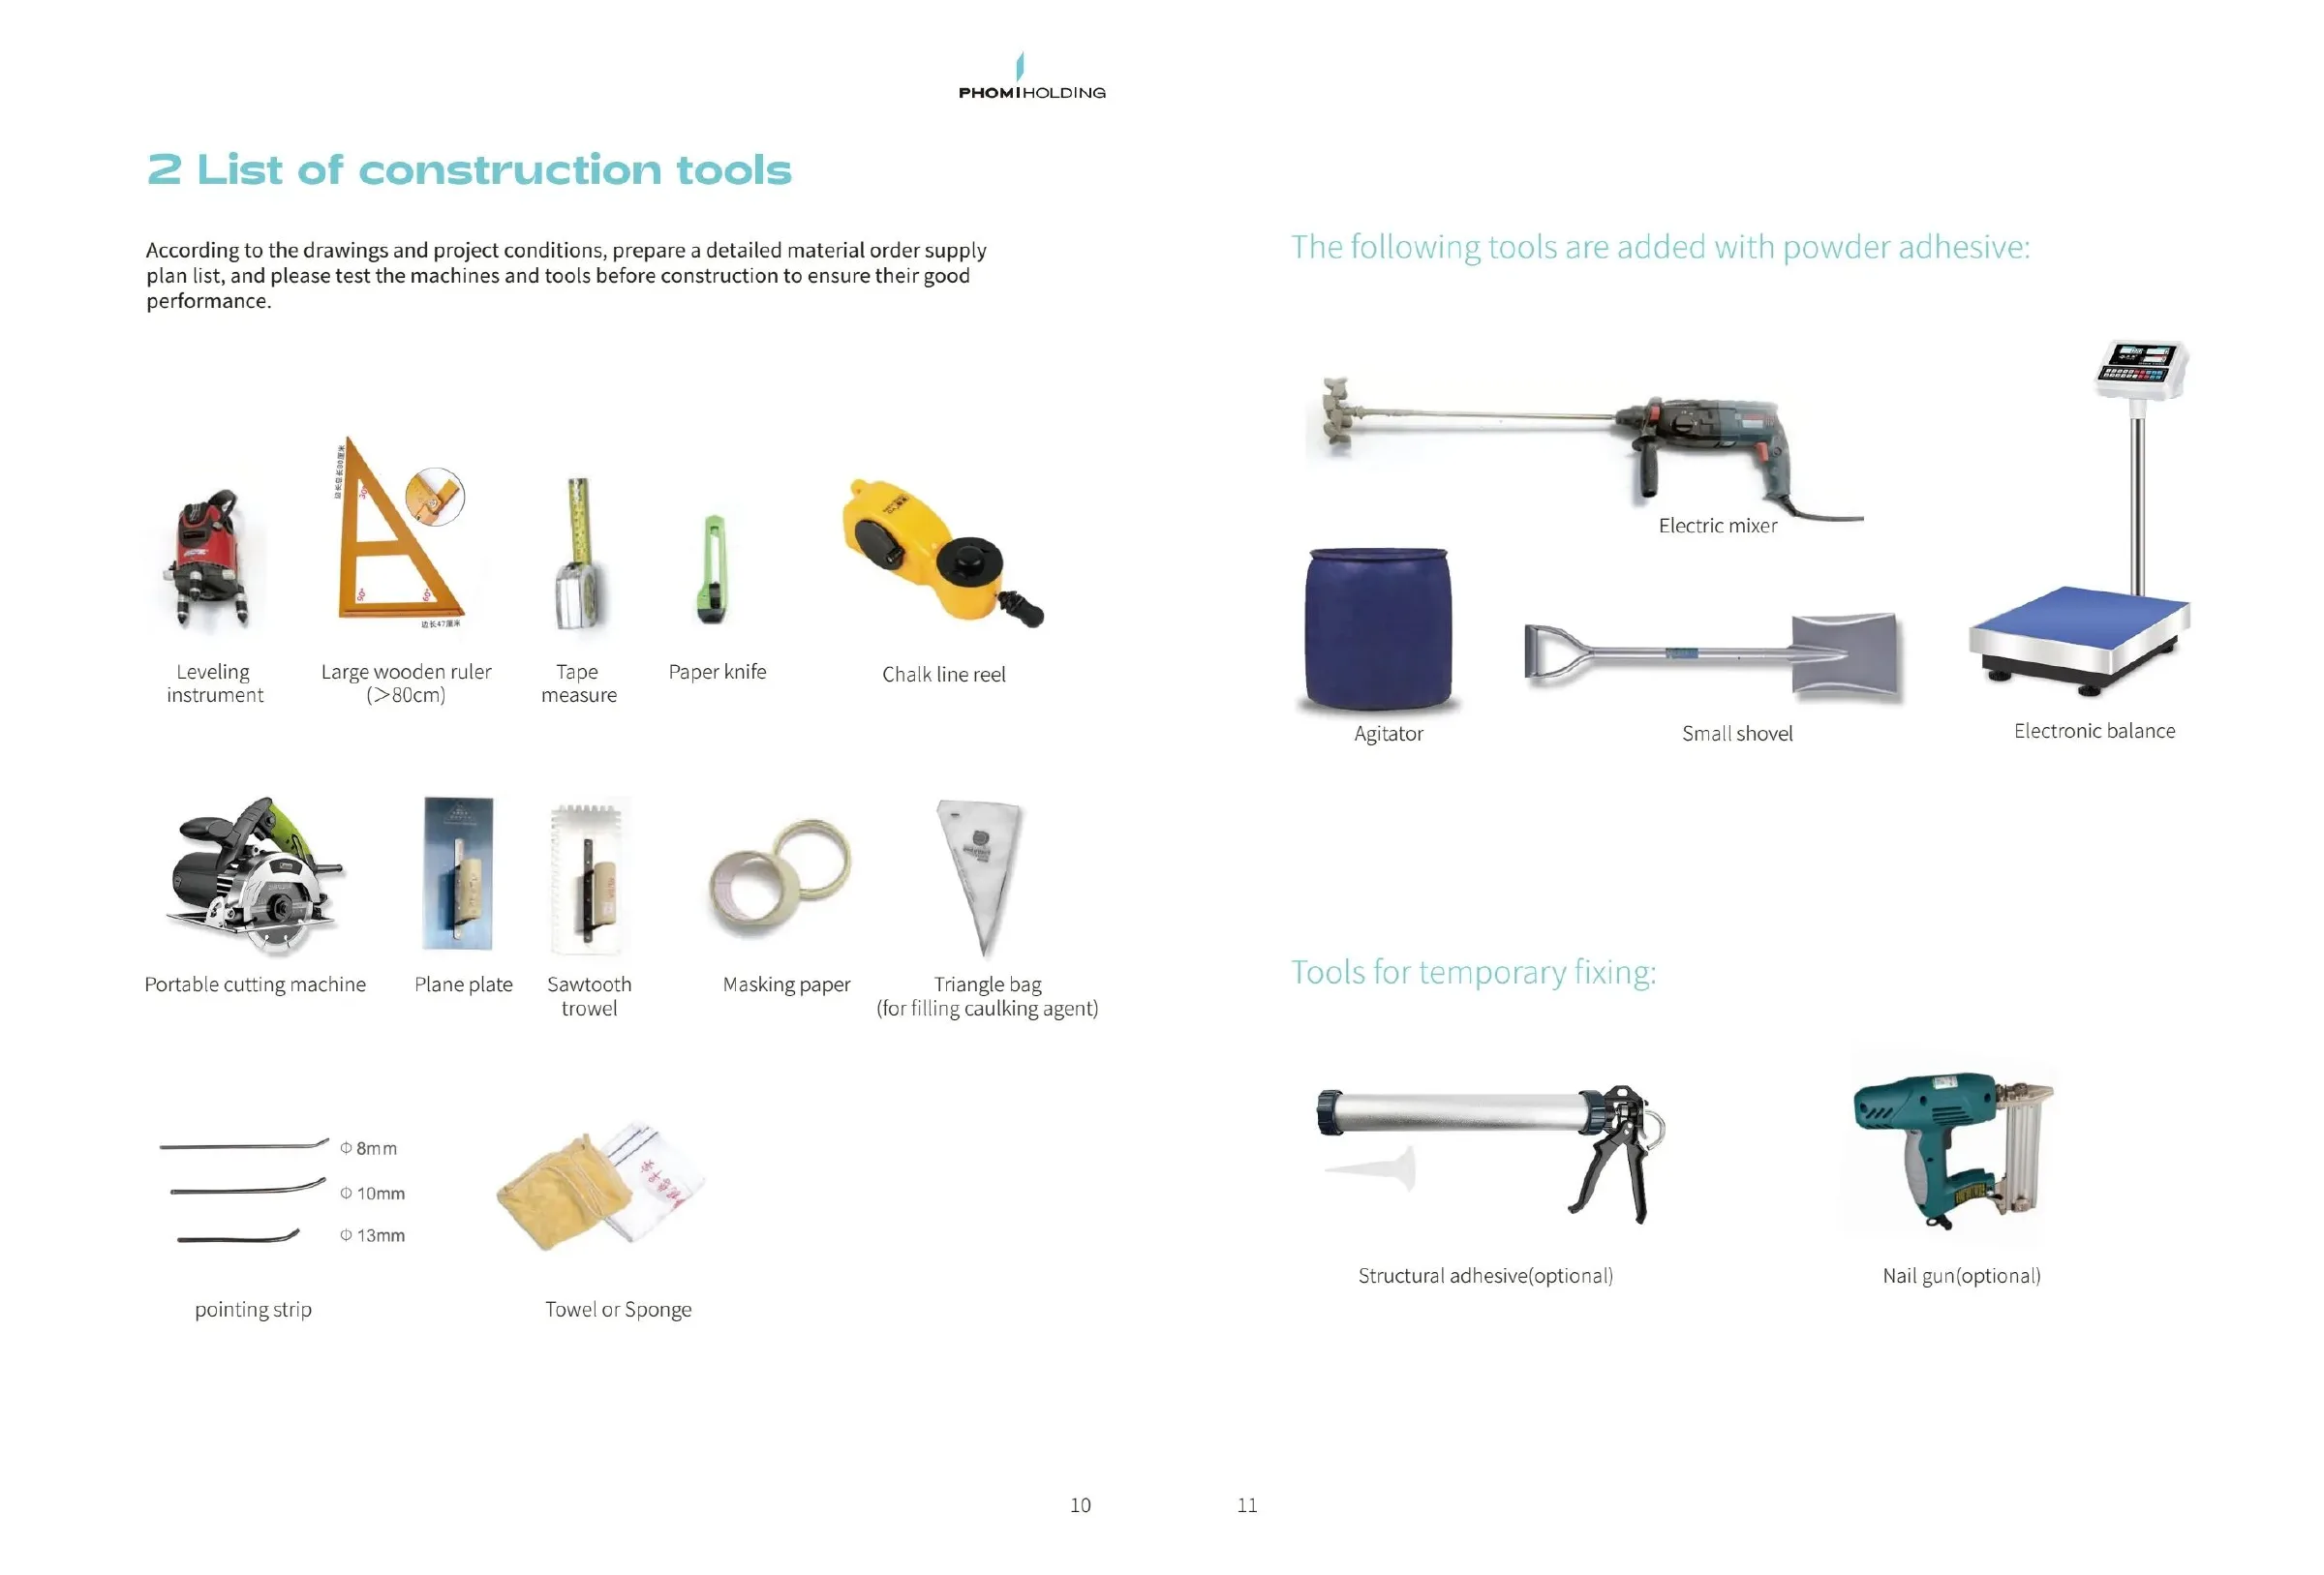
Tools required
Tool
Use
4–6 mm notched trowel
For combing PHOMI adhesive to an even layer. Check for full adhesive contact with the first panel.
Smooth trowel or plastic float
For pressing the panel against the substrate.
60 and 200 cm spirit levels
The short one for a single panel, the long one for a whole row.
Cross-line laser
A faster alternative to string on a large wall.
Tape measure, string line, pencil
For marking the layout and the starting line.
Sharp knife and metal straightedge
For straight cuts.
Tool
Use
Angle grinder and fine diamond blade
For shaped and cross cuts, for example around openings.
Mixer and bucket
For mixing the adhesive. Mixing by hand will not give an even mix.
Sponge and clean water
For removing adhesive residue as you go.
Masking tape, spacer pins or wedges
For holding the panel temporarily until the adhesive sets.
Support batten
To carry the bottom row. Without it, the first row slides down.
Gloves, safety glasses and dust mask
Cutting produces stone dust.
Checklist
The wall is load-bearing, dry, clean and free of dust and greaseOtherwise the adhesive bonds to flaking paint, dust or grease rather than the substrate.
Flatness has been checked with a 2 m straightedge and unevenness levelledCheck the wall with the straightedge in several directions. If a gap is visible under it, level that spot before installation.
Fresh plaster or concrete has fully driedA wet substrate weakens the adhesive bond.
The surface is primed with a suitable primer and the primer has driedUnder CM 17, use Ceresit CT 17 on absorbent surfaces and Ceresit CN 94 on OSB or old tiles.
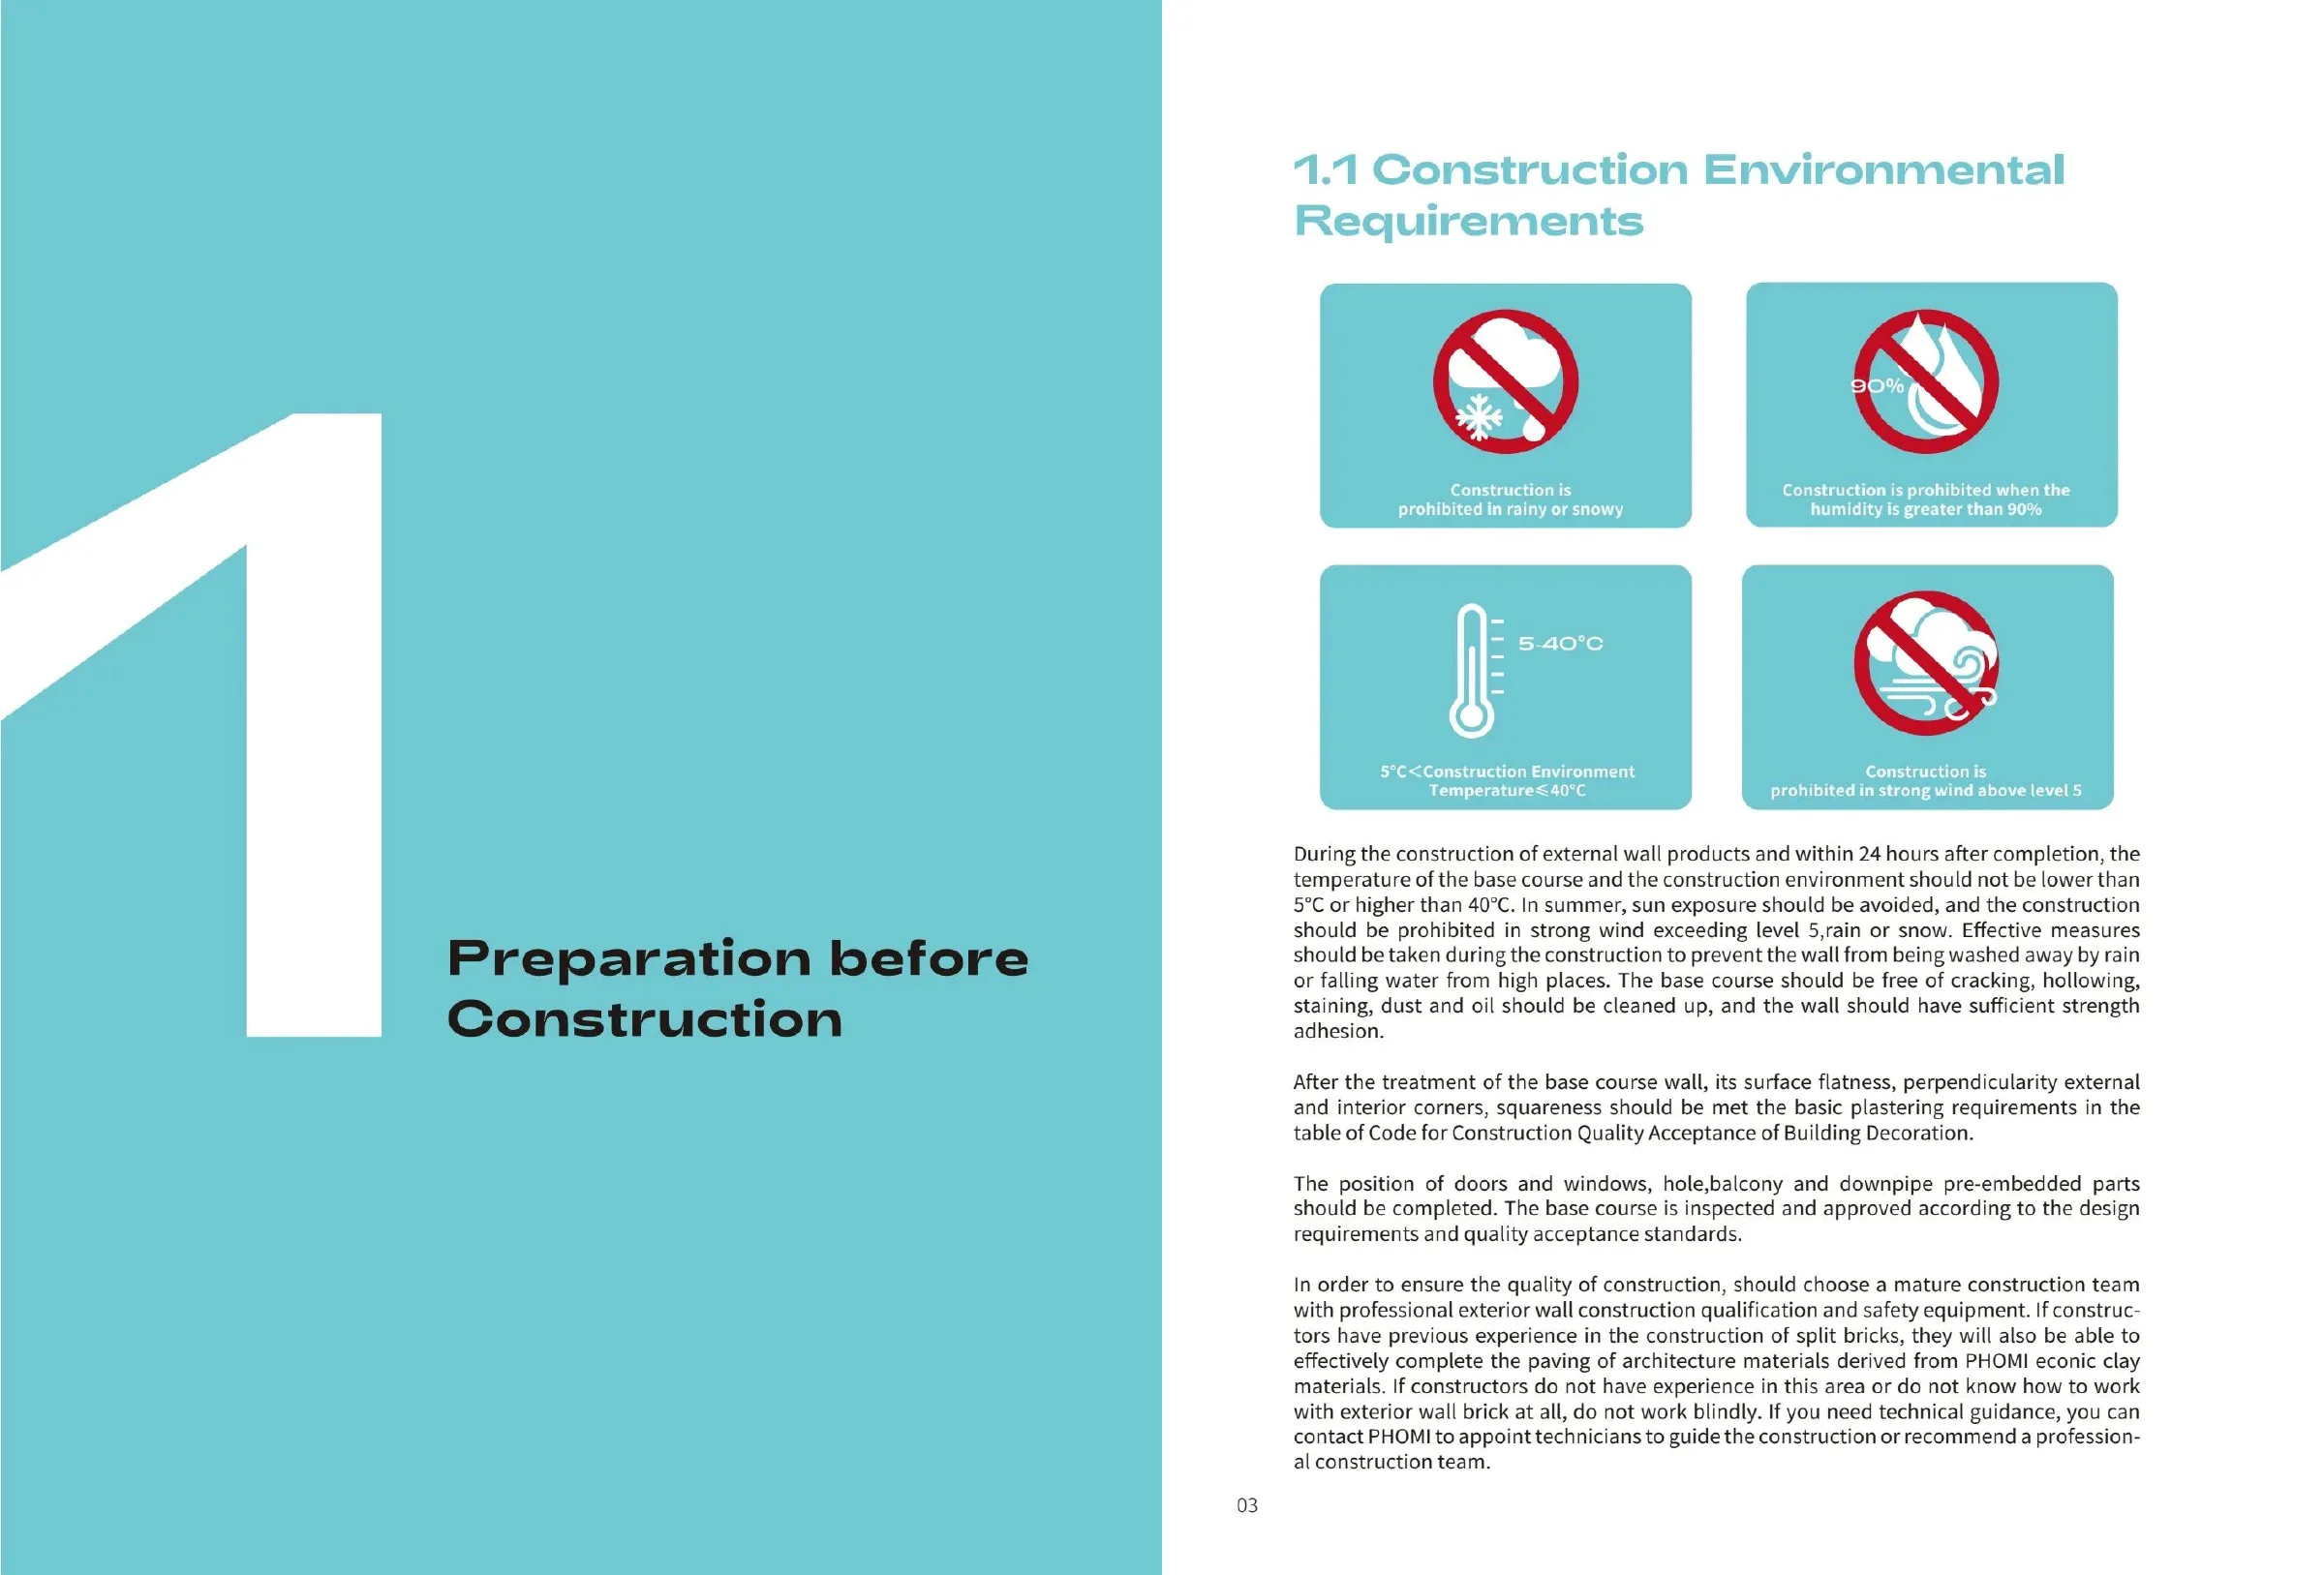
The temperature is +5…+25 °C and stays in this range at night tooFrost at night ruins a fresh adhesive layer.
The panel layout is marked on the wallA joint must not run into the corner of a window or door opening.
Flashings, drip edges and junction details are installedThese go under the panel, not on top.
Panels are from the same batch and were laid out side by side before installationA difference in tone between batches may only appear once the whole surface is bonded.
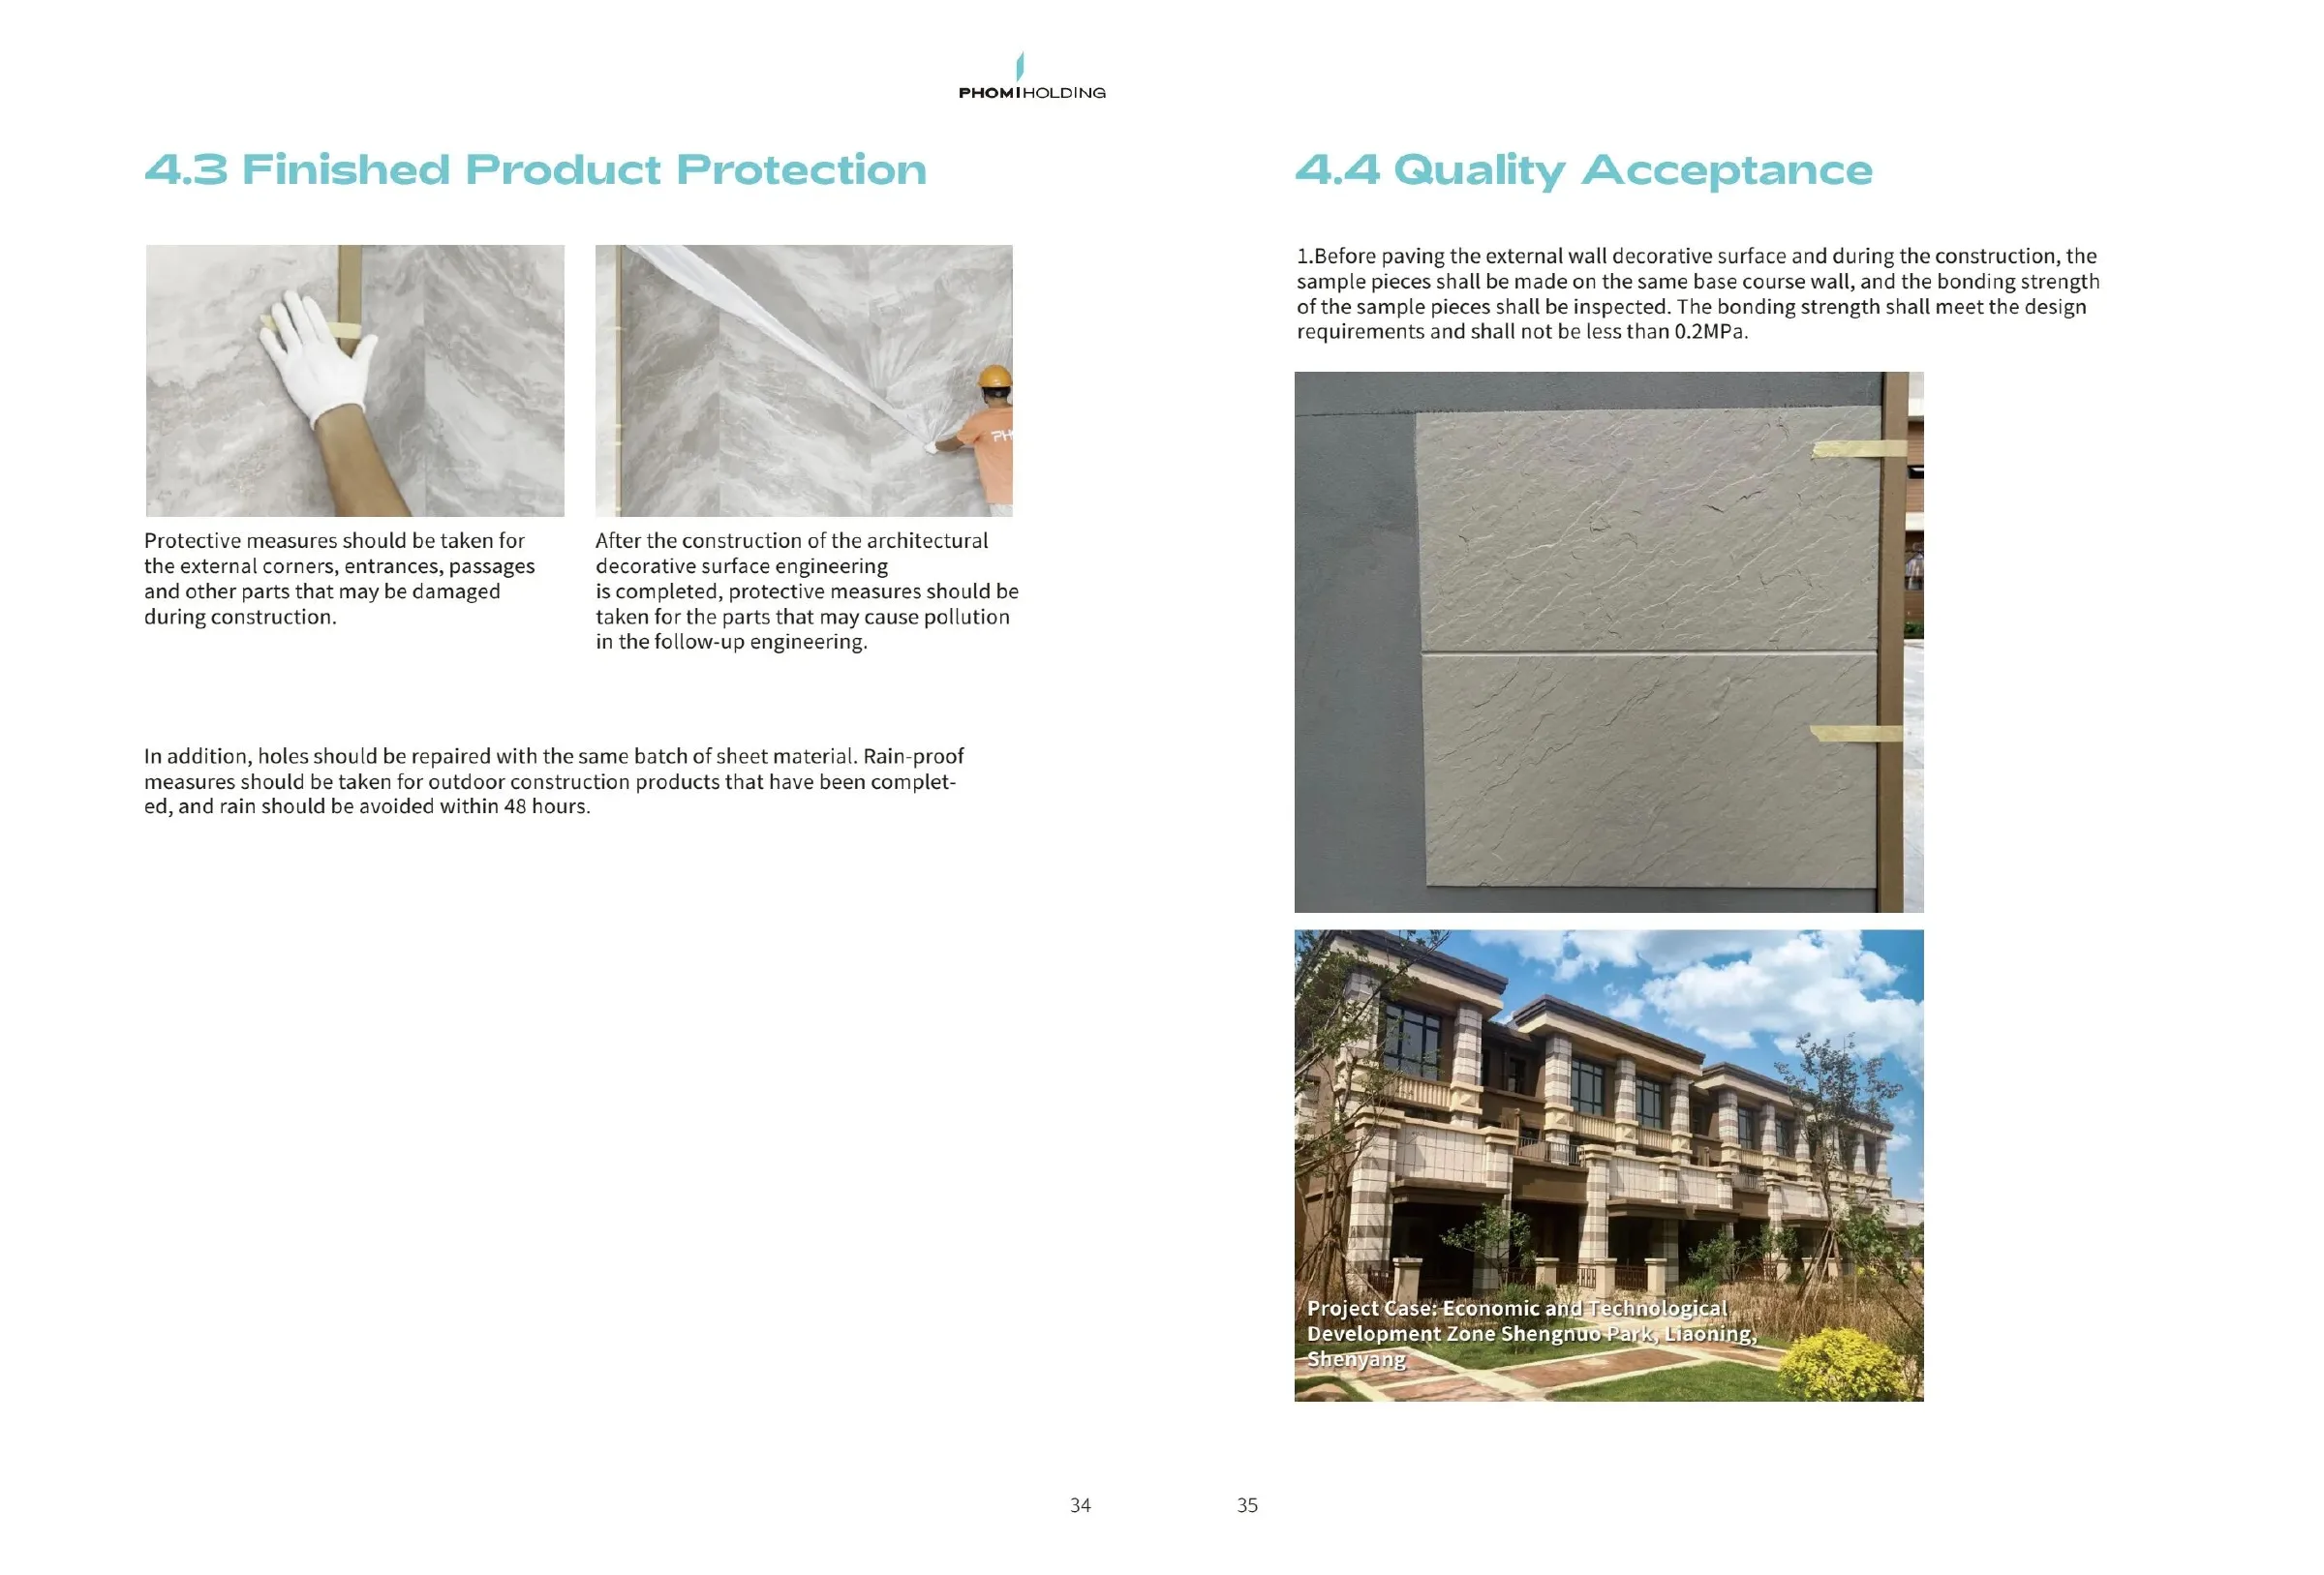
The forecast is dry for the whole adhesive setting timeFresh adhesive that gets rained on must be removed and the work redone.
Receiving and storing the material
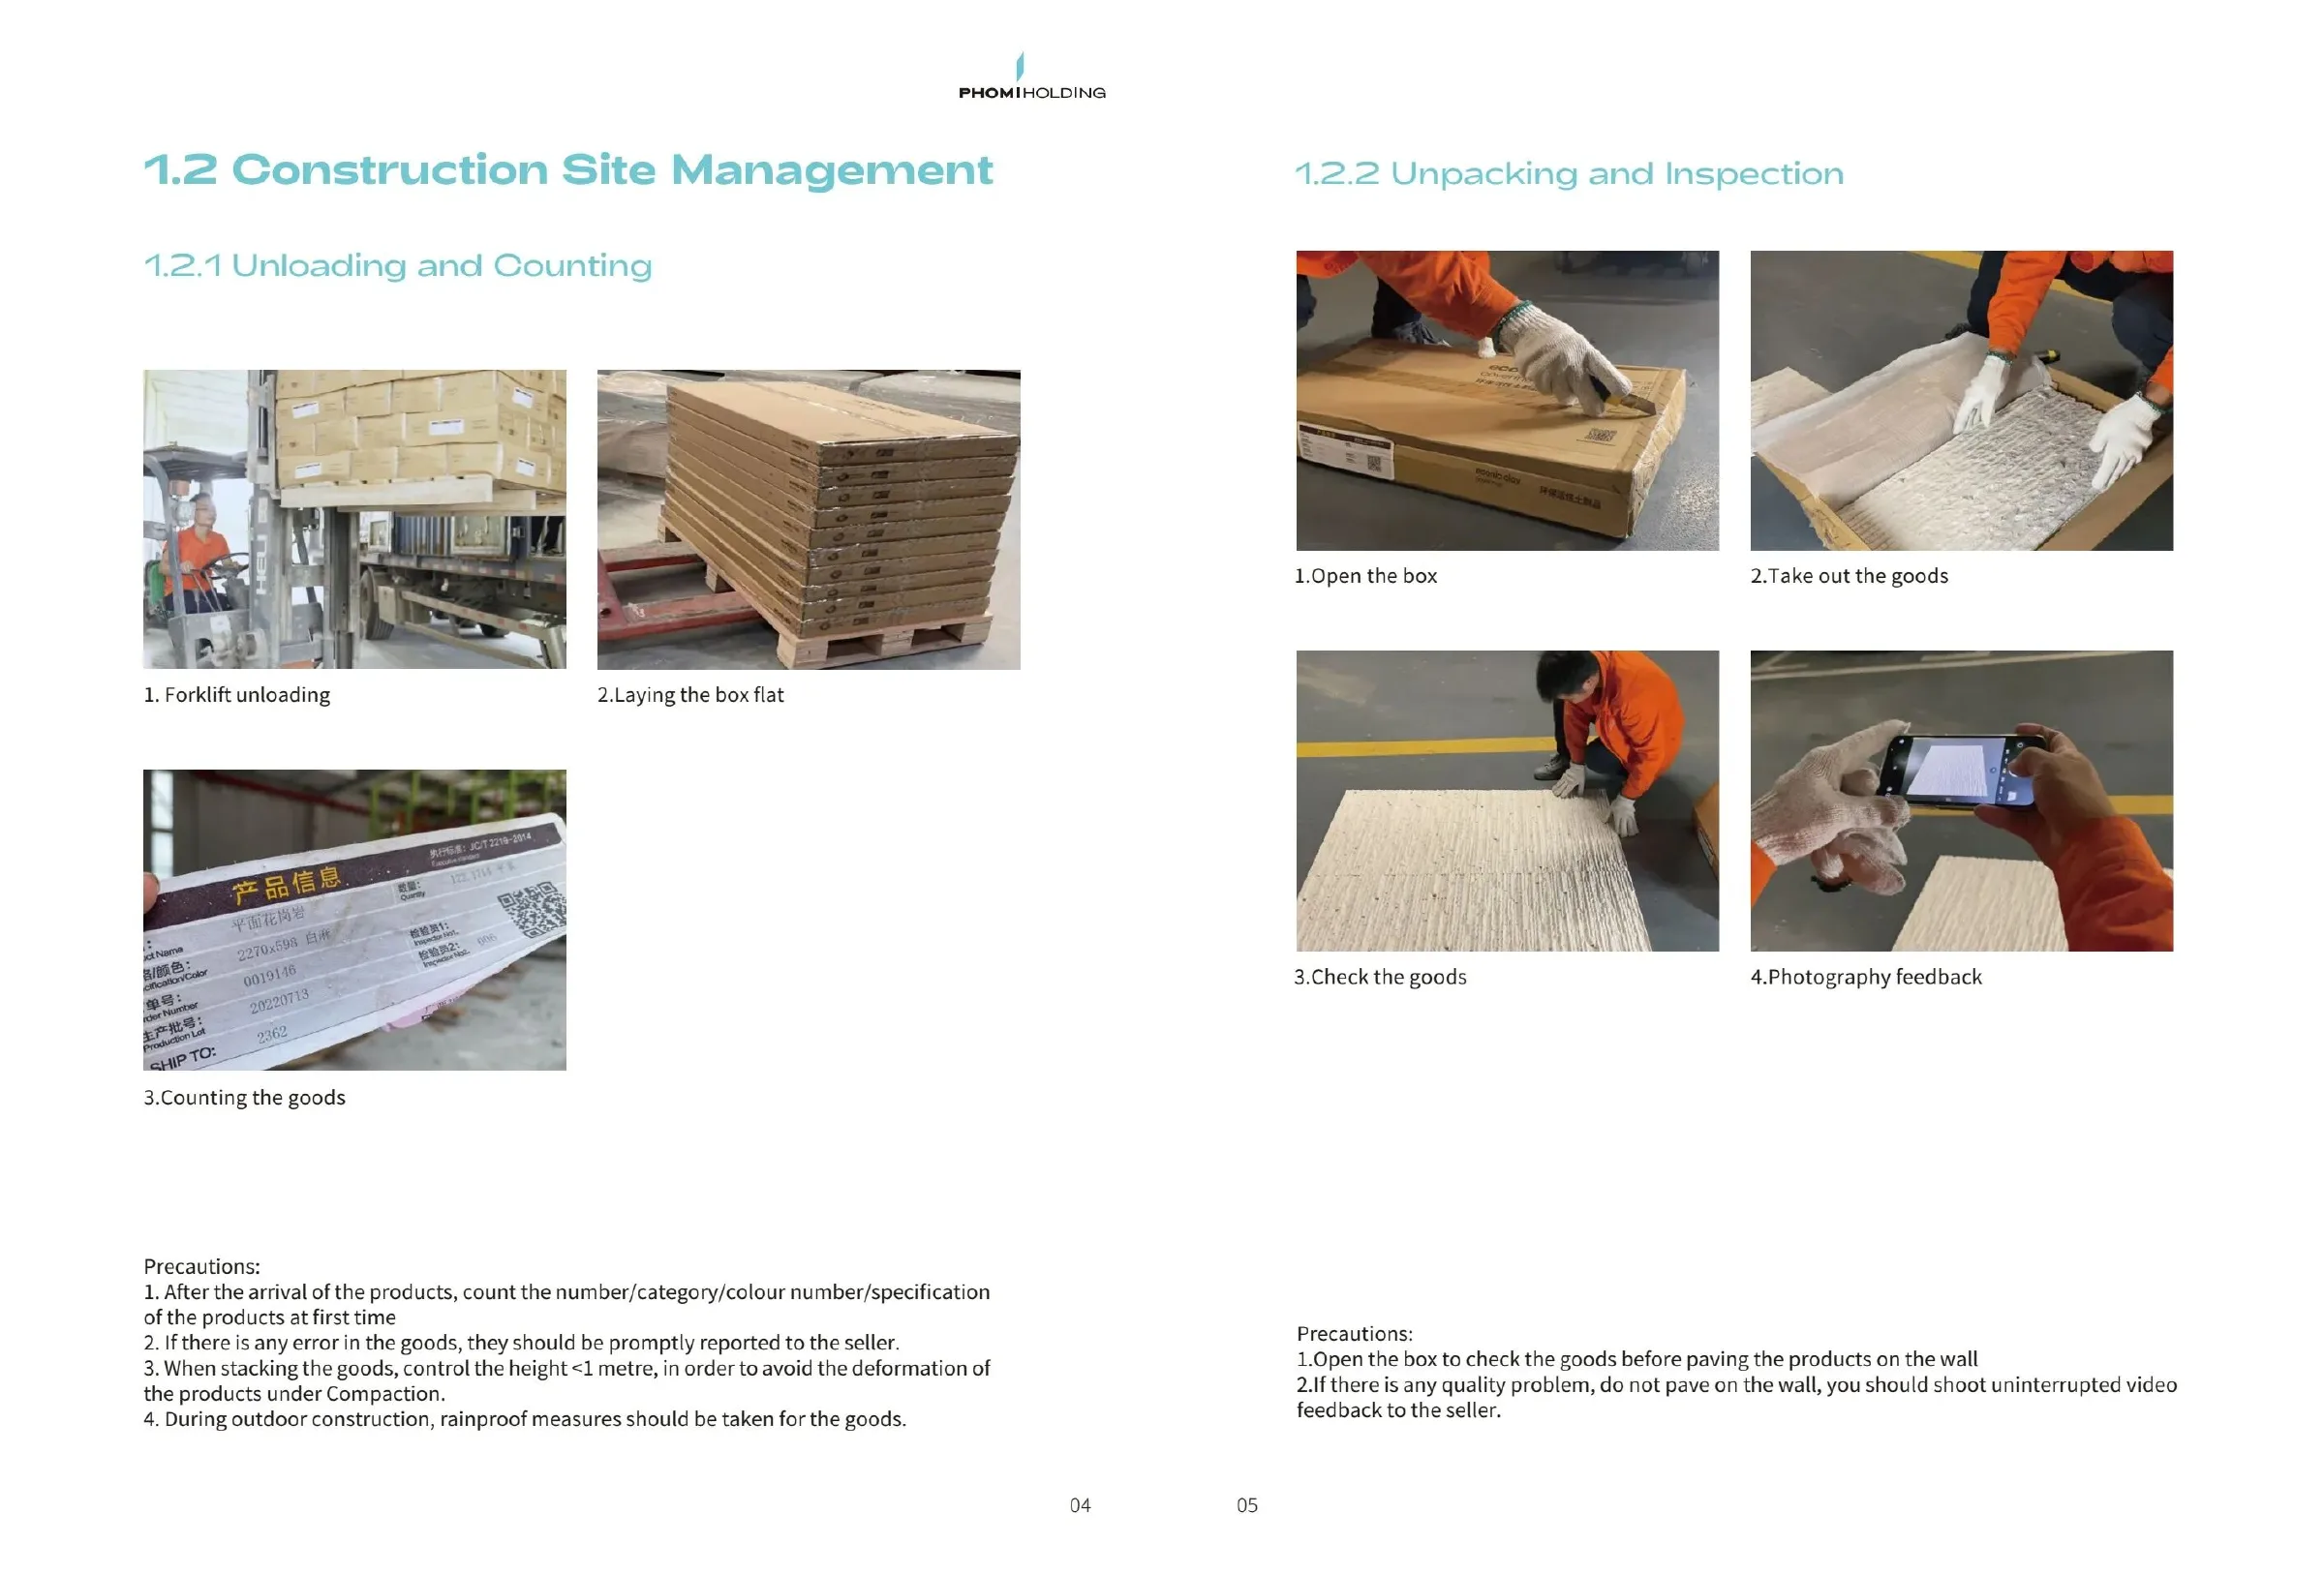
On delivery, check the quantity, pattern and batch number. A difference in tone cannot be corrected later.
Order 5–10% extra. Cutting creates waste and a batch ordered later may differ in tone.
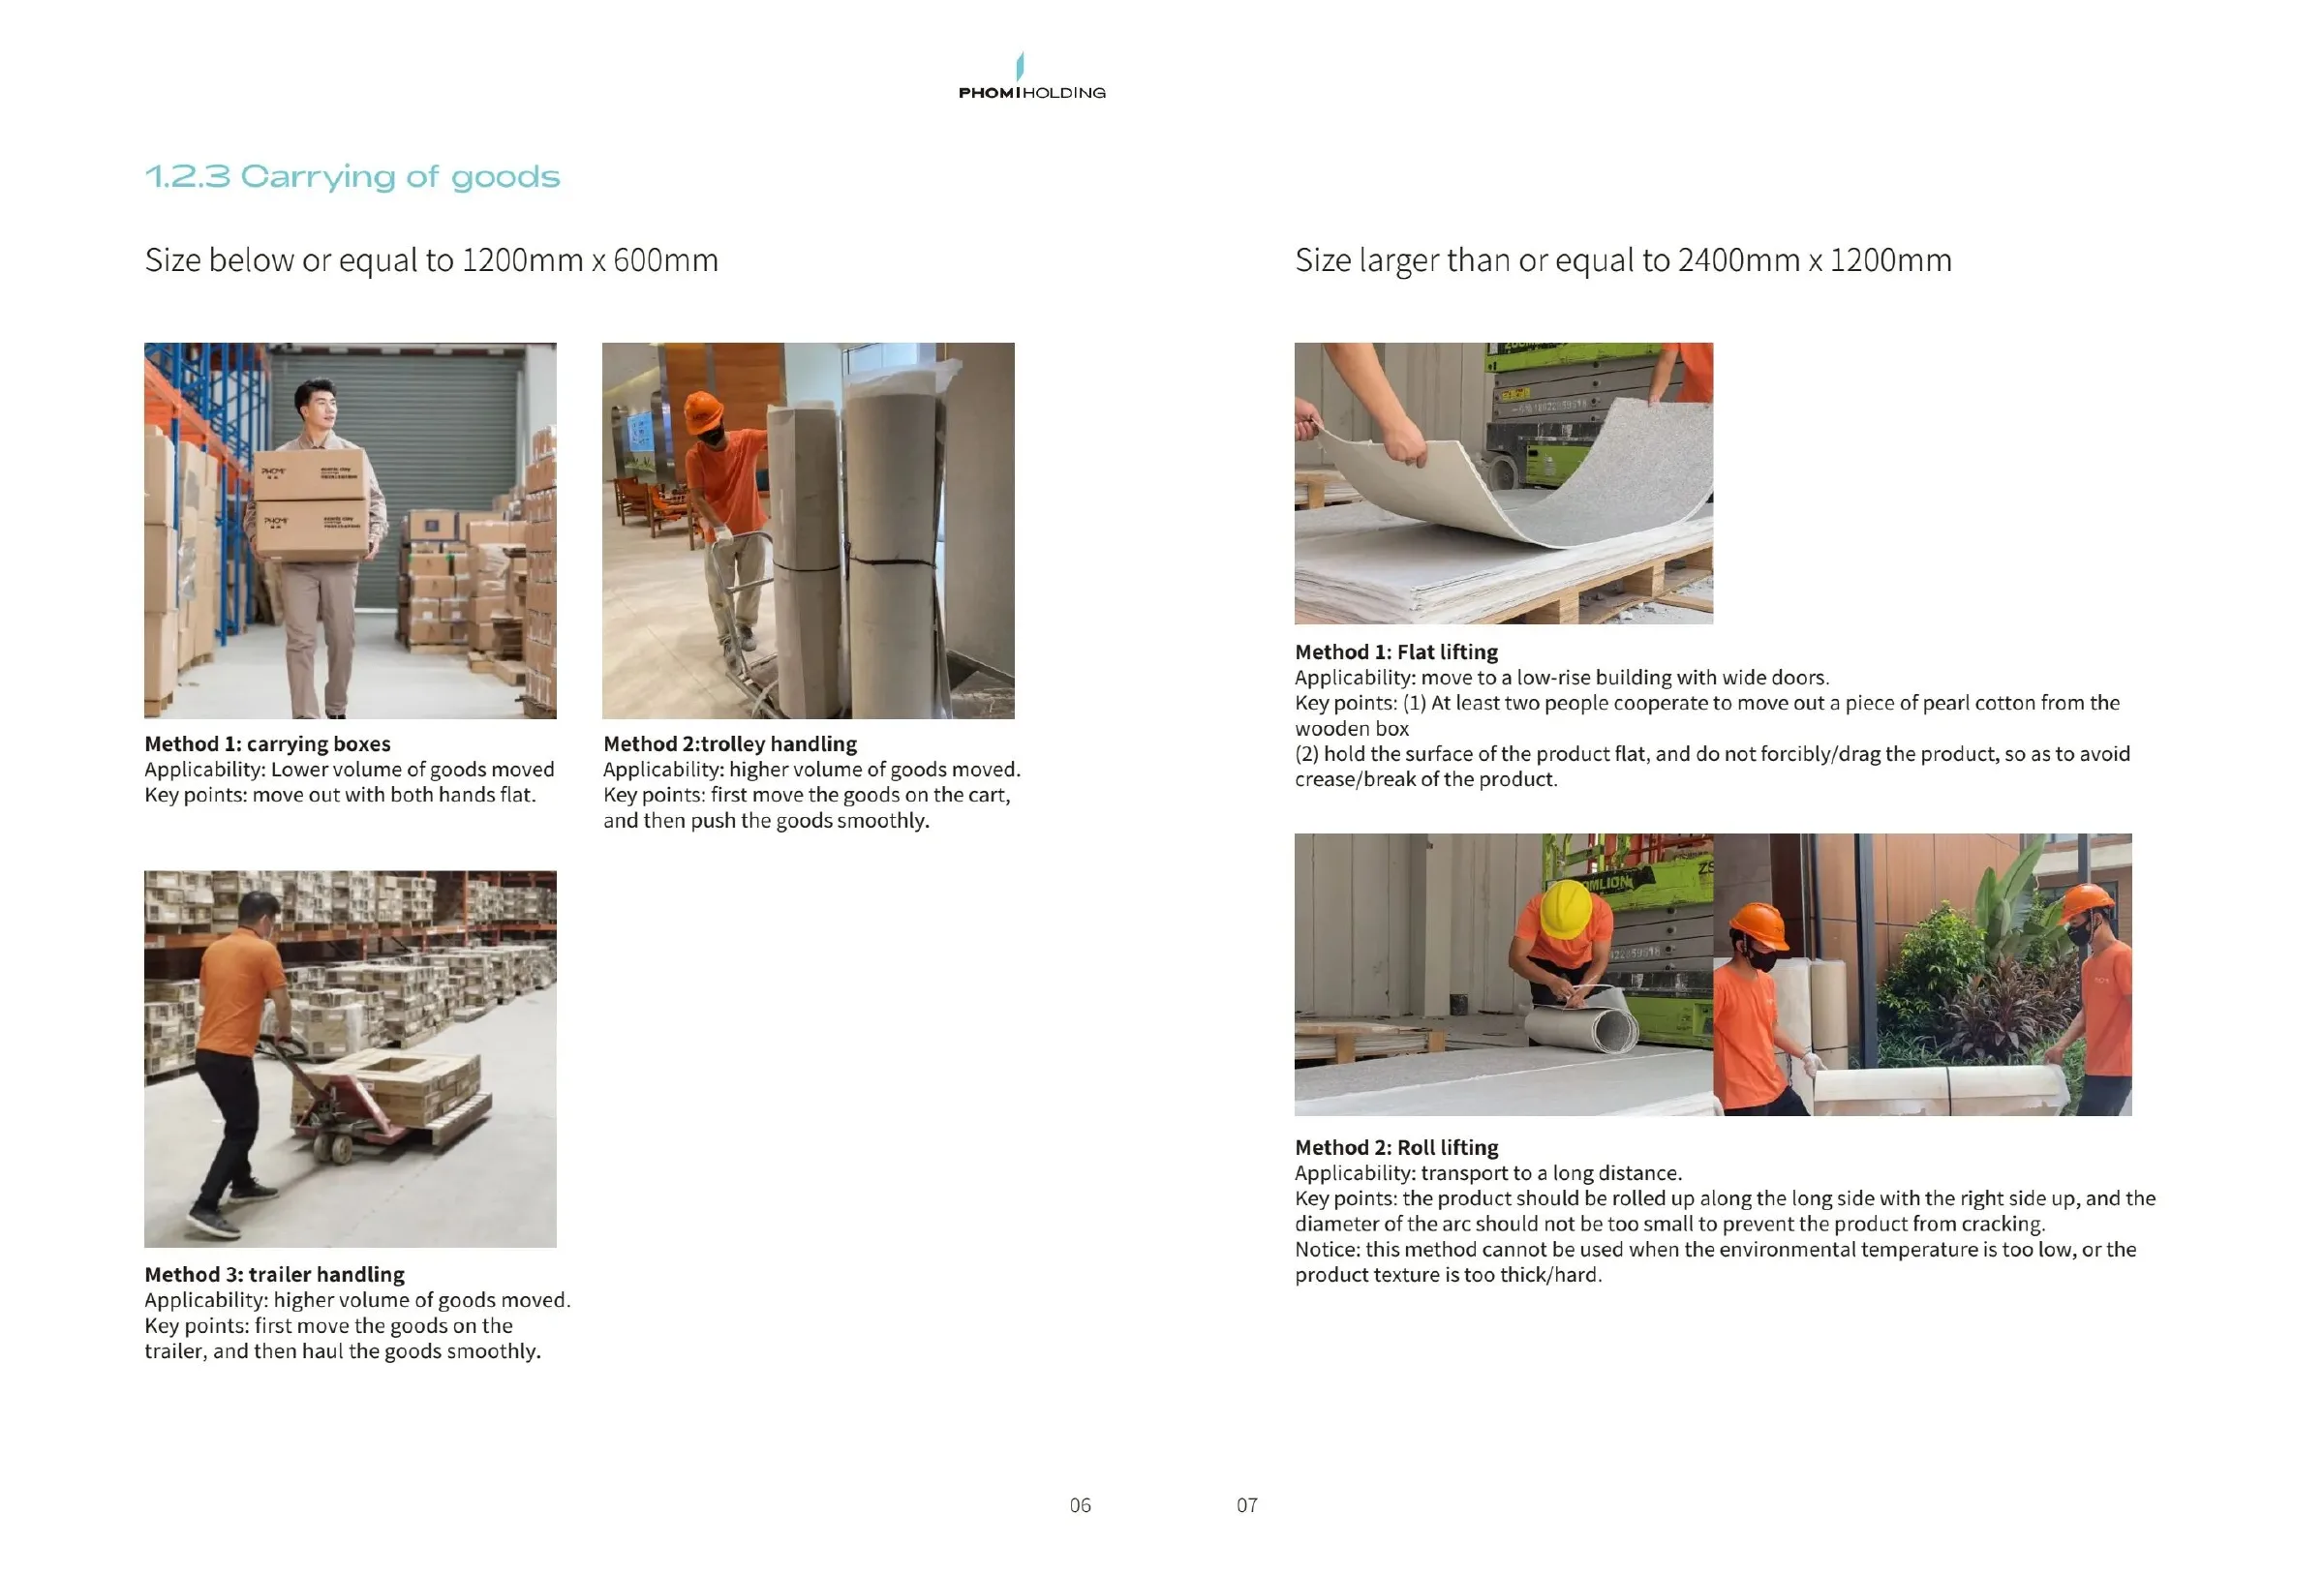
Store panels dry, protected and lying flat on a level base. Do not lean them upright against a wall, as they may warp.
Lay the panels out before installation and check the tones. Mix panels from different batches deliberately on the wall.
05 / 08
Installation step by step
Now installation begins. If this is your first time, start with a smaller interior wall rather than a façade.
Combing and pressing the adhesive
A
Comb the adhesive evenly in one direction
onto the PHOMI panel with a 4–6 mm notched trowel
B
Press across the whole surface
the adhesive must cover the entire back
Figure 4. A — combed adhesive layer. B — the panel is pressed in and the adhesive has settled into an even layer.
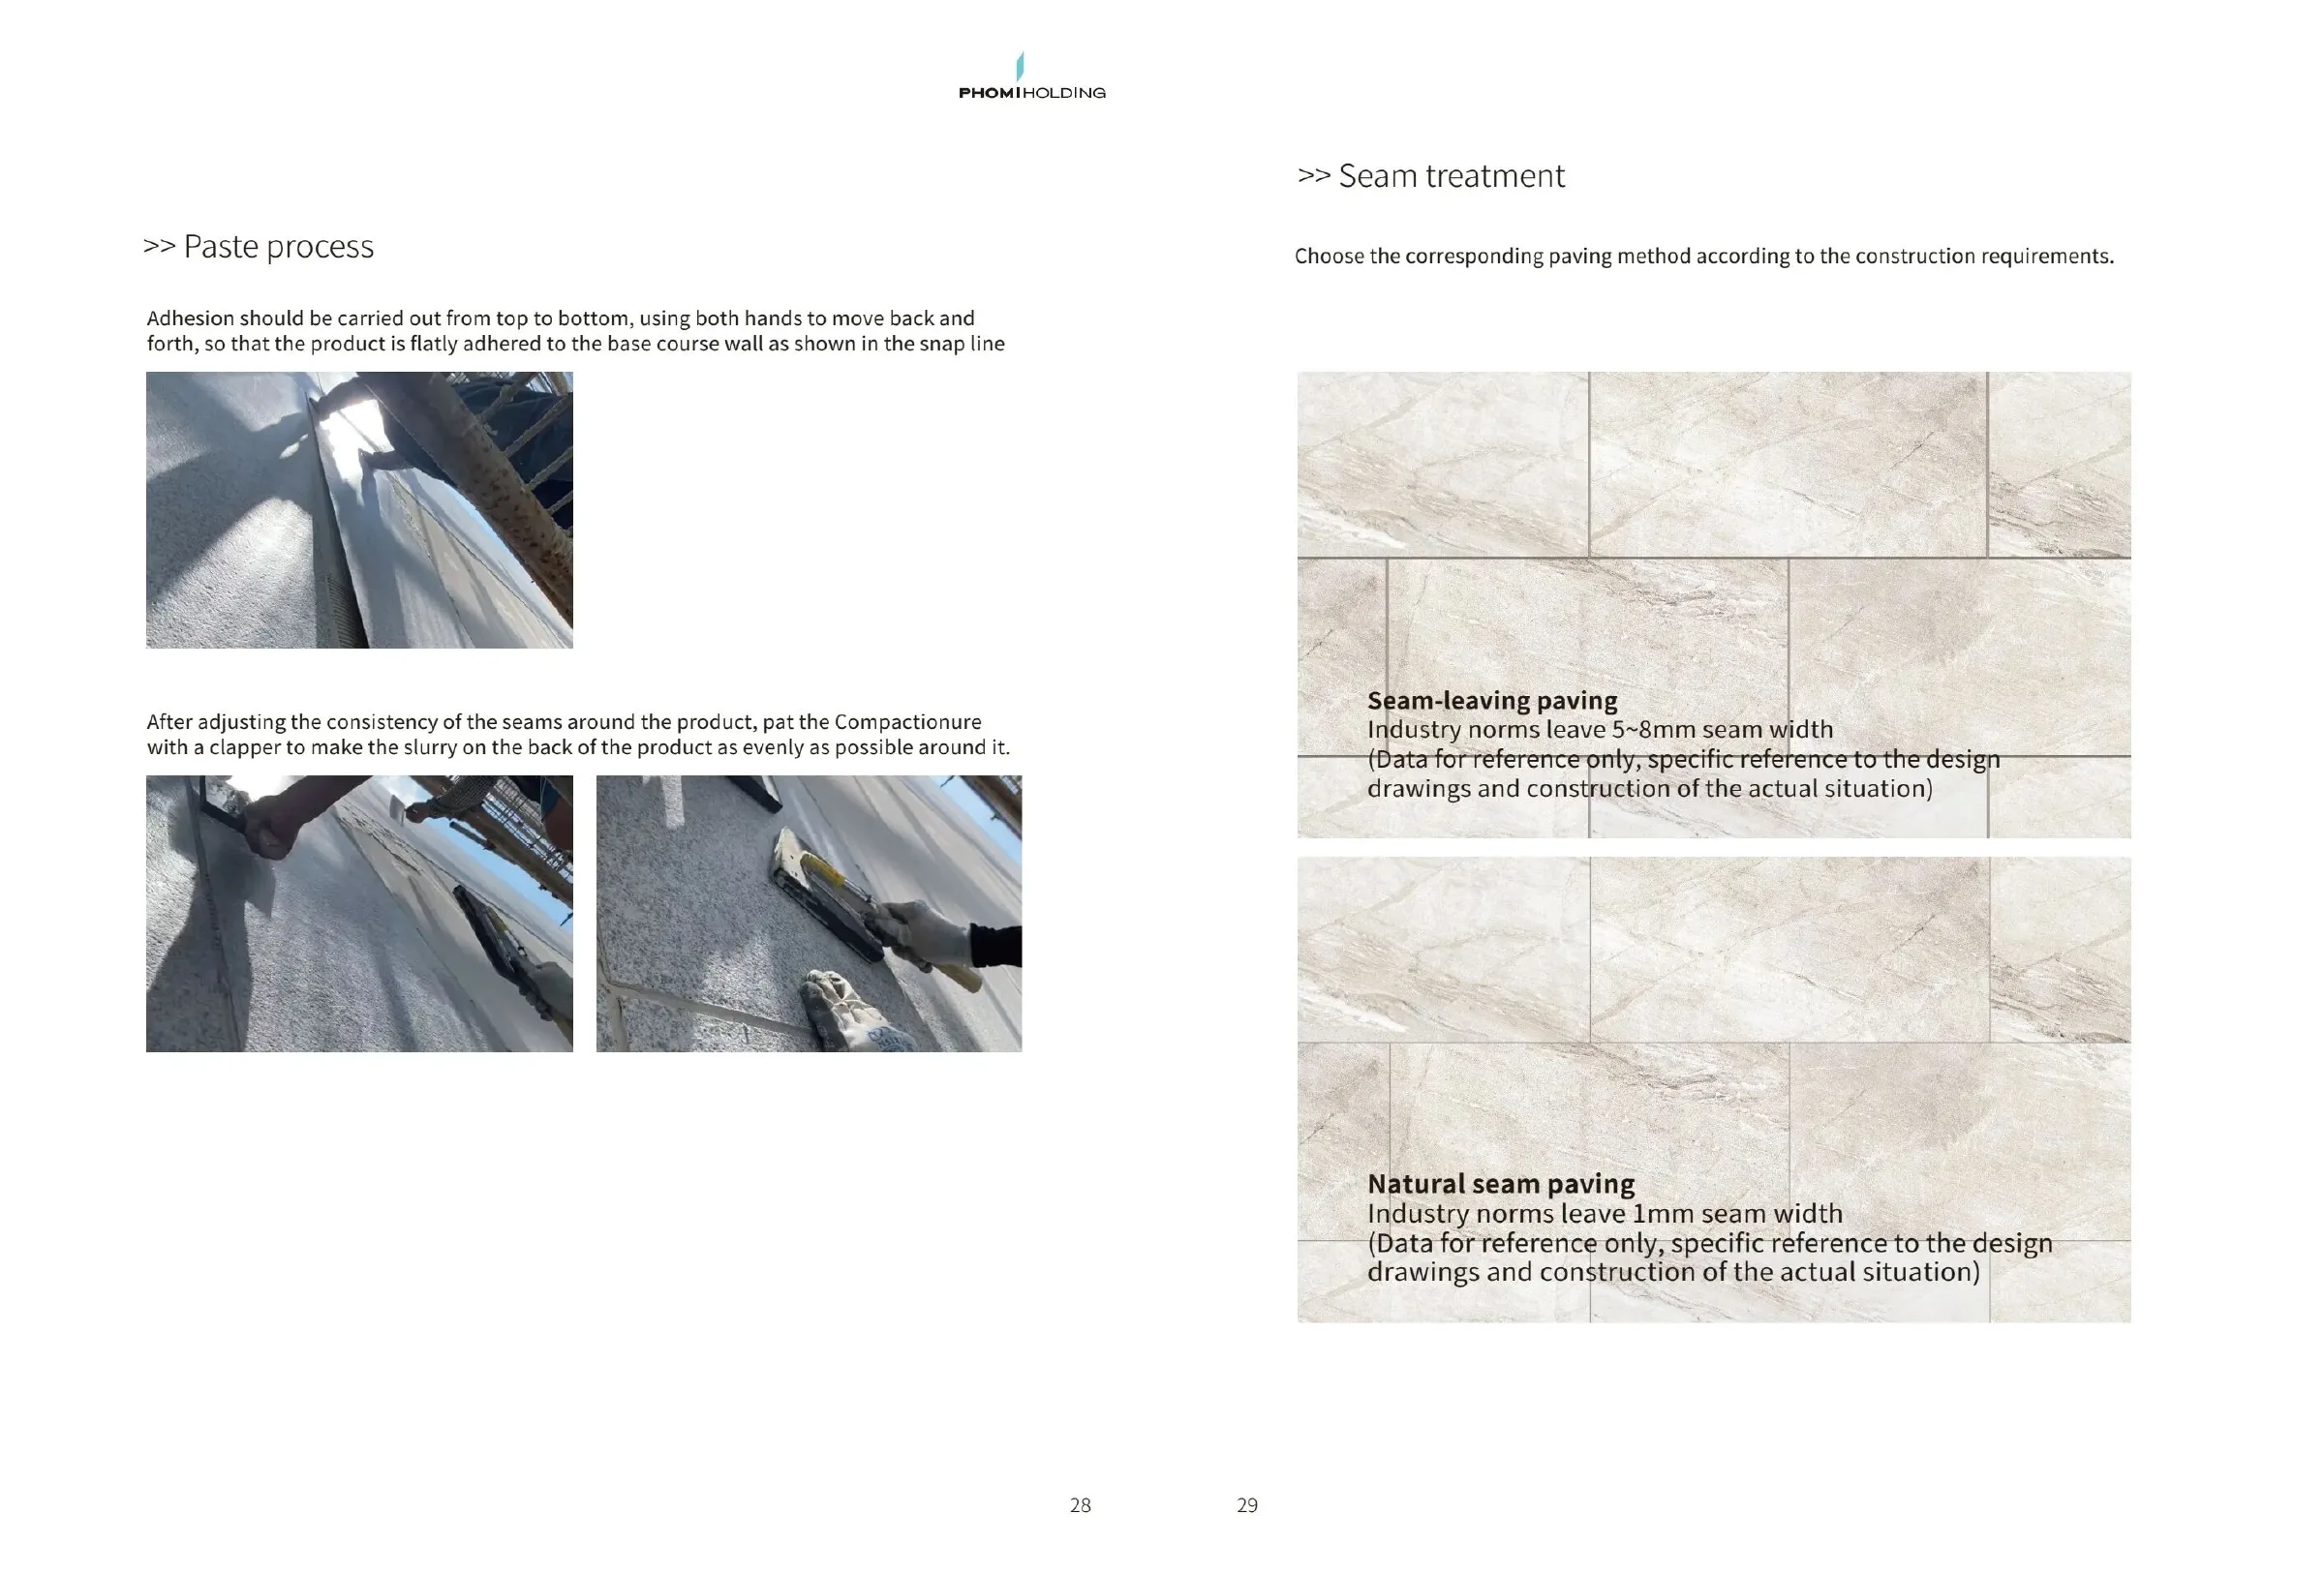
A notched trowel leaves grooves in the adhesive. When the panel is pressed in, they collapse and the adhesive fills the whole surface. No voids may remain between panel and wall.
Requirement: full adhesive contact
Water can get into a void in the adhesive layer, and the panel may come loose there. Press by hand and with a plastic float across the whole surface, not only at the edges and centre. If in doubt, take the first panel off and check the back. The adhesive must cover the entire back.
The right order
01
Mark the starting line
Mark the line across the whole wall with a level, laser or string line. Also check it at the other end of the wall. The top of the plinth may not be level, even if it looks it.
02
Fix the support batten
The batten carries the bottom row until the adhesive sets. Without it, the first row slides down and the whole wall goes crooked. The following rows cannot correct this.
03
Mix the adhesive
Pour water into the bucket first, then the mix. Mix with a mixer until smooth, let stand for 5 minutes and mix again. Do not add water later. It ruins the mix even if the mix appears fine.
04
Comb enough for one panel
Comb adhesive for one panel at a time. If a skin forms on the adhesive, there is no longer a bond. Scrape the adhesive off and comb a new layer.
05
Place and press
Place the panel along the line and press it in across its whole surface. Check immediately with a level in both directions. CM 17 placement time is up to 30 minutes, but align the panel straight away.
06
Secure
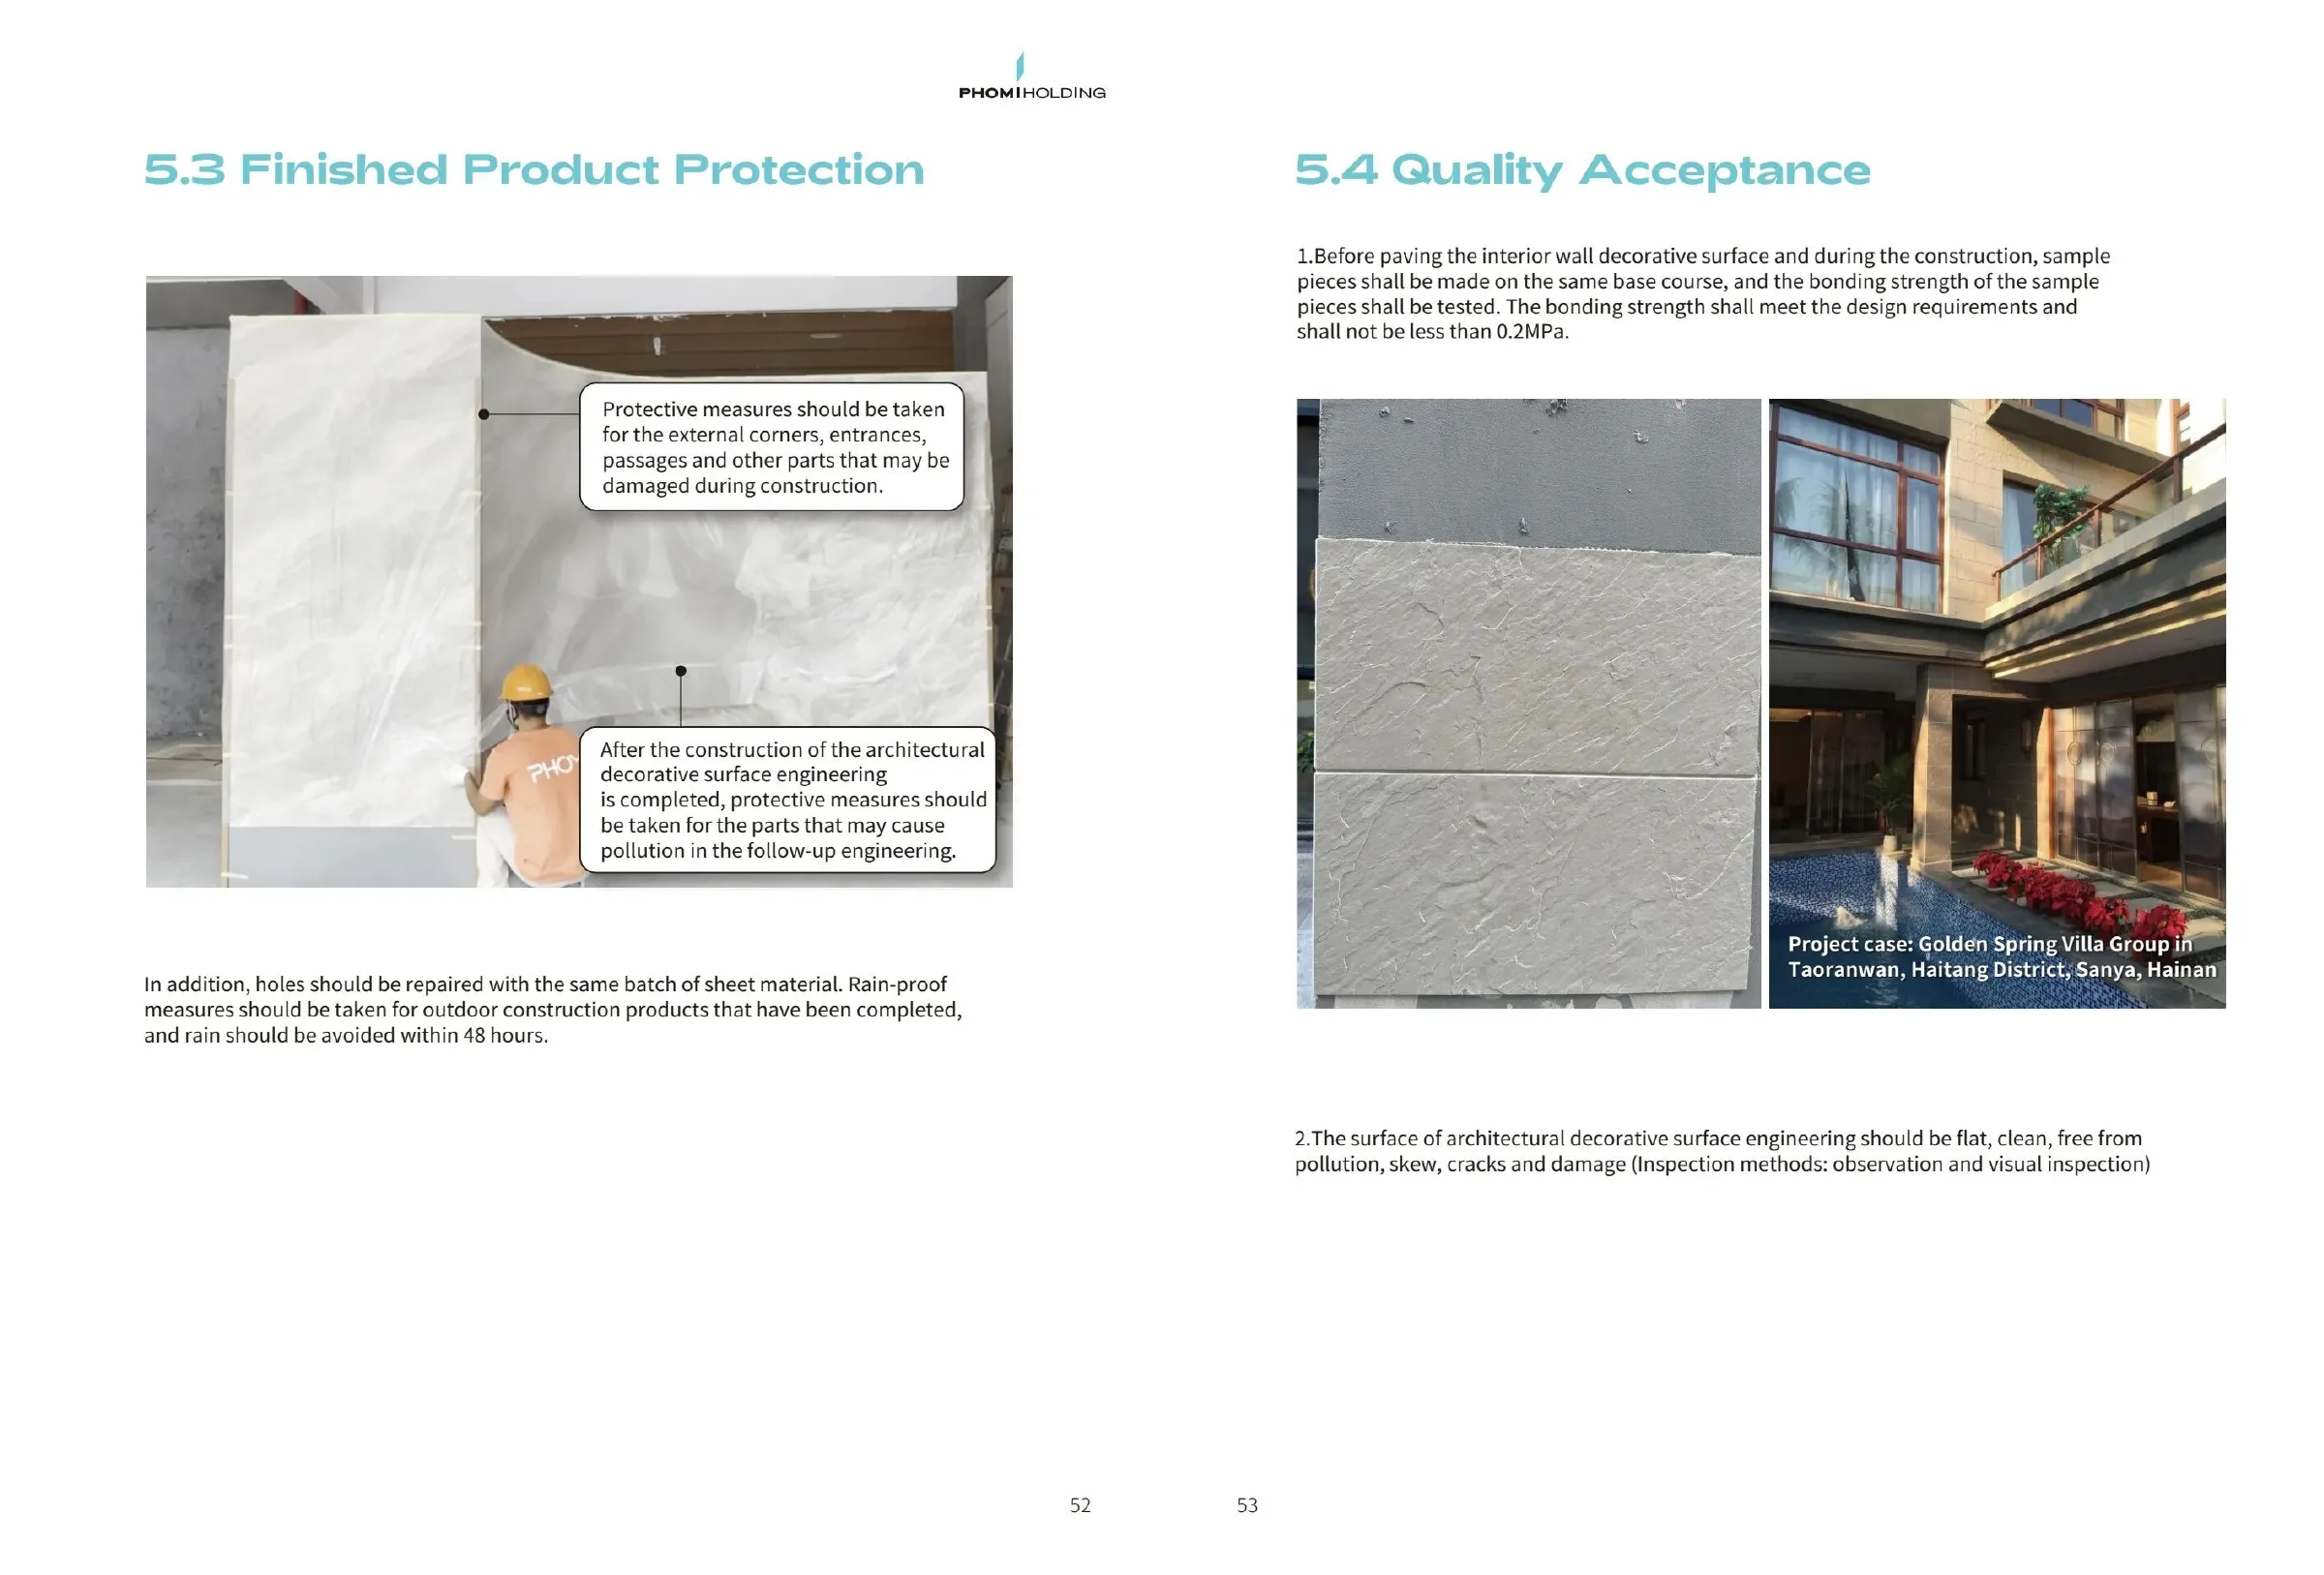
Spacer pins, wedges or masking tape hold the panel in place until the adhesive sets. Remove them before the adhesive has fully hardened. Later they may come away with a piece of the surface.
07
Clean immediately
Wipe adhesive residue off the surface immediately with a damp sponge. Removing hardened adhesive damages the surface and this cannot be repaired.
08
Install row by row
Check level and joint line after each row. An error in one row carries into the next ones and grows with every row.
06 / 08
Details
A straight wall is easy. Corners, openings and junctions decide the result.
Cutting
1
Straight cut
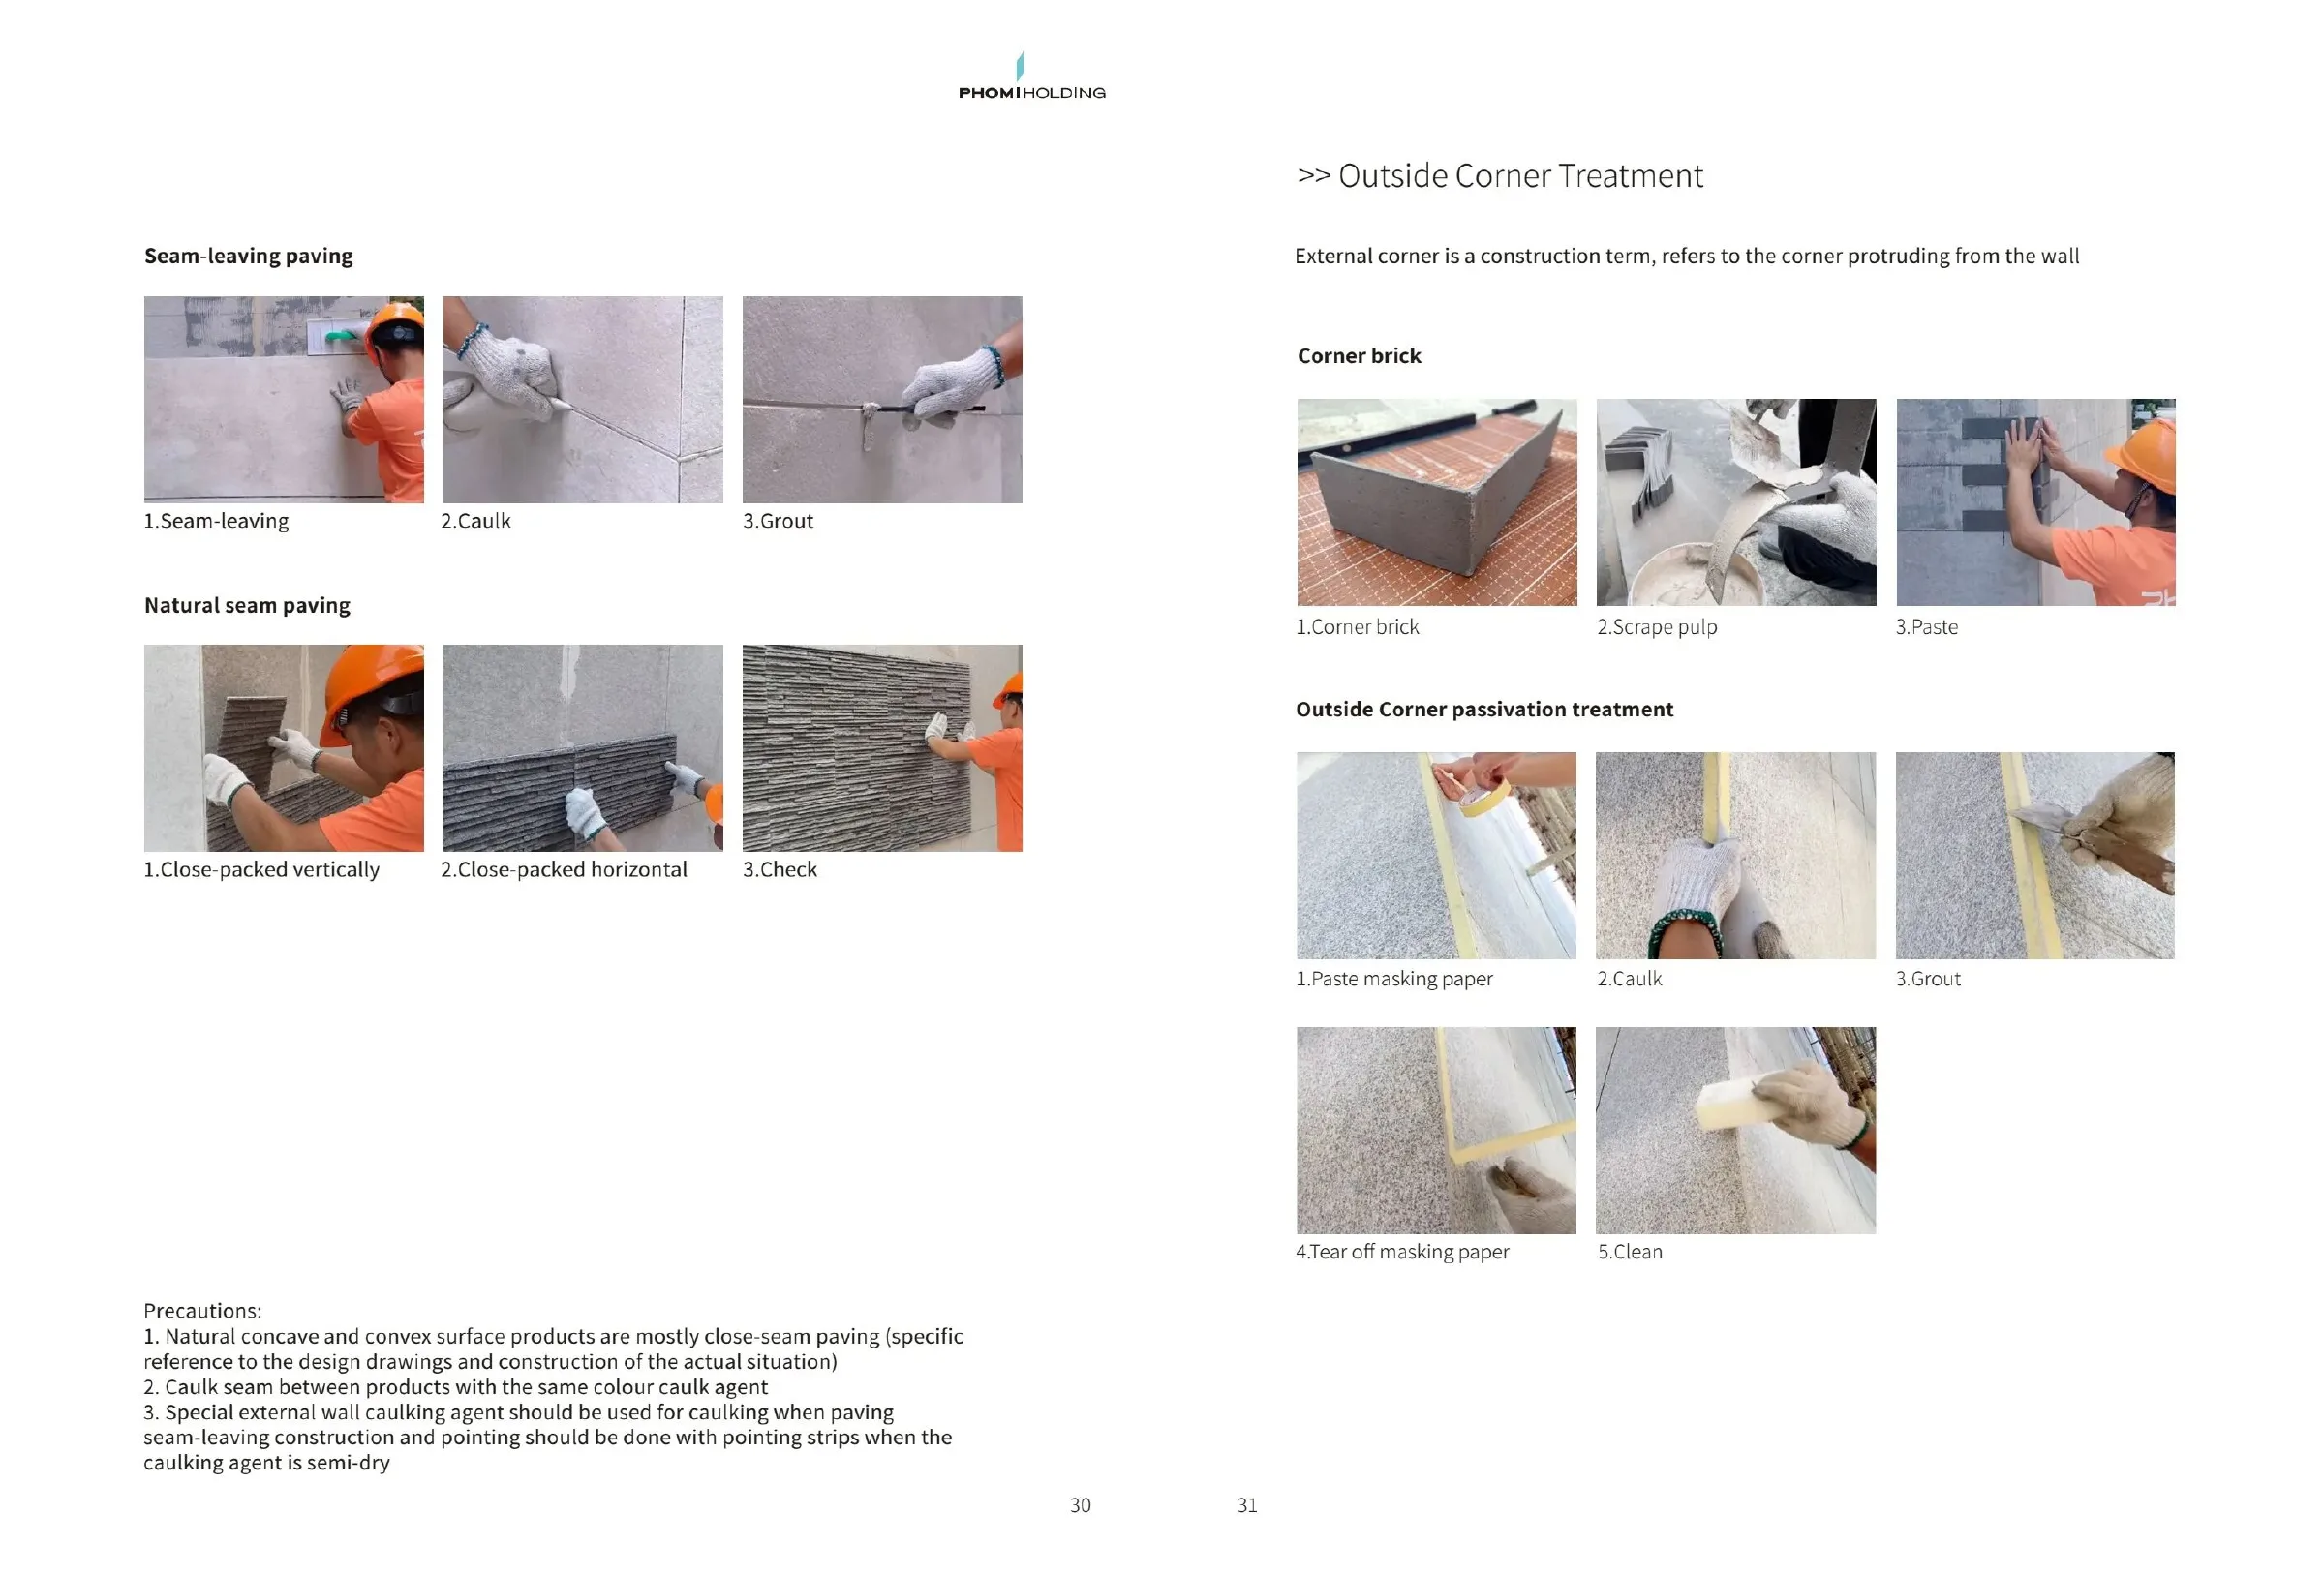
Cut with a sharp knife along a straightedge, 2–3 times along the same line. Then snap the panel over an edge, like plasterboard.
2
Shaped and cross cuts
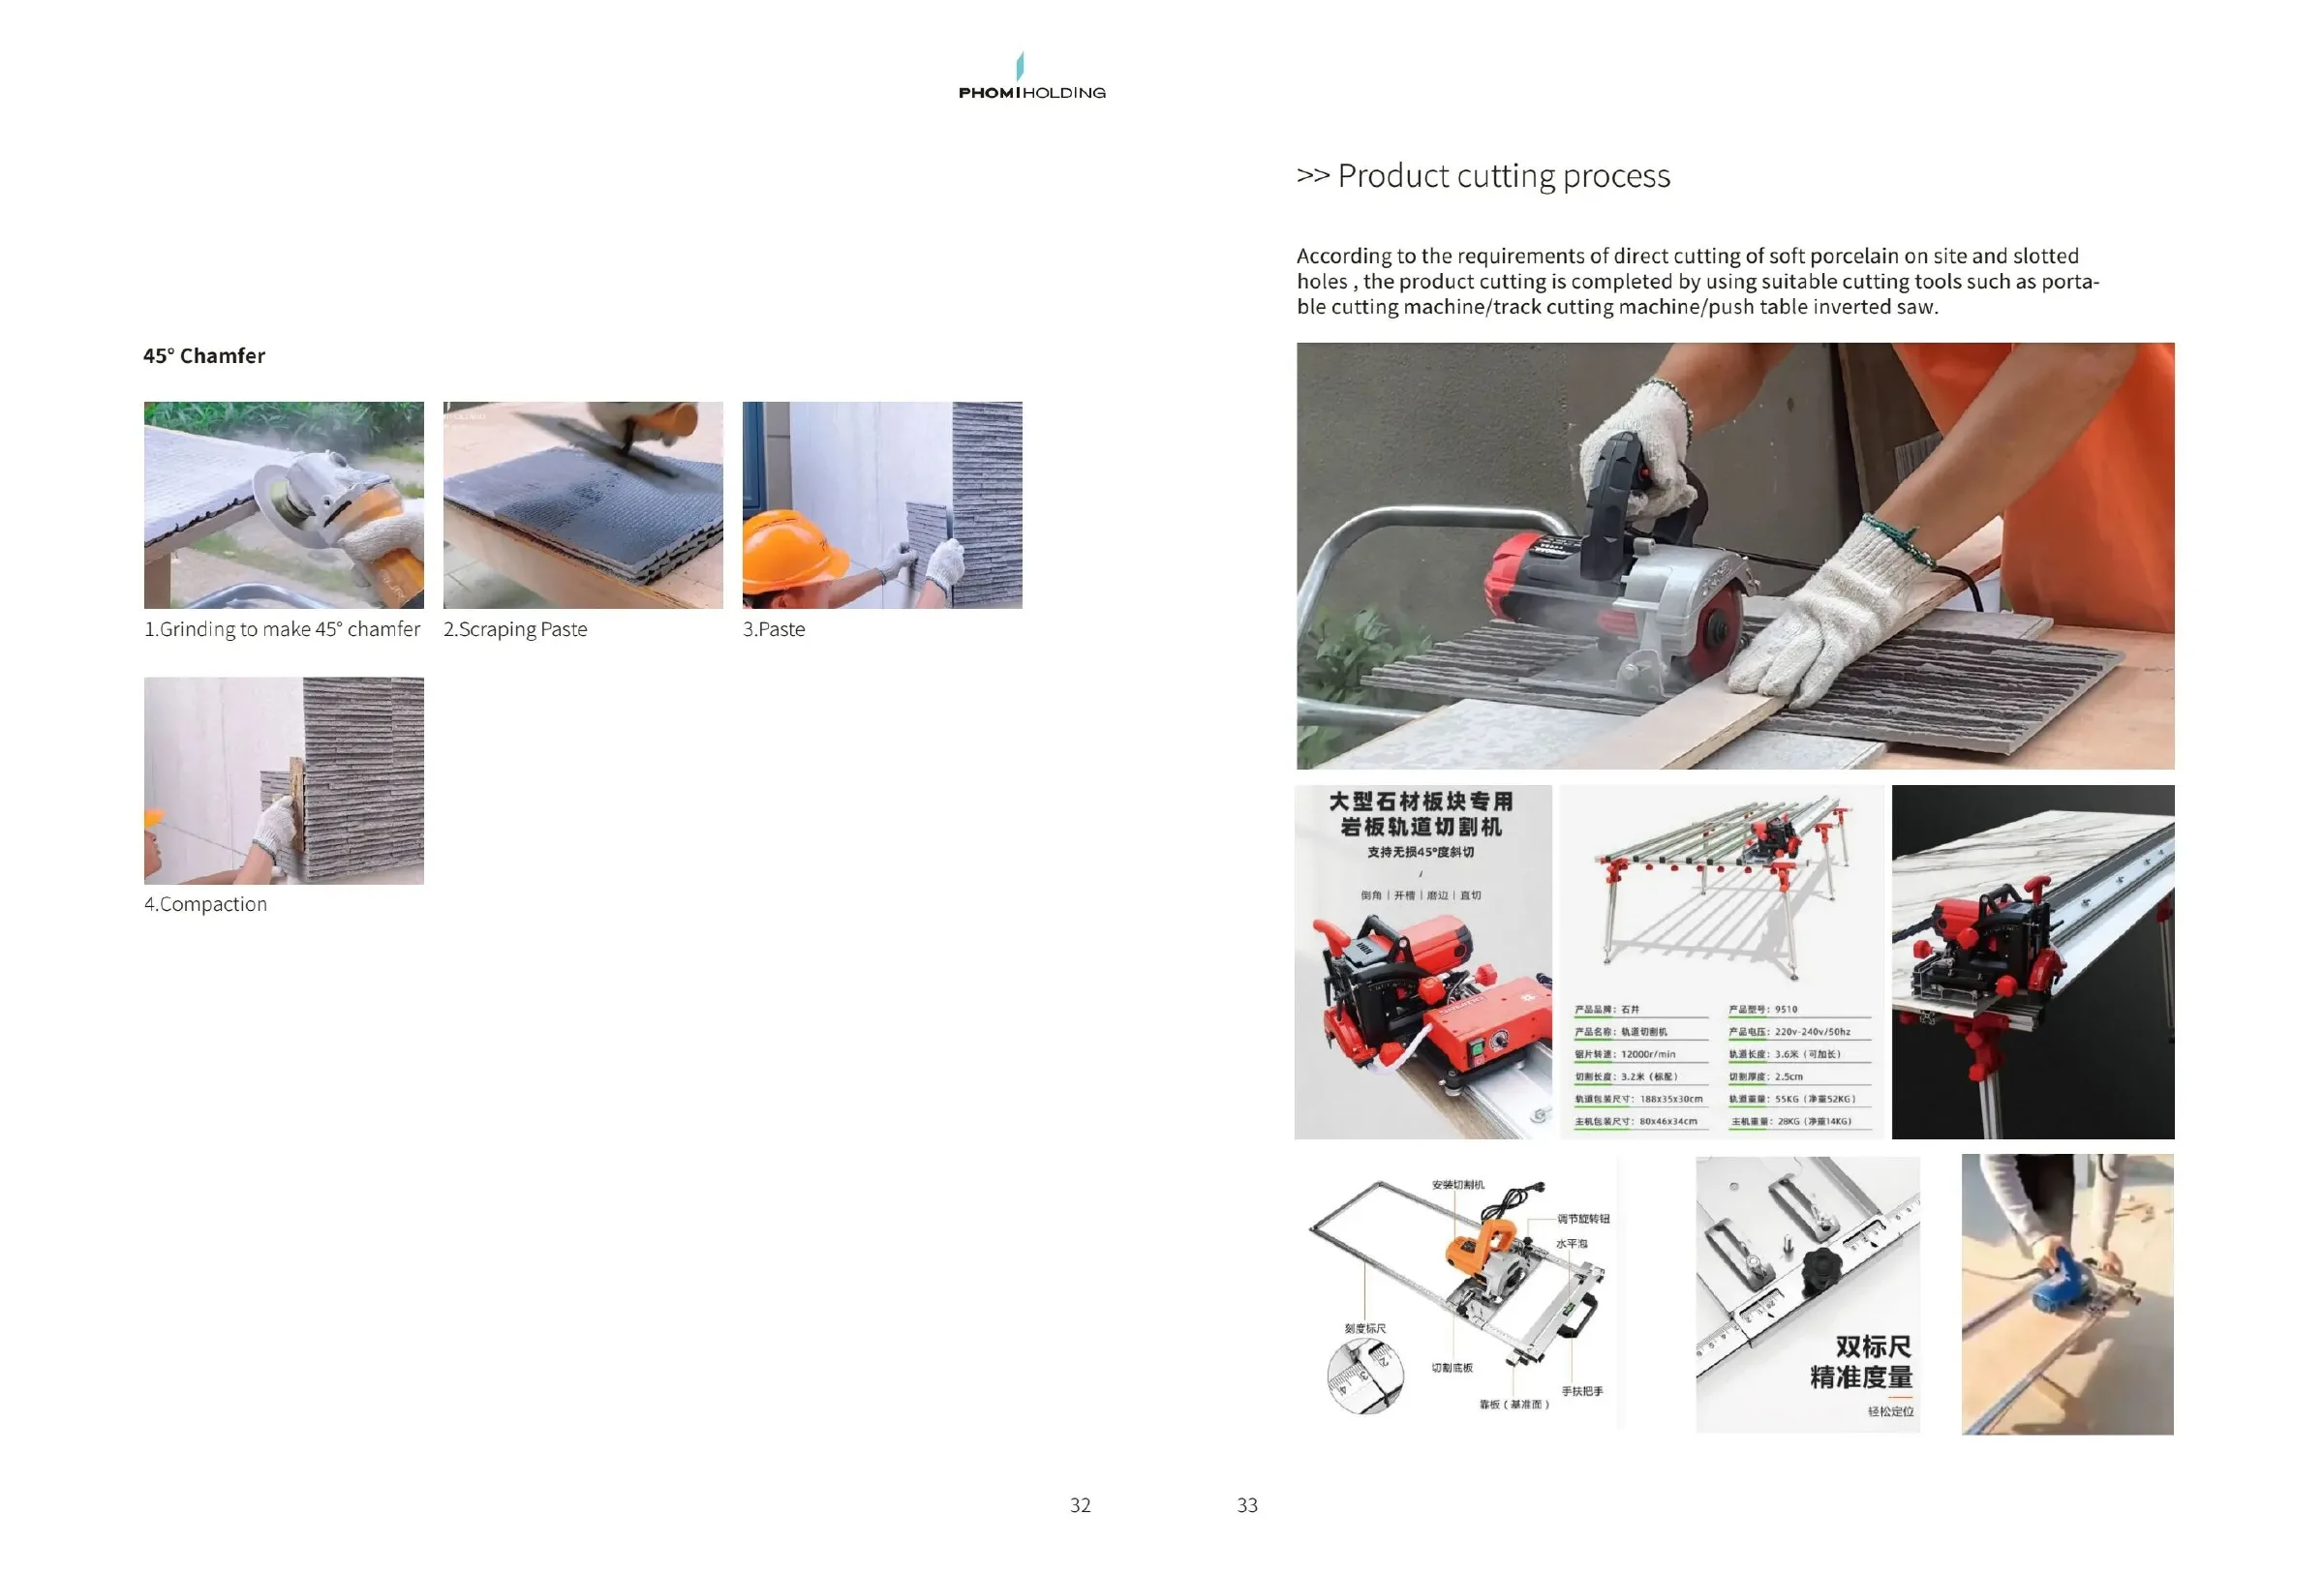
Cut with a fine diamond blade on an angle grinder, face side up. Cut outdoors or with dust extraction.
Always cut on a flat surface. The panel must not flex during cutting, or the cut will wander or a microcrack will form on the surface. Stone dust is harmful to health. Wear a dust mask and safety glasses. Measure twice: a cut cannot be undone, and a batch ordered later may differ in tone.
External corners
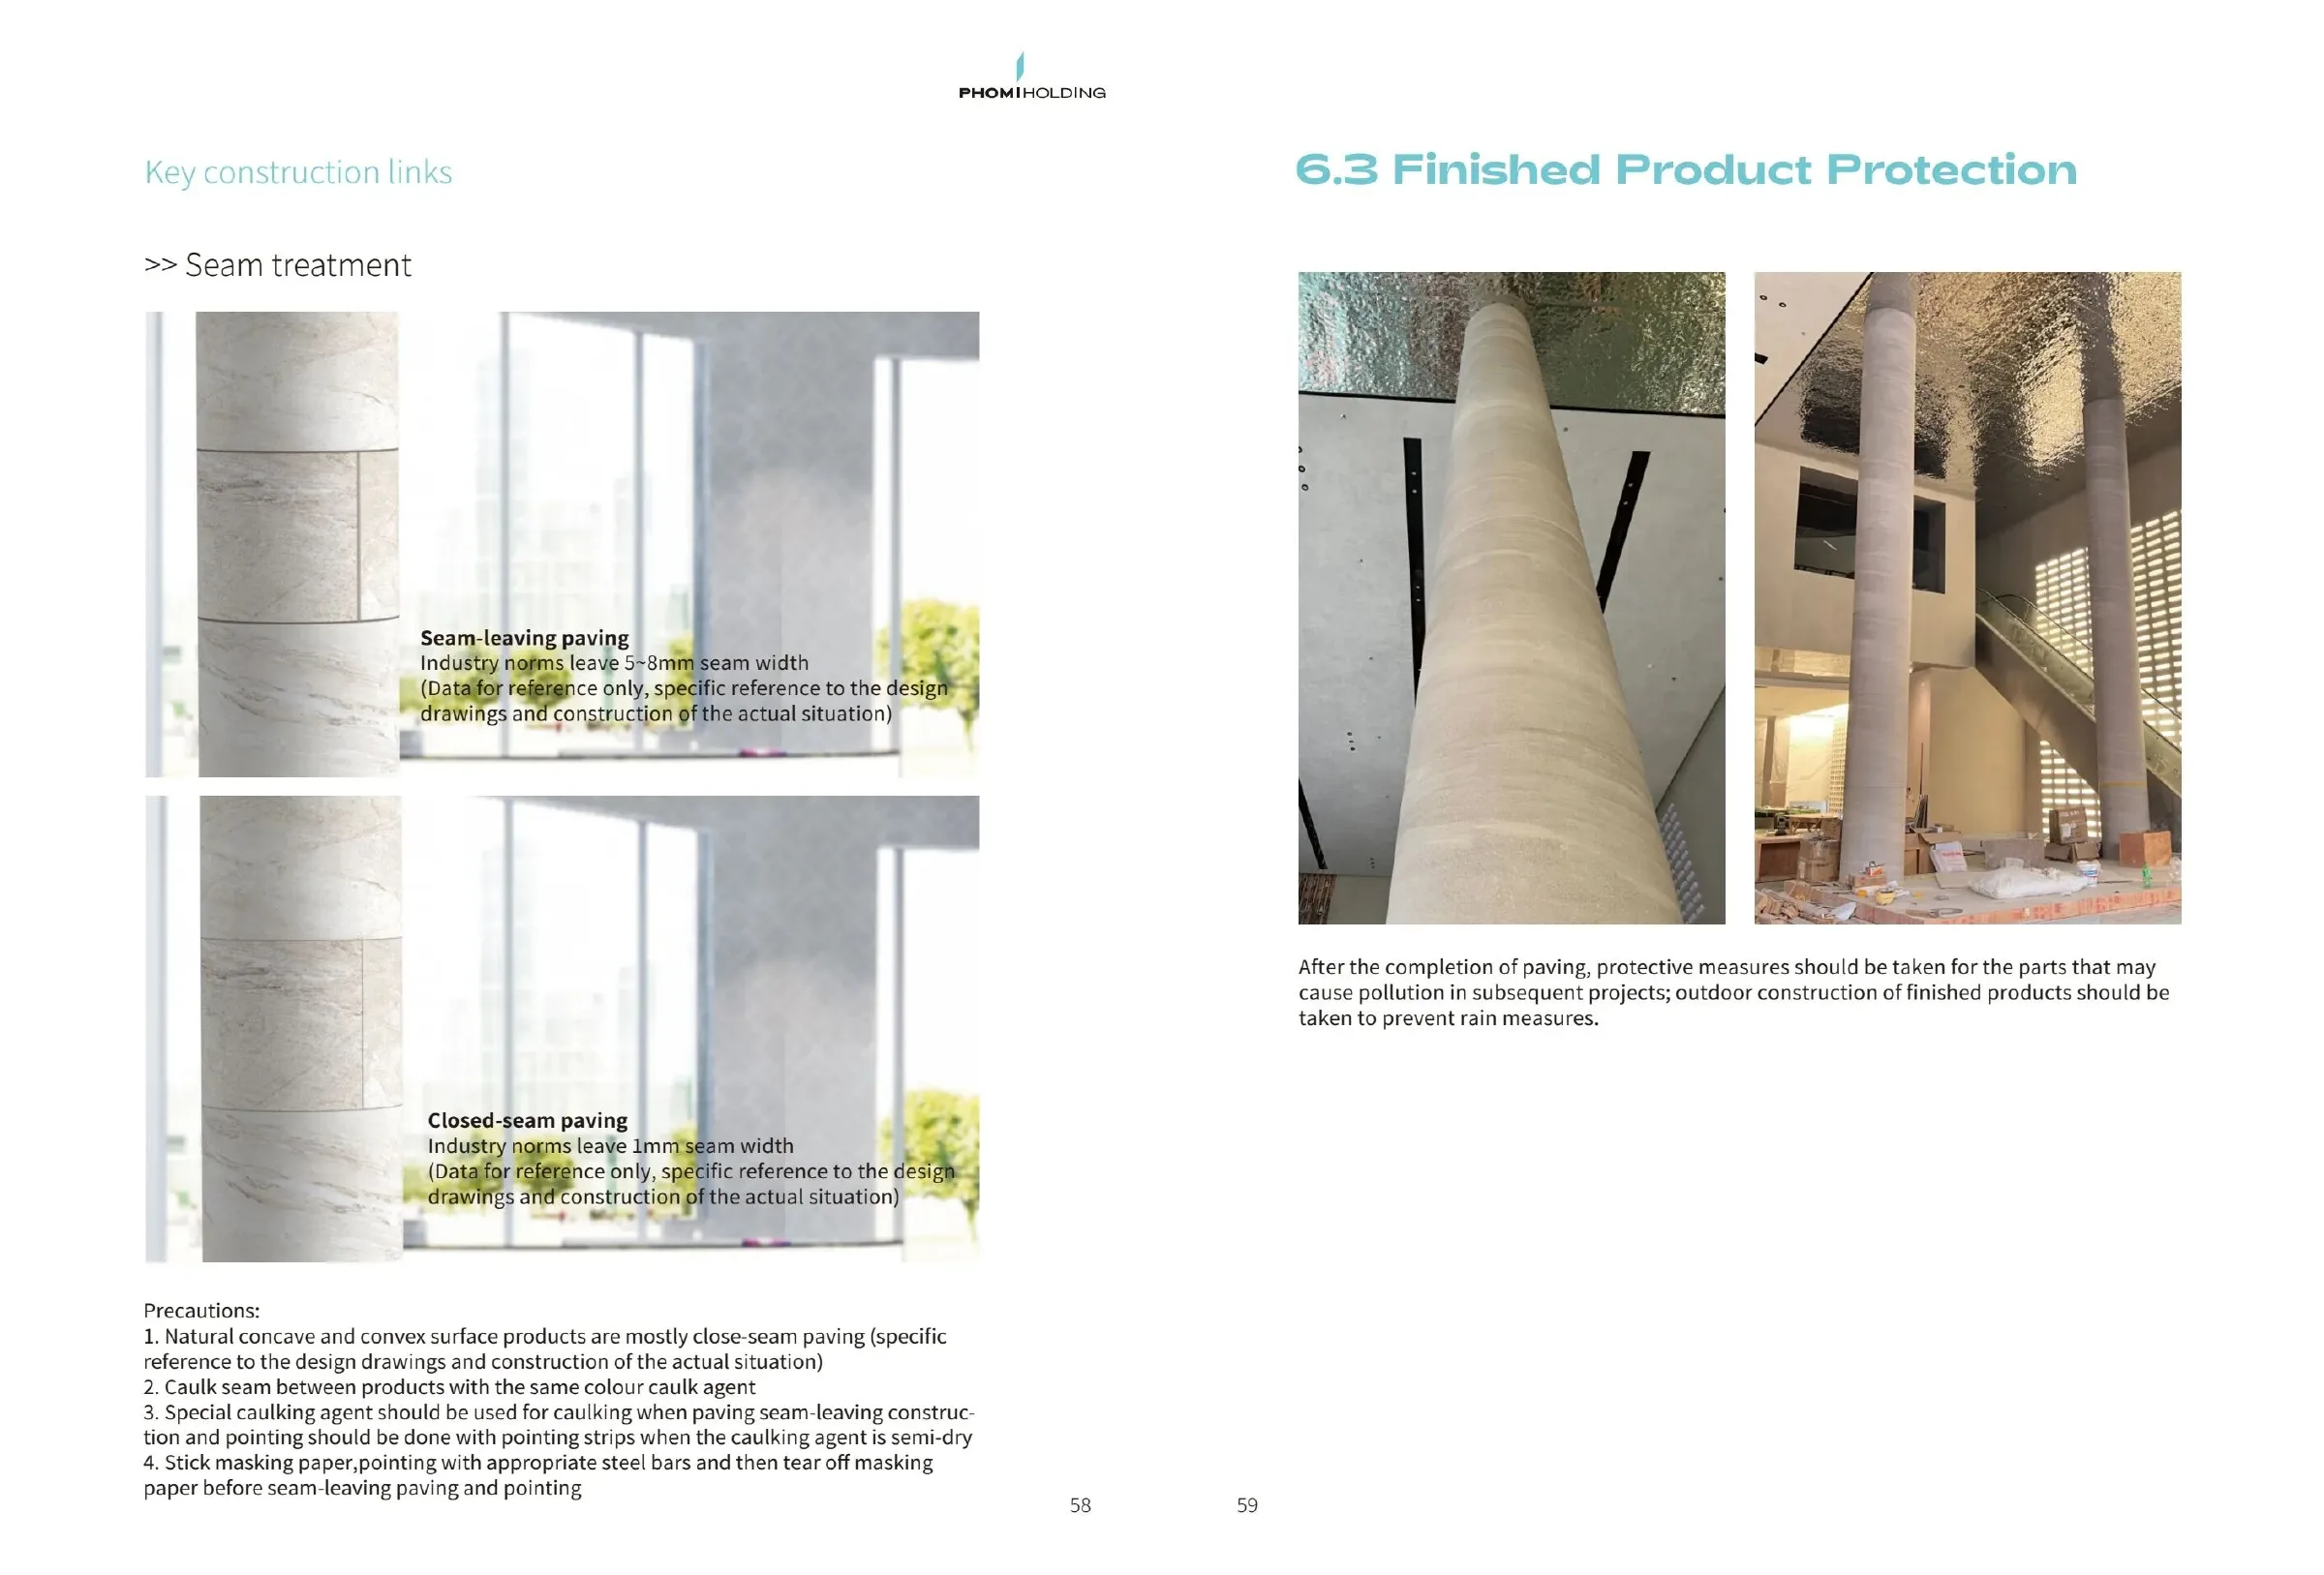
An external corner may be covered with a single panel only if the manufacturer has confirmed the minimum bending radius for that collection and the corner complies with it. Check the bend on a test piece from the same collection. If there is no confirmed value, build the corner from two panels cut at 45°.
Do not bend sharply
Do not bend a panel to a smaller radius than the manufacturer allows. If there is no value, or a test piece shows a fold line, pale streak or crack, do not take the panel around the corner. Cut both sides at 45°, bond them at the same time and finish the junction with a suitable grout.
Window openings and reveals
Install flashings and drip edges before the panels. The panel ends on top of the flashing, otherwise water runs behind the joint. A panel joint must not run into the corner of an opening, because stresses concentrate there and cracks form. Plan the joint away from the edge of the opening. Where possible, cover the reveal with the same panel, bending it around the corner from the façade surface. That way there is no joint in the reveal corner. Leave a movement gap at junctions and seal it with flexible sealant.
Terminations and junctions
Top of the plinth — water must drain away, not sit in the joint.
Eaves and top edge of the panel — cover with flashing or tuck under the existing detail.
Internal corners — panels meet in the corner. Leave a small movement gap and seal with flexible sealant.
Penetrations (pipes, lights, ventilation) — cut a precise opening and seal its edge.
Joints
Joint width depends on the collection and place of installation. On façades, leave a joint of at least 2 mm unless the collection’s guide requires a wider one. Indoors, install panels edge to edge only for a jointless solution. The brick collection has its own solution for this. For a visible joint, use grout suited to the location: exterior grout on façades, interior grout indoors, and wet-room grout in bathrooms and shower rooms.
07 / 08
Weather and schedule
In northern conditions, the weather decides whether the job succeeds or has to be redone in spring.
Condition
Requirement and reason
Air and wall temperature
+5…+25 °C. At lower temperatures the adhesive does not set properly; at higher ones it dries too quickly.
Night-time temperature
Must not fall below +5 °C. Daytime warmth does not help if it freezes at night.
Direct sun and wind
The adhesive surface dries before the panel is placed. Shade the scaffolding or work in the shade.
Rain
Stop work. Cover the fresh surface until the adhesive has set.
CM 17: grouting on walls
after 12 hours
In a northern climate, façade work is usually carried out from April to October, depending on the weather. Interiors can be worked on all year round. The temperature must stay at +5…+25 °C both during installation and while the adhesive sets. The finished façade has been tested separately and withstands −30 degrees. Winter does not damage the finished surface.
08 / 08
Common mistakes
These eight mistakes are the most frequent and the most expensive.
Mistake
What happens
How to avoid it
Adhesive is combed over too large an area at once
A skin forms on the adhesive and the bond is lost
Comb enough for one panel at a time
The panel is pressed only at the edges
Voids remain, water gets in and the panel comes loose
Press across the whole surface
The wall is uneven
The unevenness stays visible on the finished surface
Level first, not with the adhesive layer
The starting line is not level
The error carries into the following rows and grows
Check the line at both ends of the wall
A joint runs into the corner of a window opening
Stresses concentrate and a crack forms
Plan the layout before starting work
Adhesive residue is left to dry
Removing it damages the surface
Clean immediately with a damp sponge
Panels from different batches are mixed
A difference in tone remains on the wall
Lay out the batches before installation and check them
The panel is bent more sharply than allowed
A microcrack becomes visible later
Check the manufacturer’s limit or make a 45° junction
Manufacturer’s manual / in English
Manufacturer’s full manual
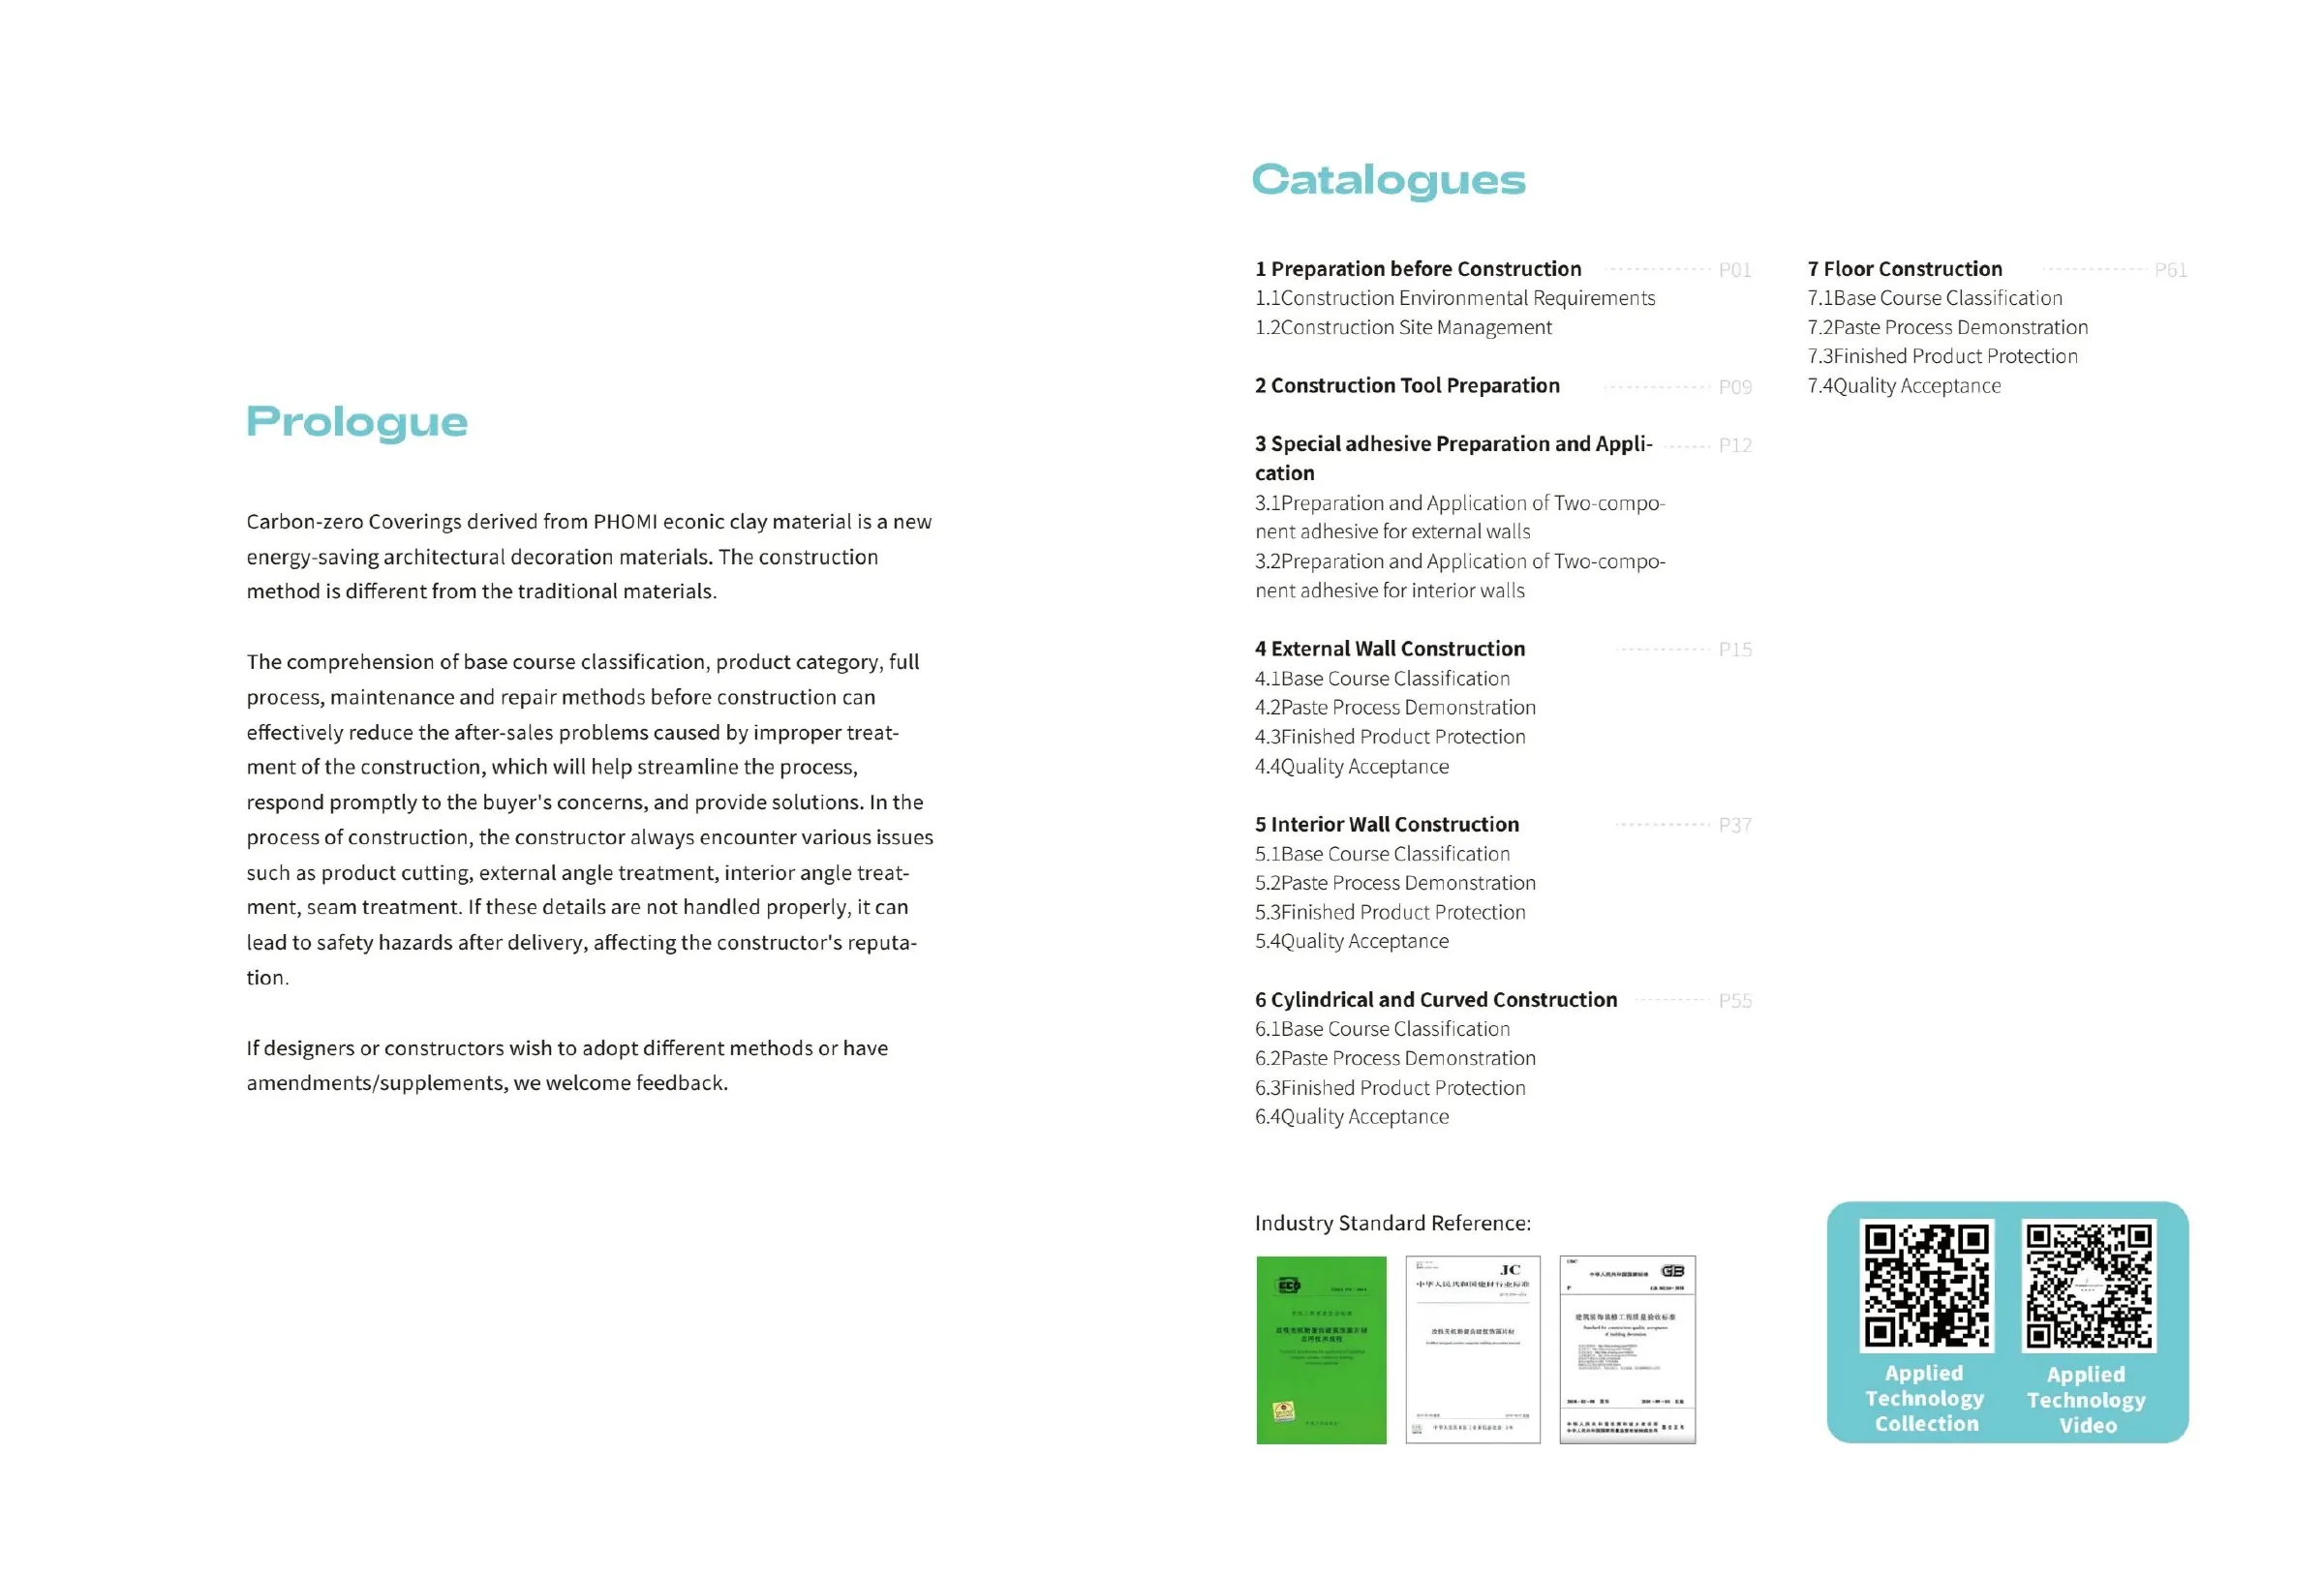
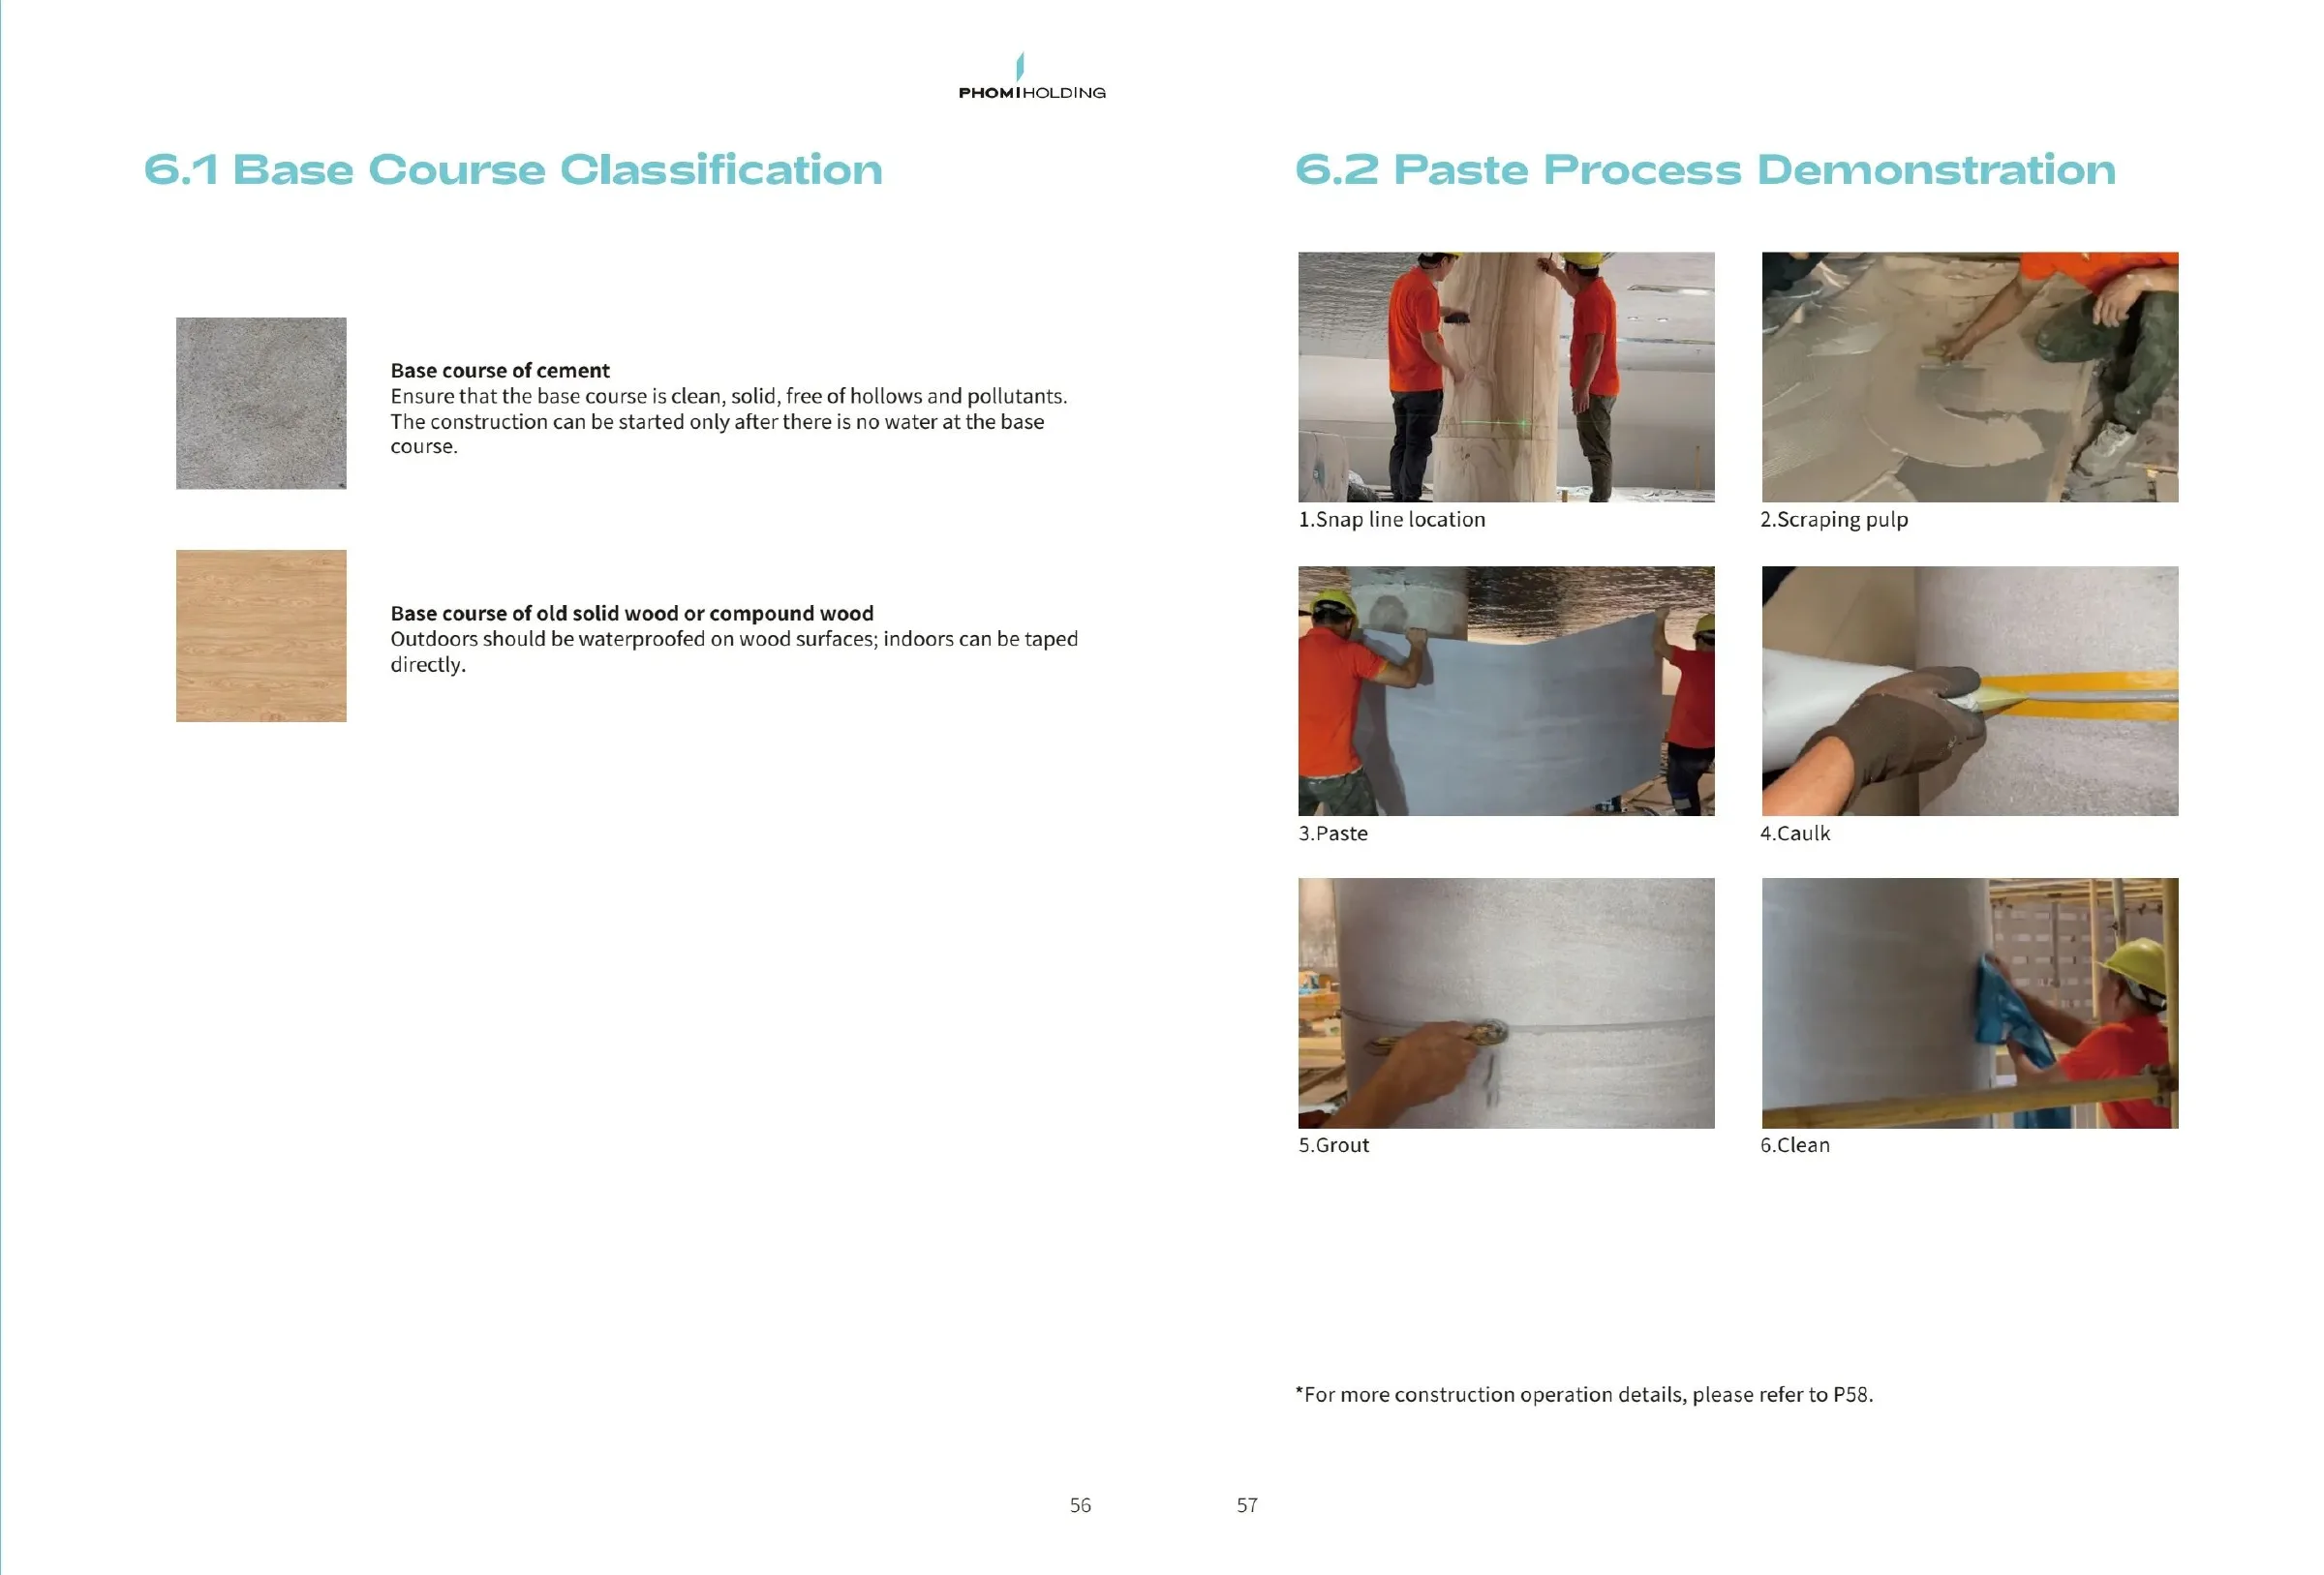
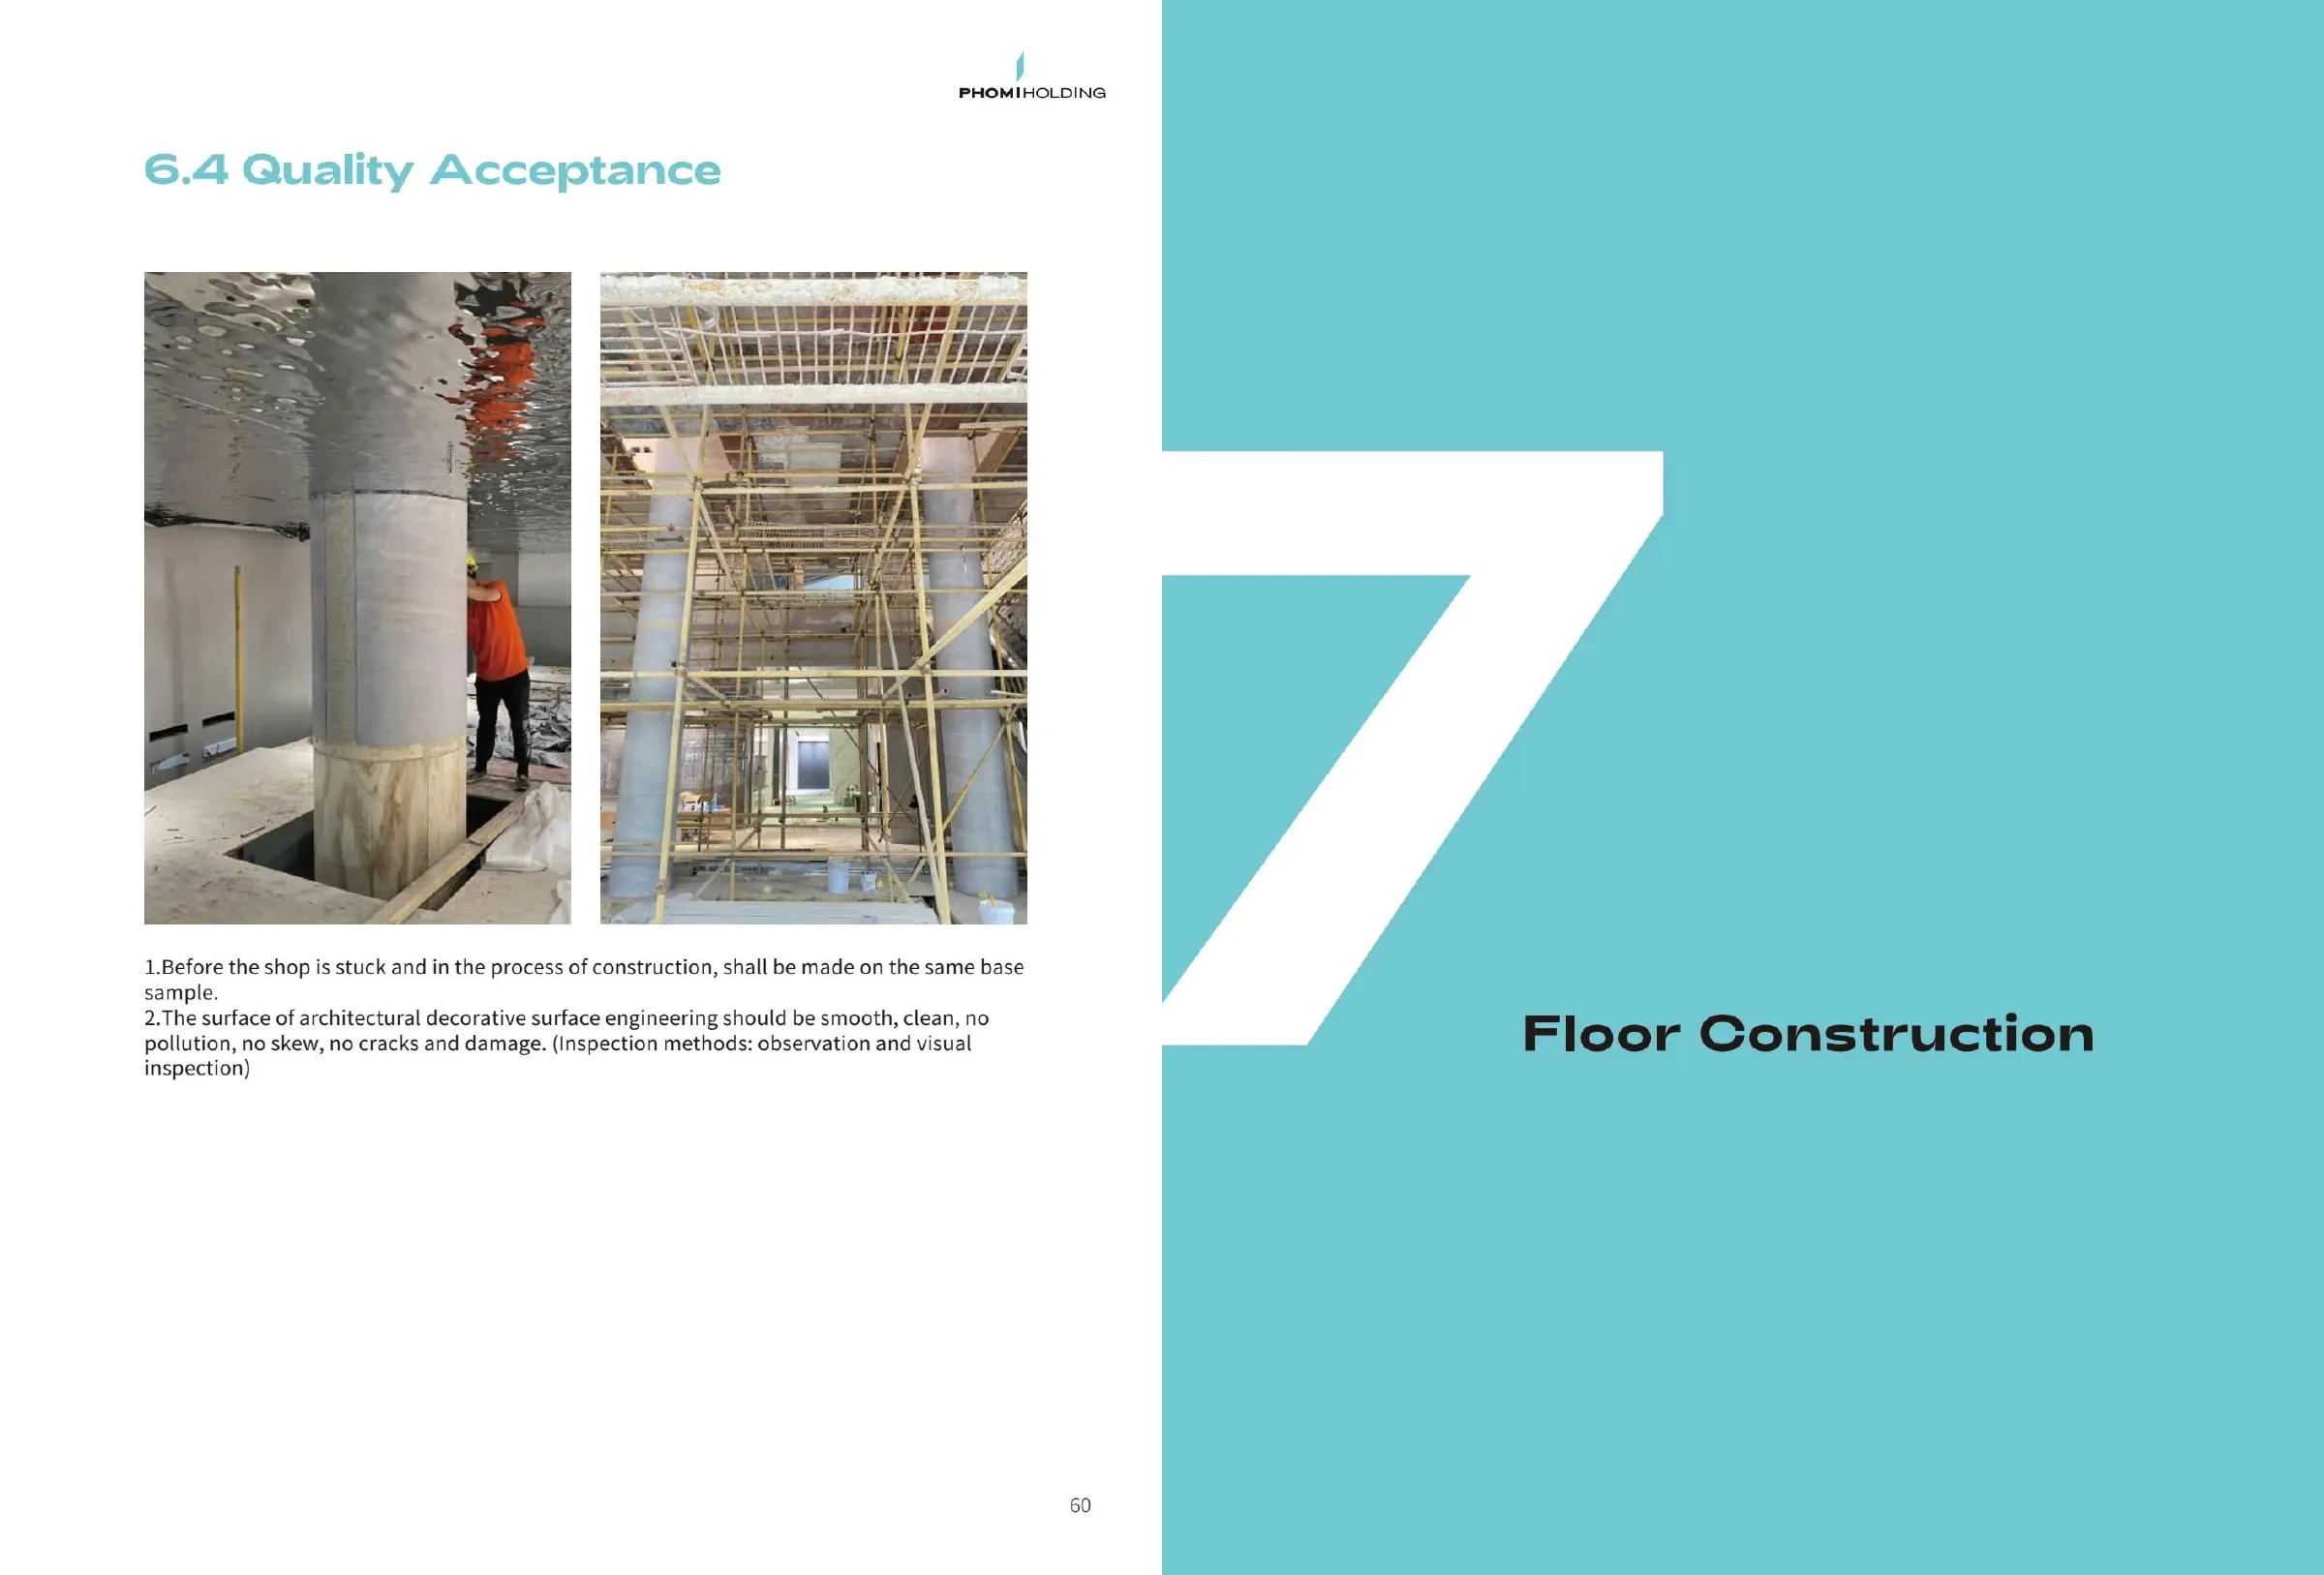
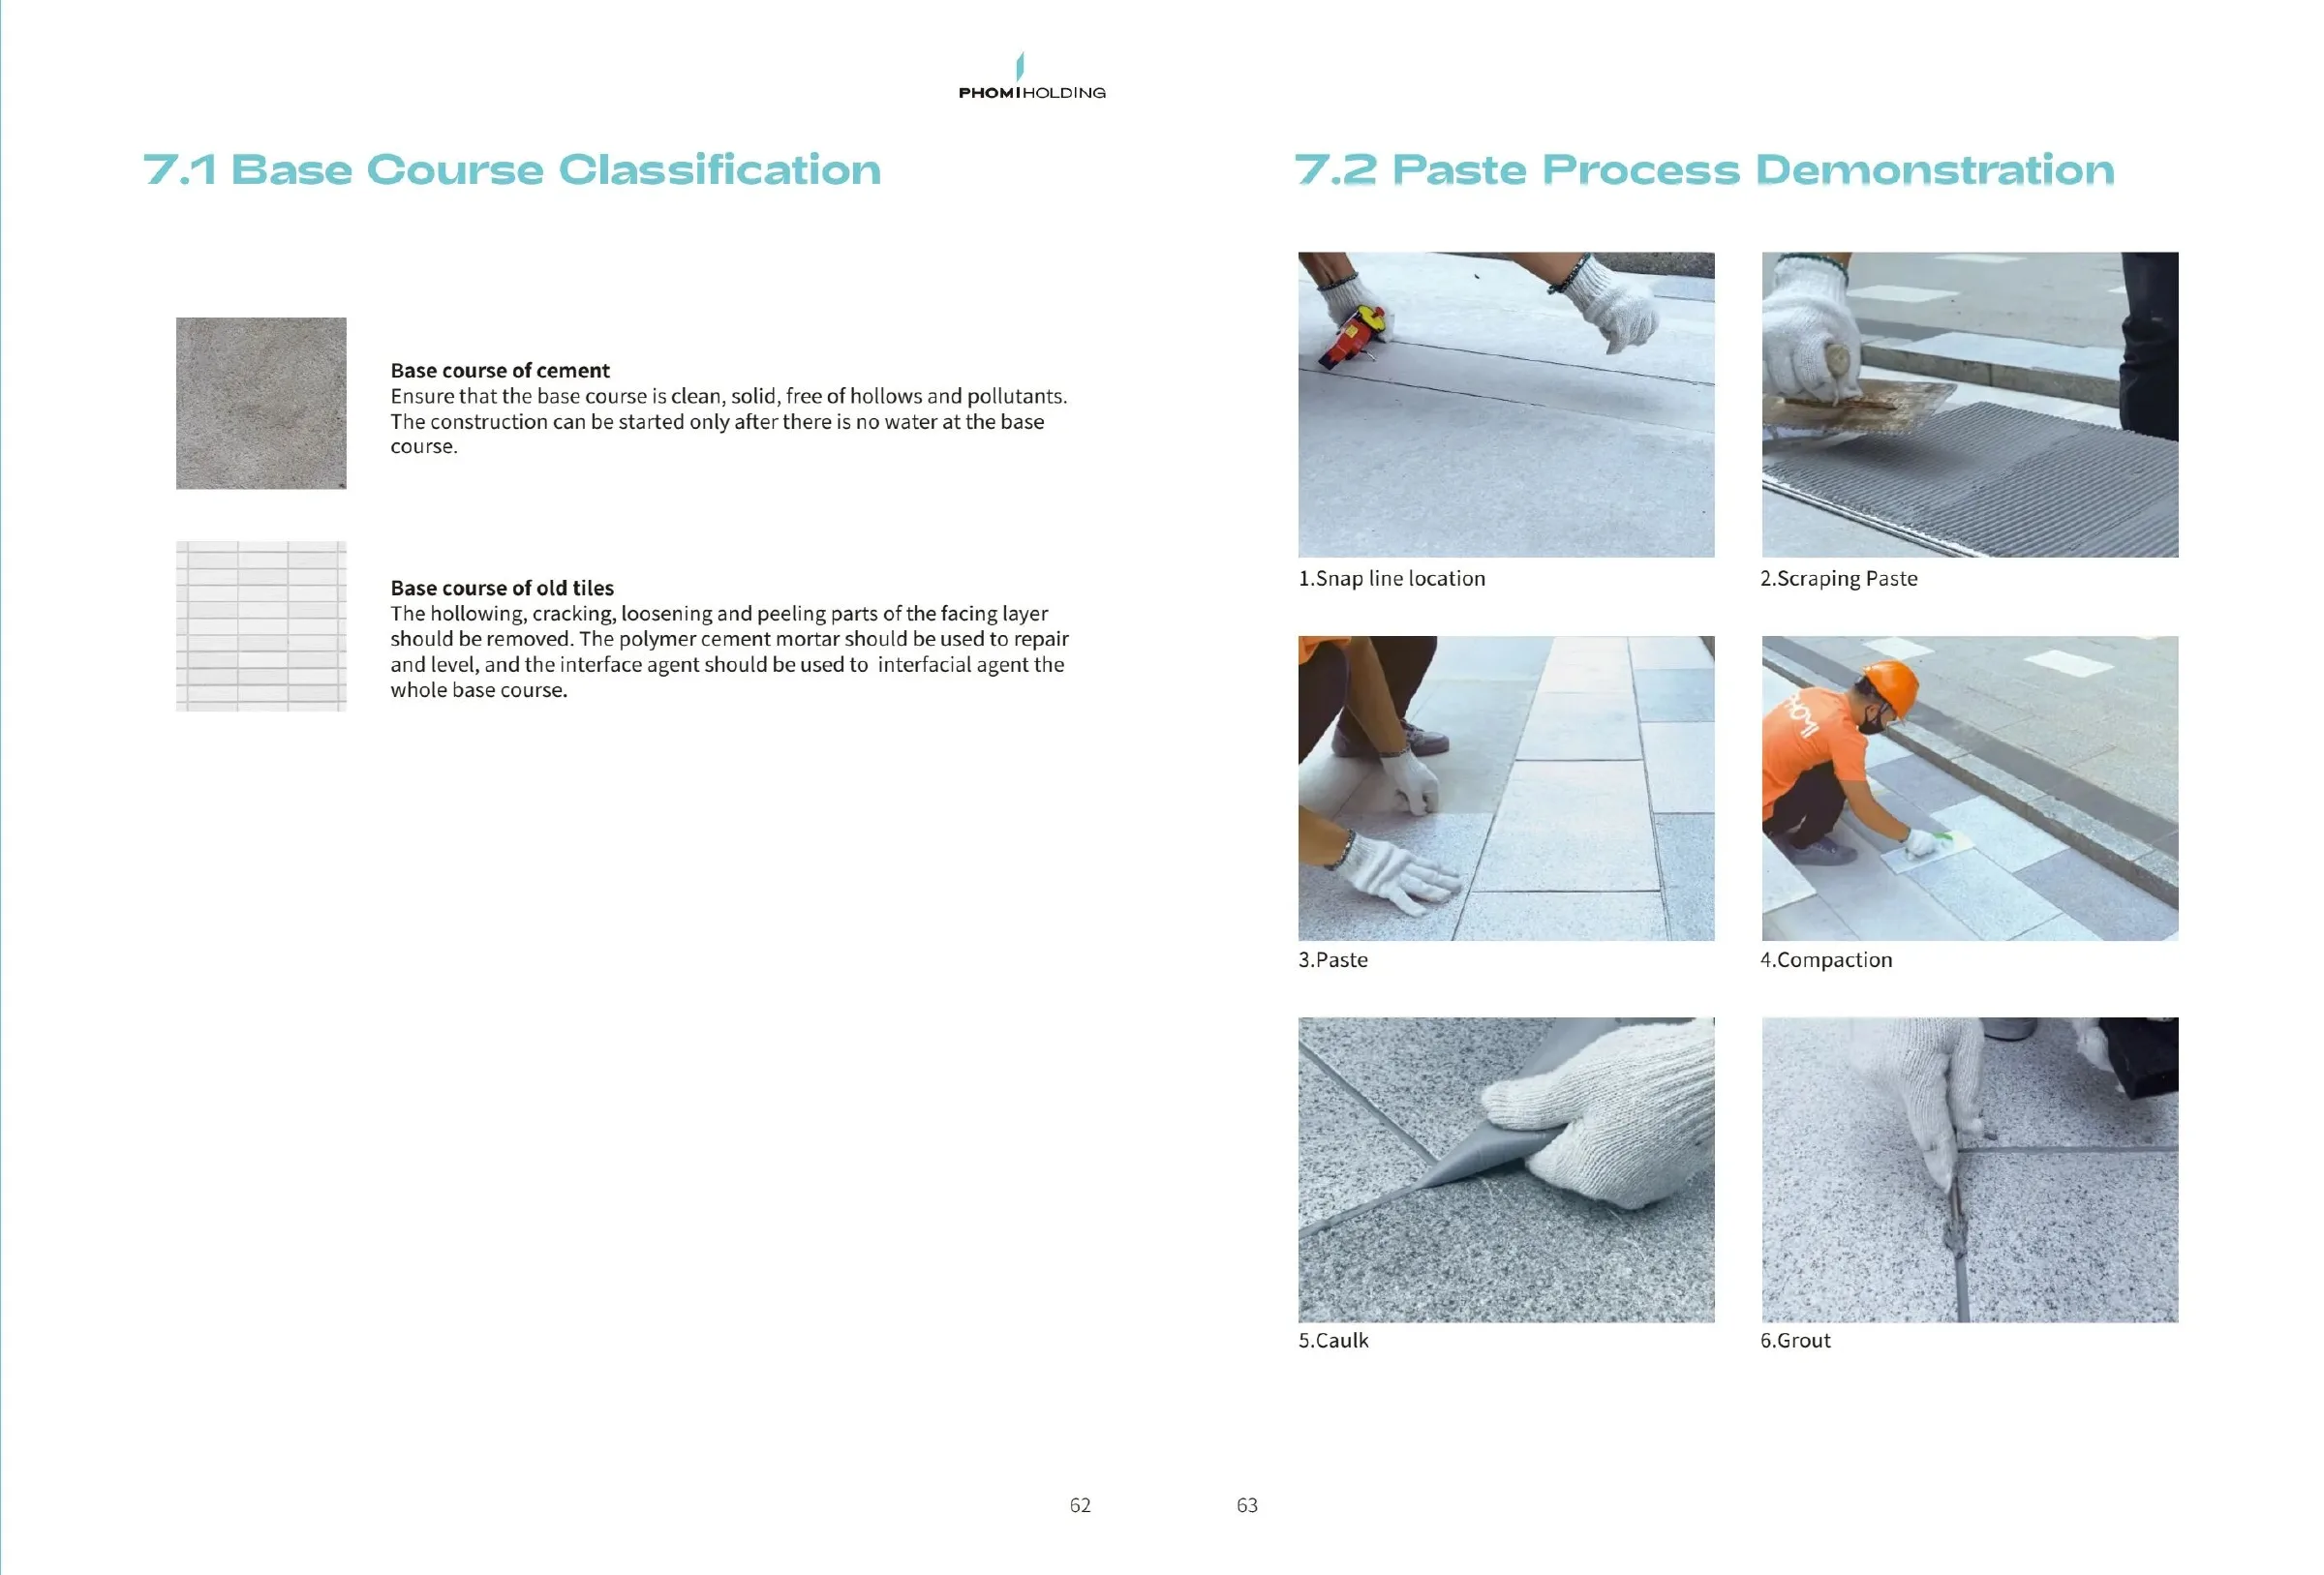
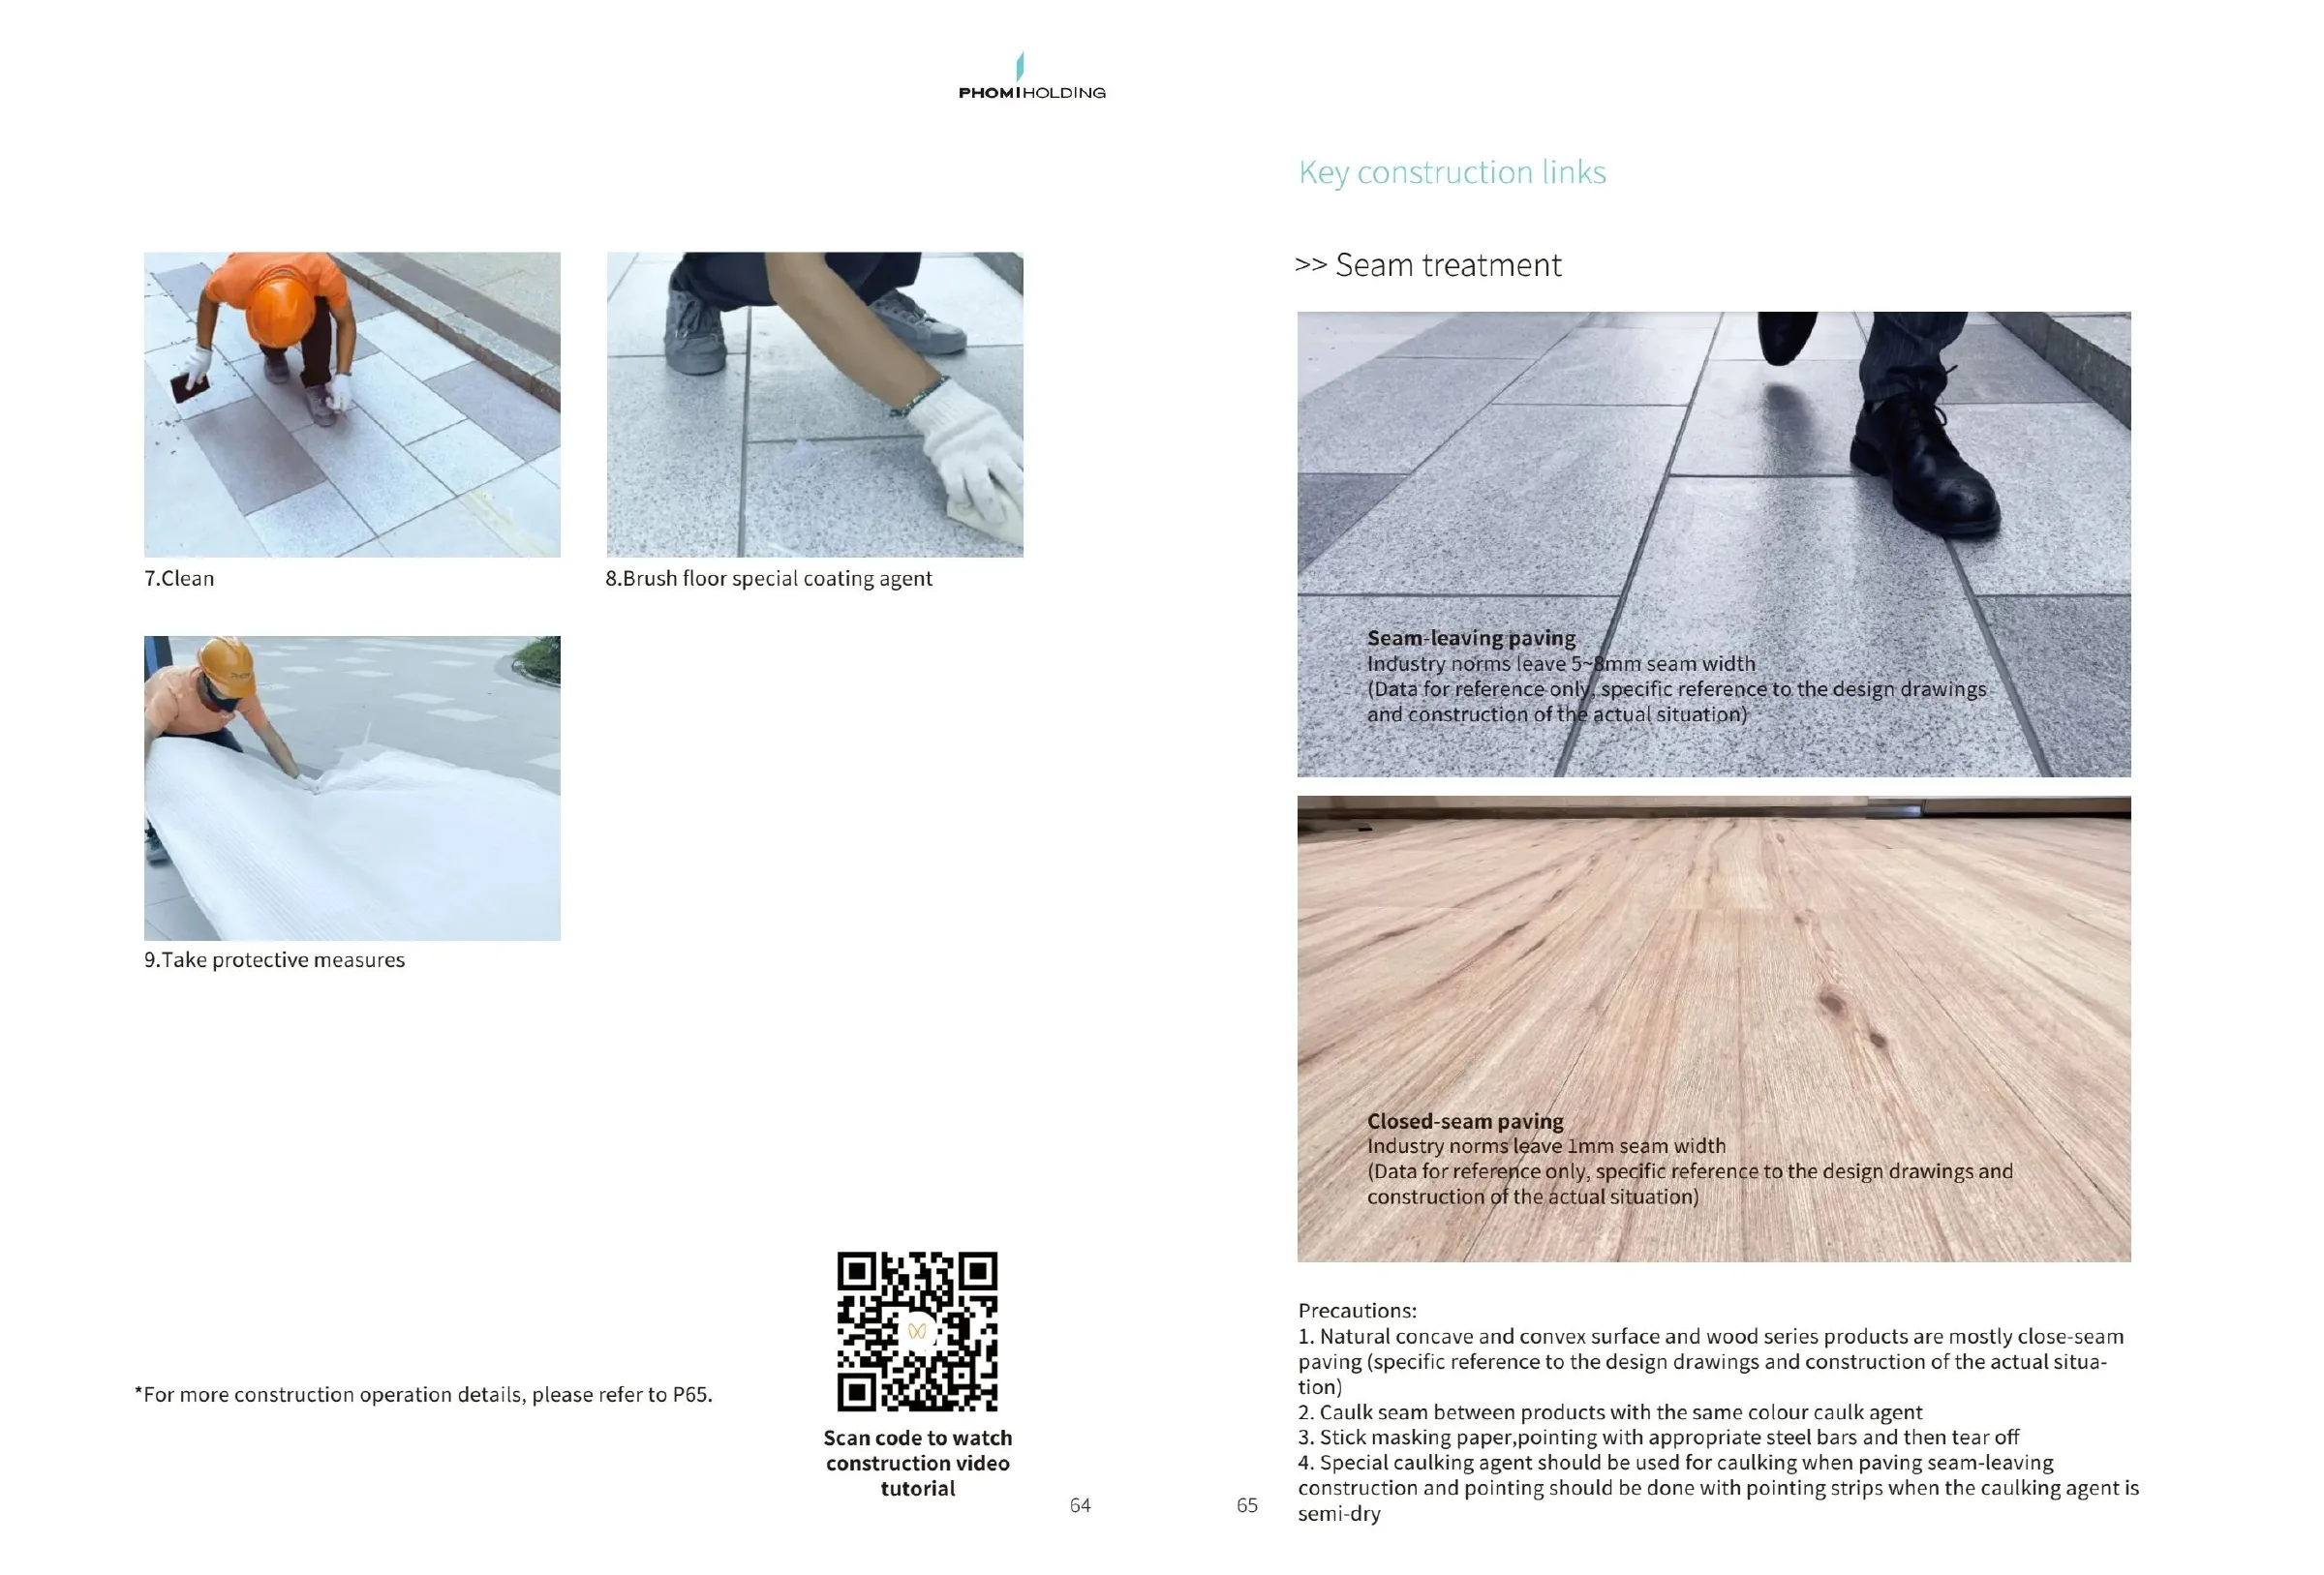
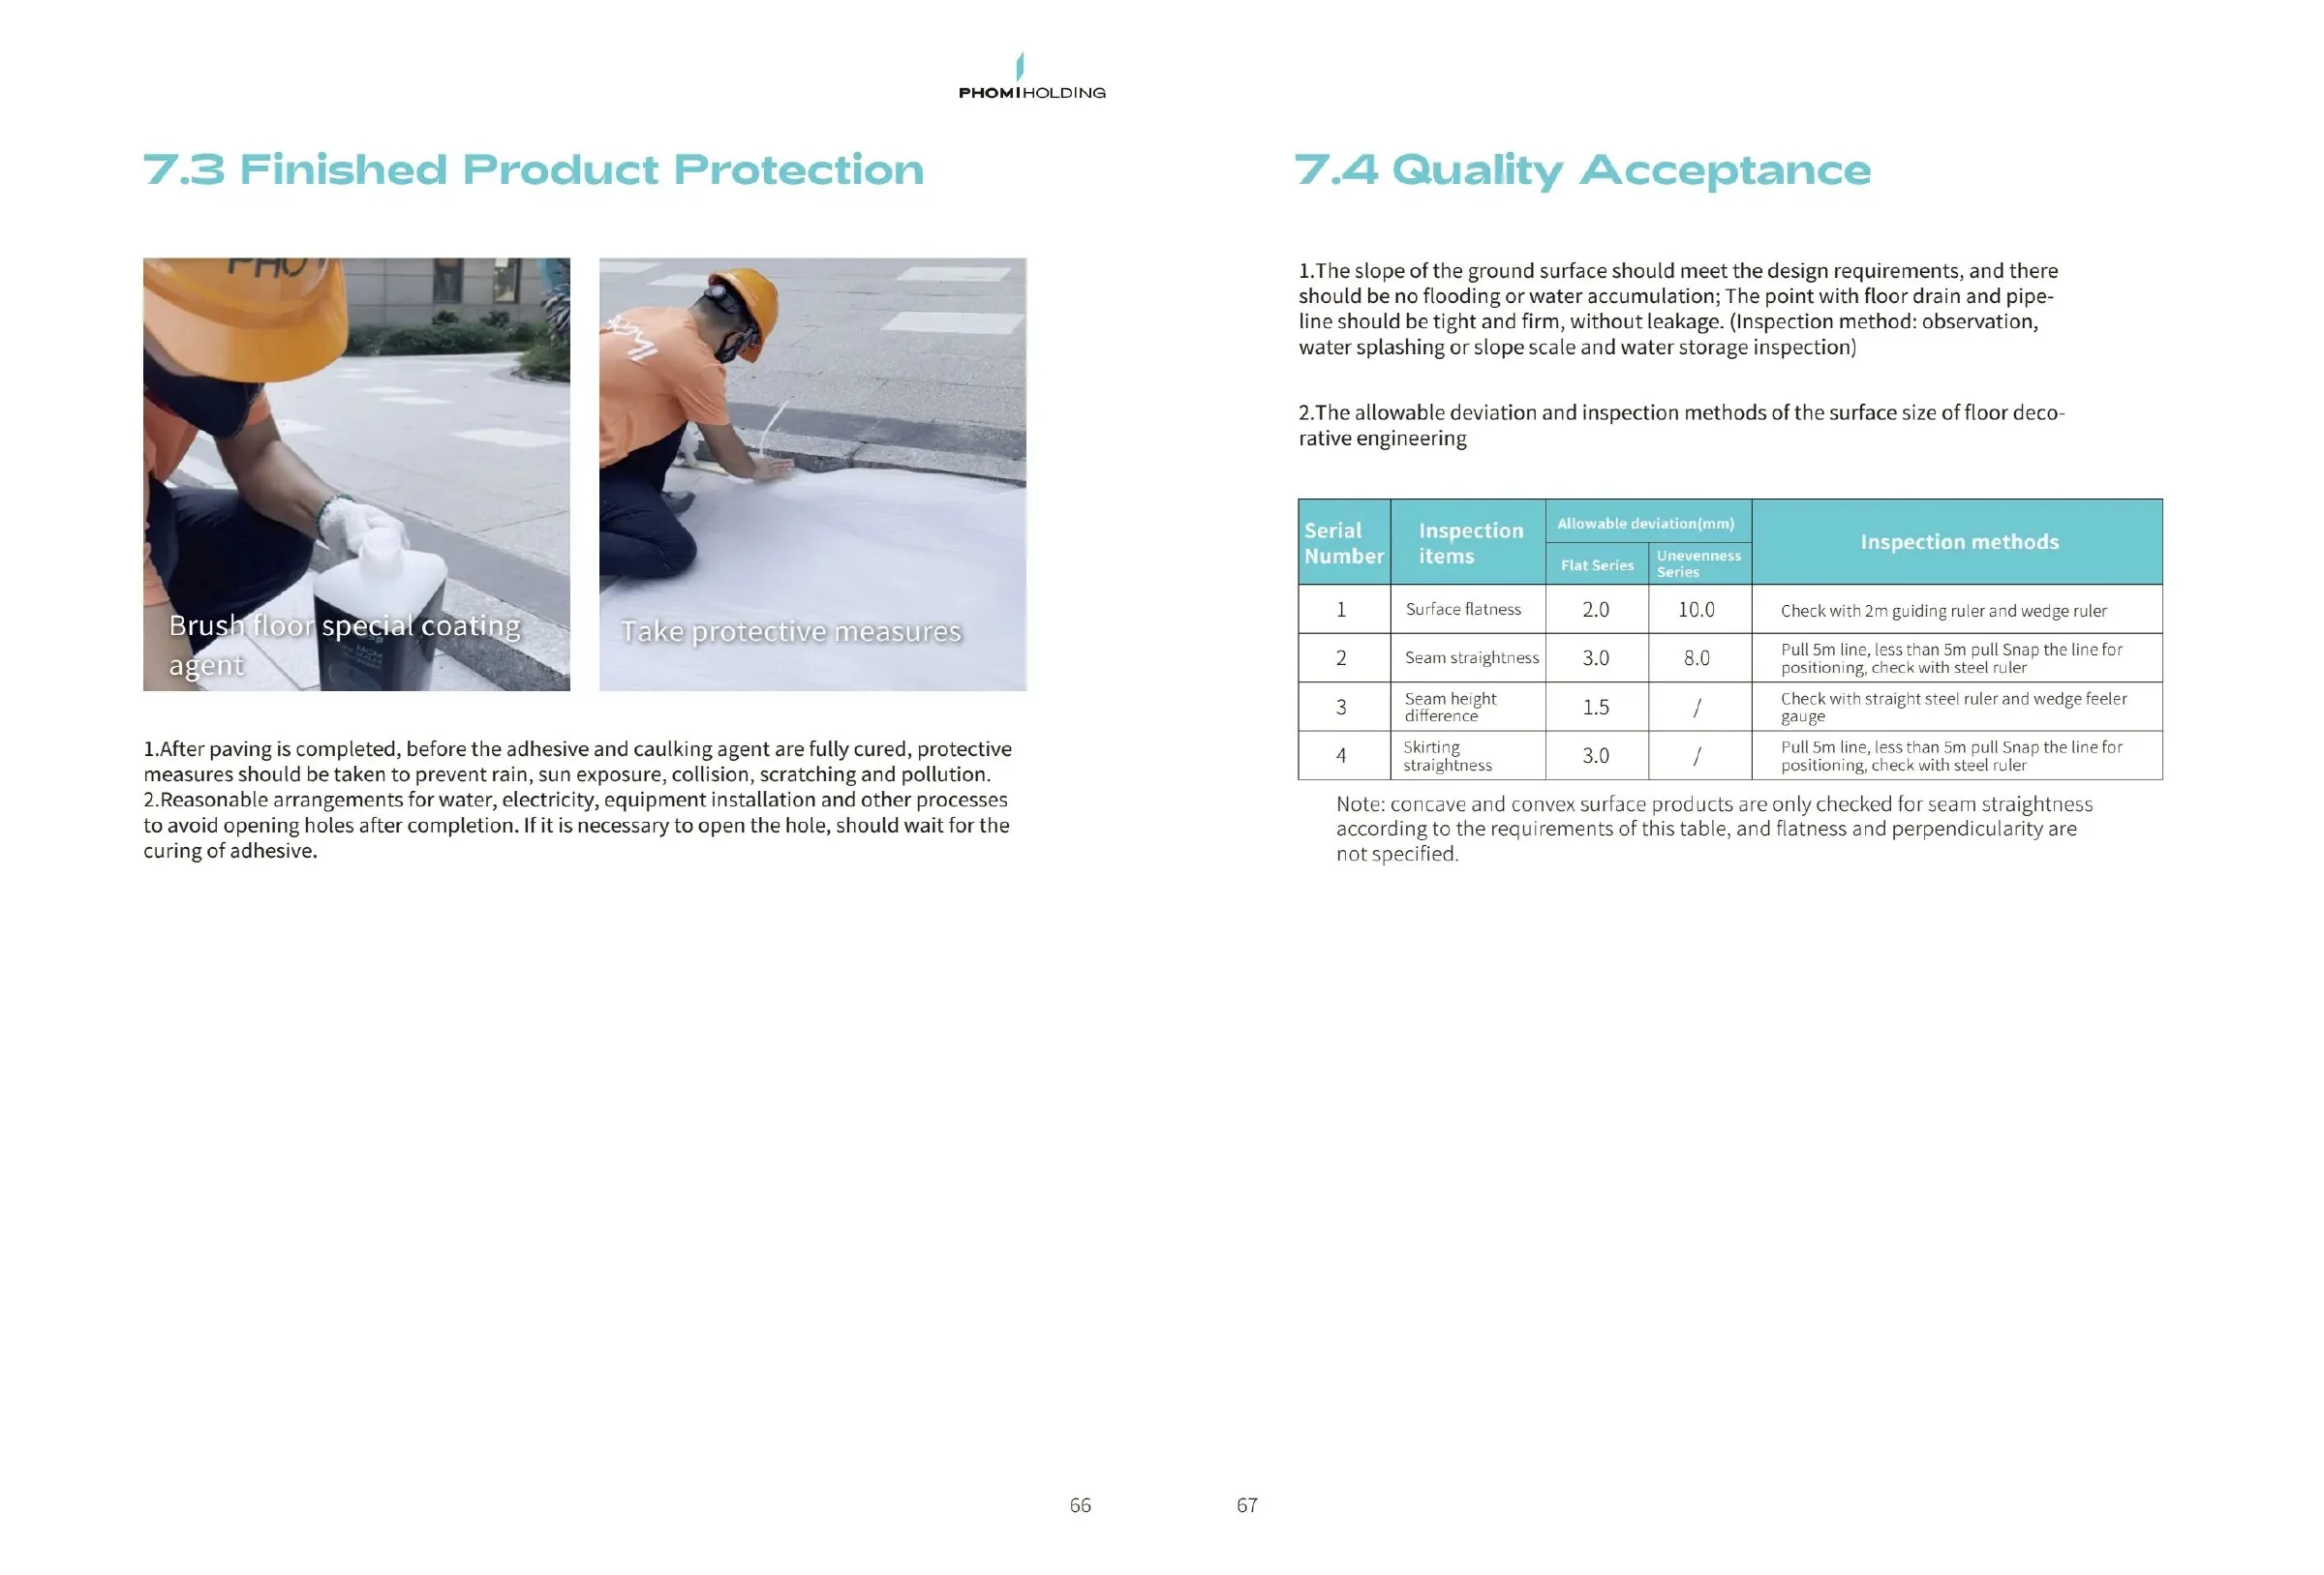
The short guide is above. This is PHOMI’s own 72-page installation manual in English, with photos of every step: substrates, mixing the adhesive, external and internal walls, curved surfaces and floors.